7.8 KiB
WebUI quickstart on Windows
This quickstart tutorial provides a step-by-step guide on how to use Text-Generation-WebUI to run Hugging Face transformers-based applications on BigDL-LLM.
The WebUI is ported from Text-Generation-WebUI.
1. Install and set up WebUI
1.1 Install GPU driver
-
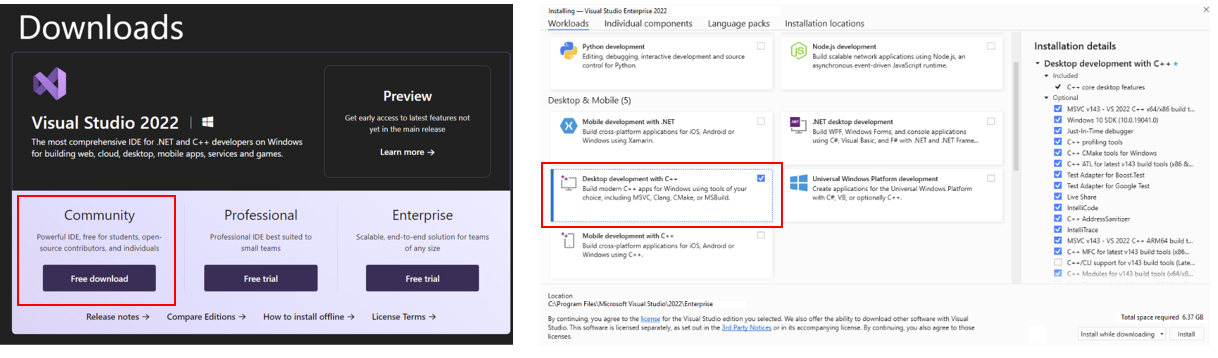
Download and Install Visual Studio 2022 Community Edition from the official Microsoft Visual Studio website. Ensure you select the Desktop development with C++ workload during the installation process.
Note: The installation could take around 15 minutes, and requires at least 7GB of free disk space. If you accidentally skip adding the Desktop development with C++ workload during the initial setup, you can add it afterward by navigating to Tools > Get Tools and Features.... Follow the instructions on this Microsoft guide to update your installation.
-
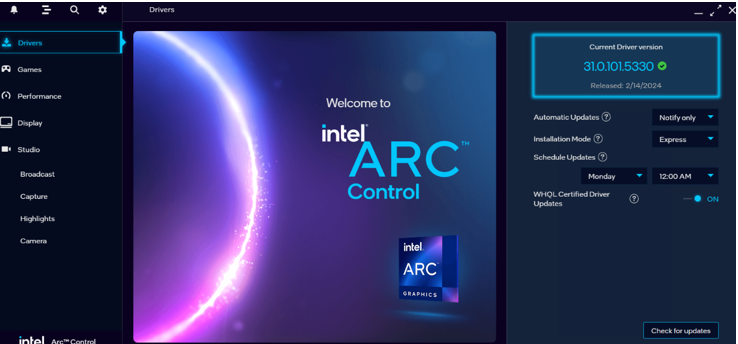
Download and install the latest GPU driver from the official Intel download page. A system reboot is necessary to apply the changes after the installation is complete.
Note: The process could take around 10 minutes. After reboot, check for the Intel Arc Control application to verify the driver has been installed correctly. If the installation was successful, you should see the Arc Control interface similar to the figure below
-
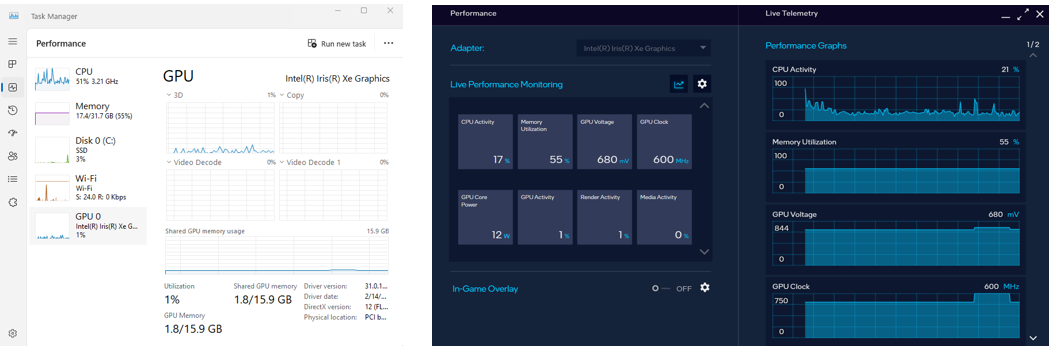
To monitor your GPU's performance and status, you can use either the Windows Task Manager (see the left side of the figure below) or the Arc Control application (see the right side of the figure below) :
1.2 Set up Python Environment
-
Visit Miniconda installation page, download the Miniconda installer for Windows, and follow the instructions to complete the installation.
-
After installation, open the Anaconda Prompt, create a new python environment
llm:conda create -n llm python=3.9 libuv -
Activate the newly created environment
llm:conda activate llm
1.3 Install oneAPI and bigdl-llm
-
With the
llmenvironment active, usepipto install the Intel oneAPI Base Toolkit:pip install dpcpp-cpp-rt==2024.0.2 mkl-dpcpp==2024.0.0 onednn==2024.0.0 -
Use
pipto installbigdl-llmfor GPU:pip install --pre --upgrade bigdl-llm[xpu] -f https://developer.intel.com/ipex-whl-stable-xpu
1.4 Download WebUI
Download text-generation-webui with BigDL-LLM optimizations from here and unzip it to a folder. In this example, the text-generation-webui folder is C:\text-generation-webui
1.5 Install other dependencies
In your Anaconda Prompt terminal, navigate to your unzipped text-generation-webui folder. Then use pip to install other WebUI dependencies:
pip install -r requirements_cpu_only.txt
2. Start the WebUI Server
-
Step 1: Open the Anaconda Prompt and activate the Python environment
llmyou previously created:conda activate llm -
Step 2: If you're running on iGPU, set some environment variables by running below commands:
For more details about runtime configurations, refer to this guide:
set SYCL_CACHE_PERSISTENT=1 set BIGDL_LLM_XMX_DISABLED=1 -
Step 3: Navigate to your unzipped text-generation-webui folder (
C:\text-generation-webuiin this example) and launch webUI. Models will be optimized and run at 4-bit precision.cd C:\text-generation-webui python server.py --load-in-4bit -
Step 4: After the successful startup of the WebUI server, links to access WebUI are displayed in the terminal.
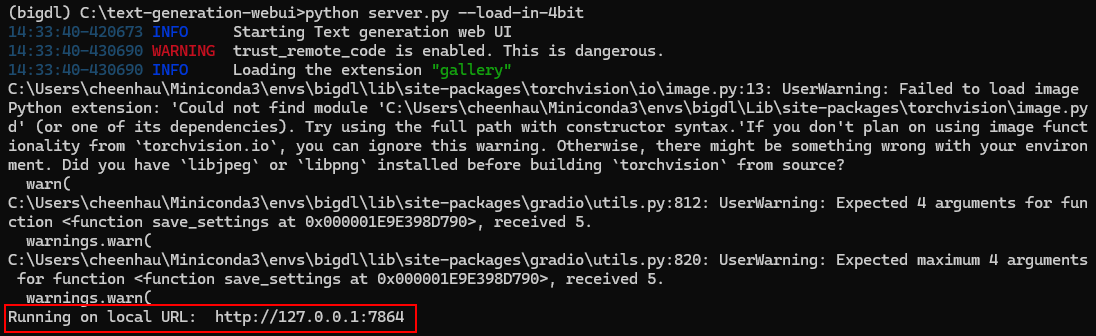
Open the local URL (eg., http://127.0.0.1:7864) in your web browser to access the webUI interface.
3. Using WebUI
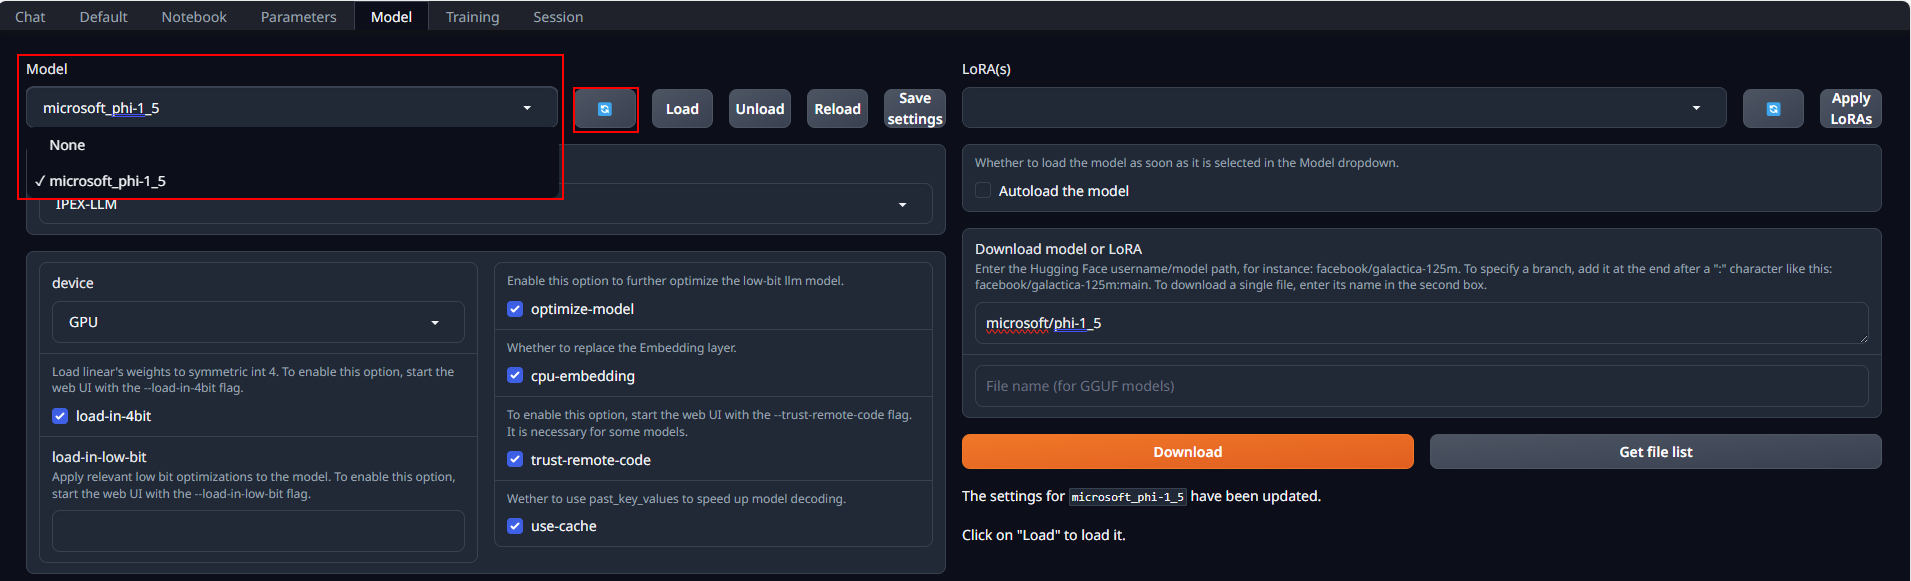
3.1 Select the Model
First, you need to place huggingface models in C:\text-generation-webui\models.
You can either copy a local model to that folder, or download a model from Huggingface Hub using webUI (VPN connection might be required).
To download a model, navigate to Model tab, enter the Huggingface model username/model path under Download model or LoRA (for instance, Qwen/Qwen-7B-Chat), and click Download.

After the models have been obtained, click the blue icon to refresh the Model drop-down list.
Then select the model you want from the list.
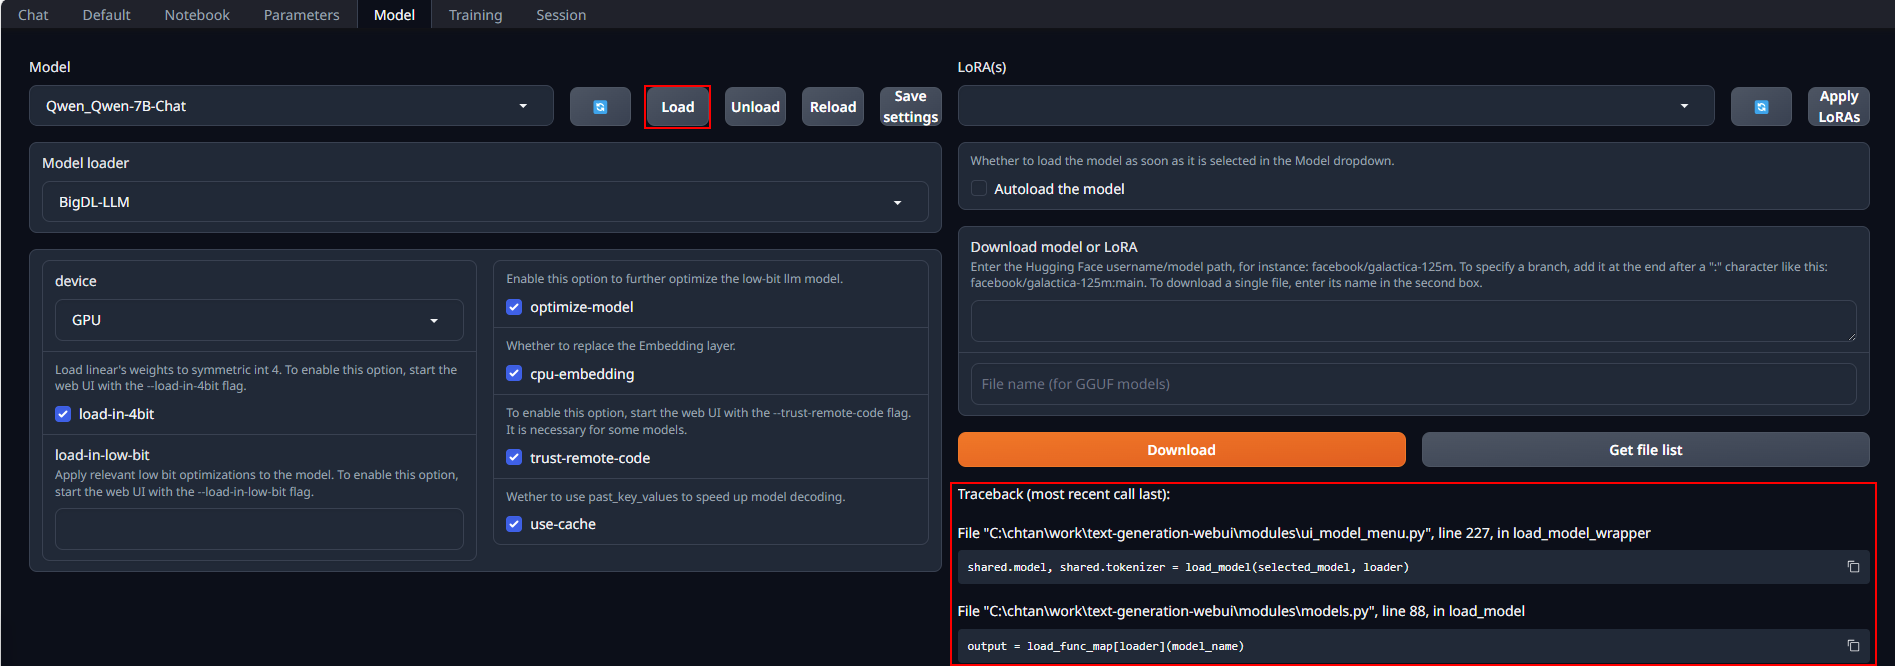
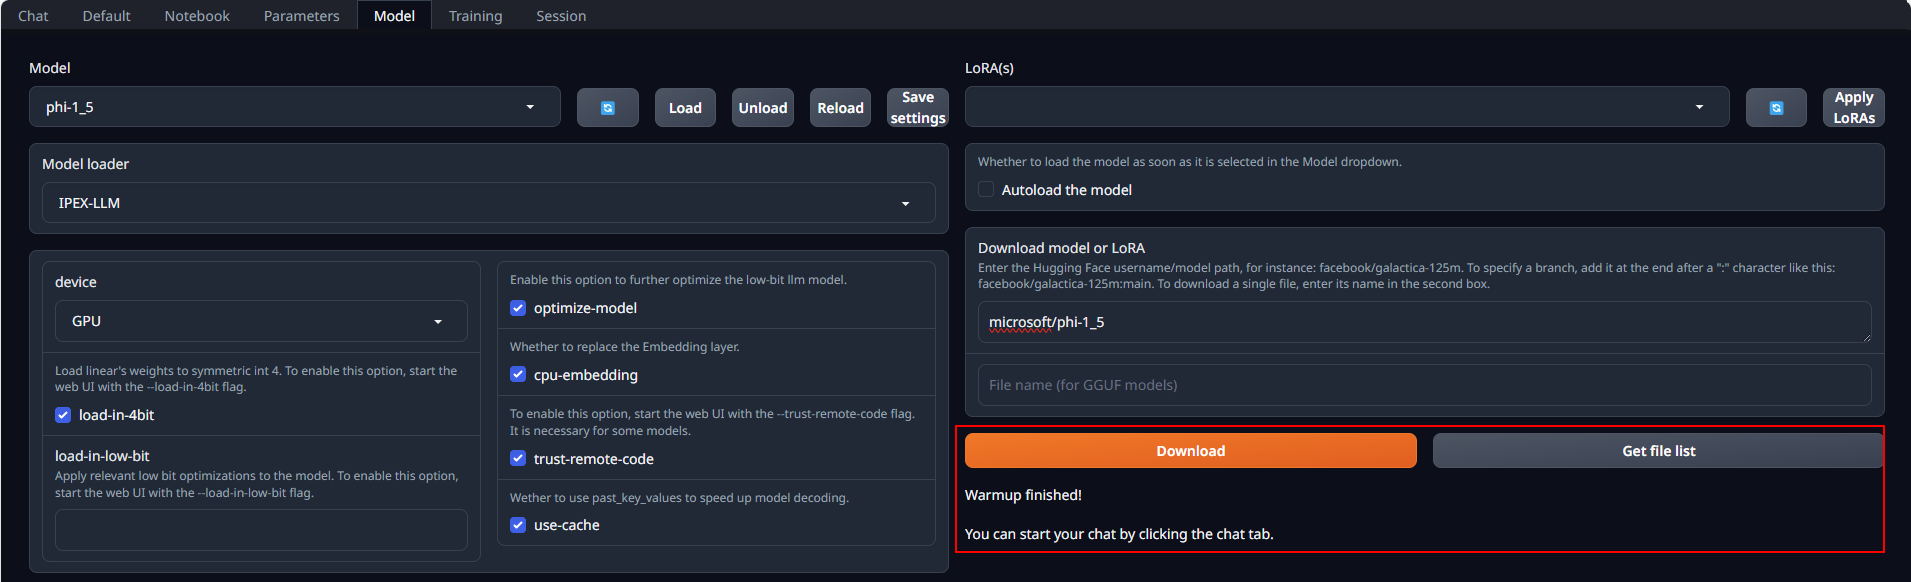
3.2 Load the Model
Using the default model settings are recommended.
Click Load to load your model.
-
For some modes, you might see an
ImportError: This modeling file requires the following packages that were not found in your environmenterror message (scroll down to the end of the error messages) and instructions for installing the packages. This is because the models require additional pip packages. Stop the WebUI Server in the Anaconda Prompt terminal withCtrl+C, install the pip packages, and then run the WebUI Server again. If there are still errors on missing packages, repeat the process of installing missing packages. -
Some models are too old and do not support the installed version of transformers package. In this case, errors like
AttributeError, would appear. You are should use a more recent model.
When the model is successfully loaded, you will get a message on this.
3.3 Run the Model on WebUI
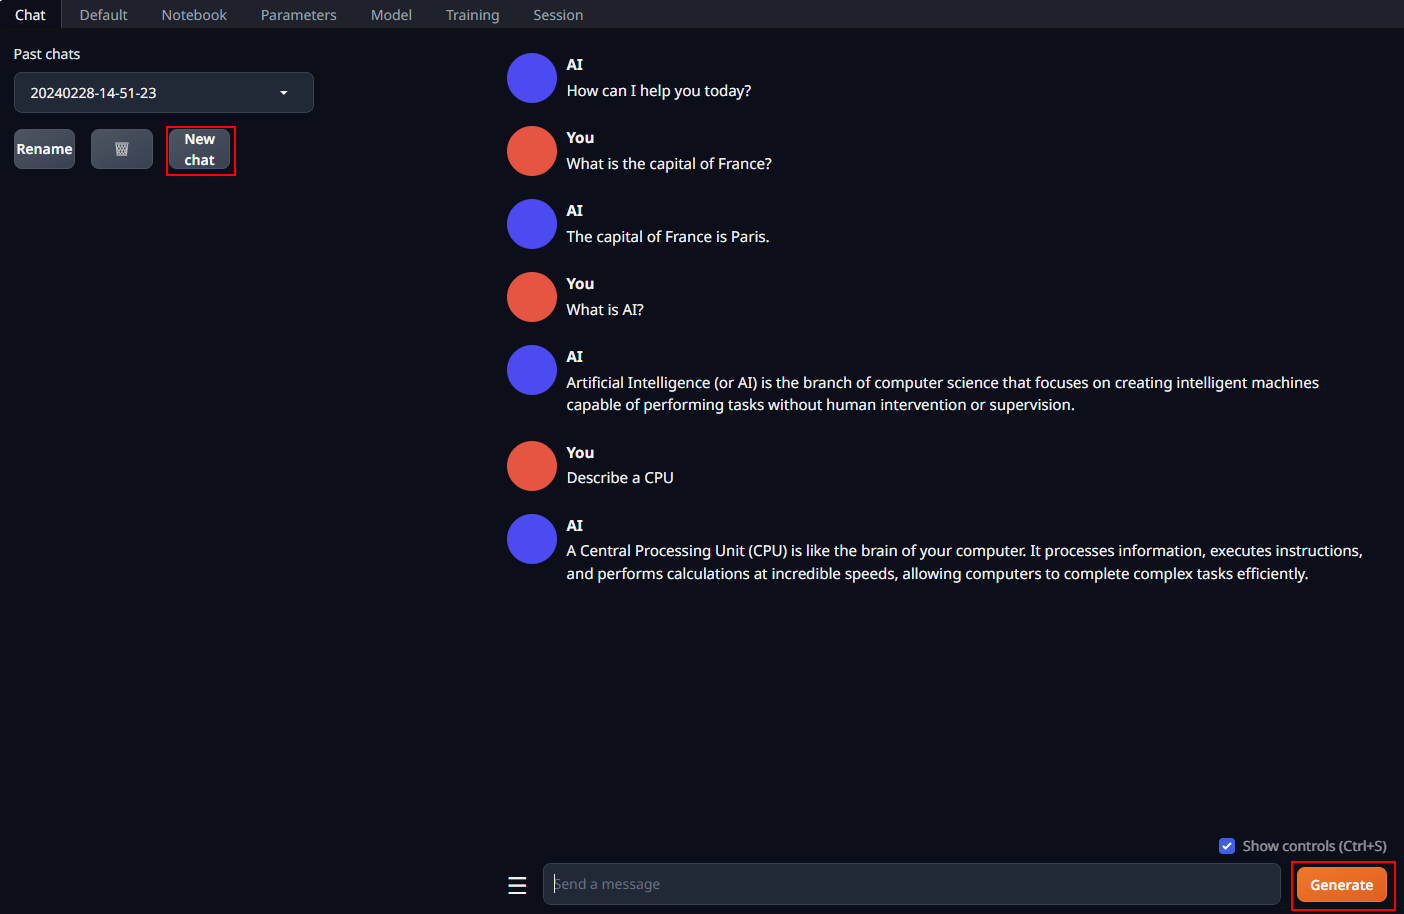
Select the Chat tab. This interface supports having multi-turn conversations with the model.
You may simply enter prompts and click the Generate button to get responses.
You can start a new conversation by clicking New chat.
3.4 Ending the program
Go to the Anaconda Prompt terminal where the WebUI Server was launched, enter Ctrl+C to stop the server.
Then close the webUI browser tab.