7.5 KiB
Run Code Copilot on Windows with Intel GPU
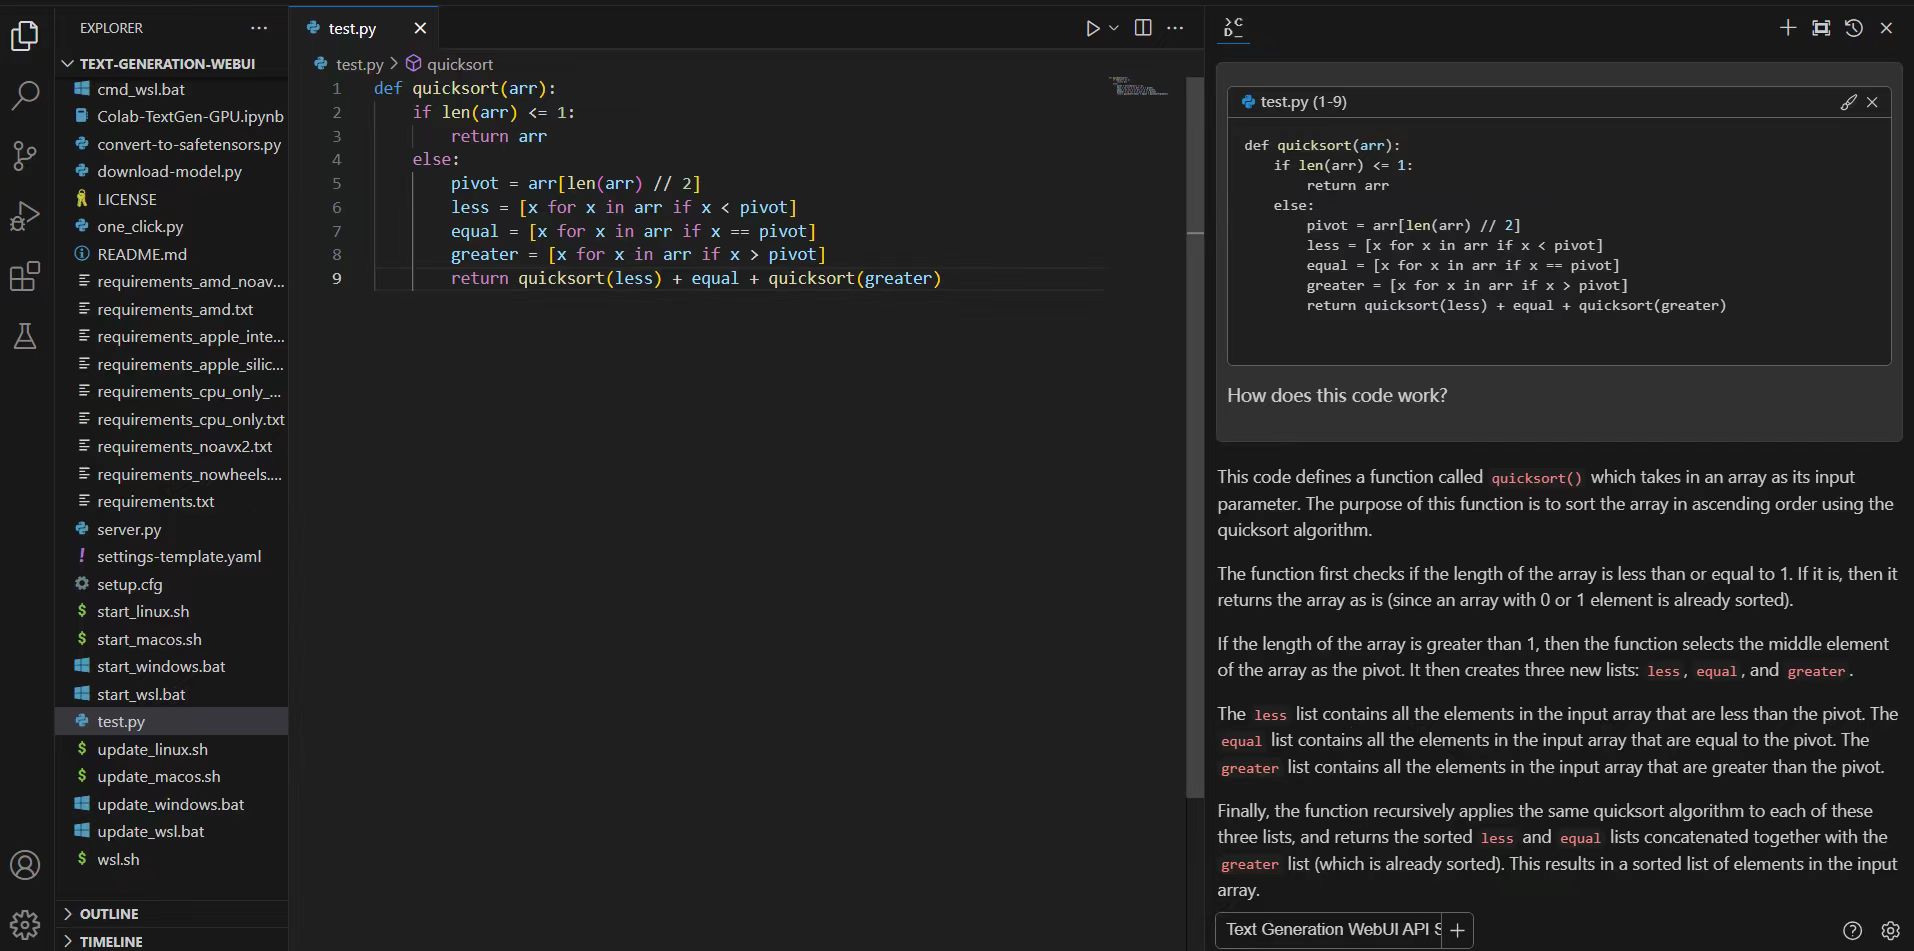
Continue is a coding copilot extension in Microsoft Visual Studio Code; by porting it to ipex-llm, users can now easily leverage local llms running on Intel GPU (e.g., local PC with iGPU, discrete GPU such as Arc, Flex and Max) for code explanation, code generation/completion; see the snapshot of running Continue below (using CodeLlama-7b).
Quickstart
This guide walks you through setting up and running Continue within Visual Studio Code, empowered by local large language models served via Text Generation WebUI with ipex-llm optimizations.
1. Install and Run Text Generation WebUI
Visit Run Text Generation WebUI Quickstart Guide, and follow the steps 1) Install IPEX-LLM, 2) Install WebUI and 3) Start the Server to install and start the Text Generation WebUI API Service, with a few exceptions as below:
- The Text Generation WebUI API service requires Python version 3.10 or higher. But IPEX-LLM installation instructions used
python=3.9as default for creating the conda environment. We recommend changing it to3.11, using below command:conda create -n llm python=3.11 libuv - When following instructions in Install Python Dependencies, install an extra dependency for the API service, i.e.
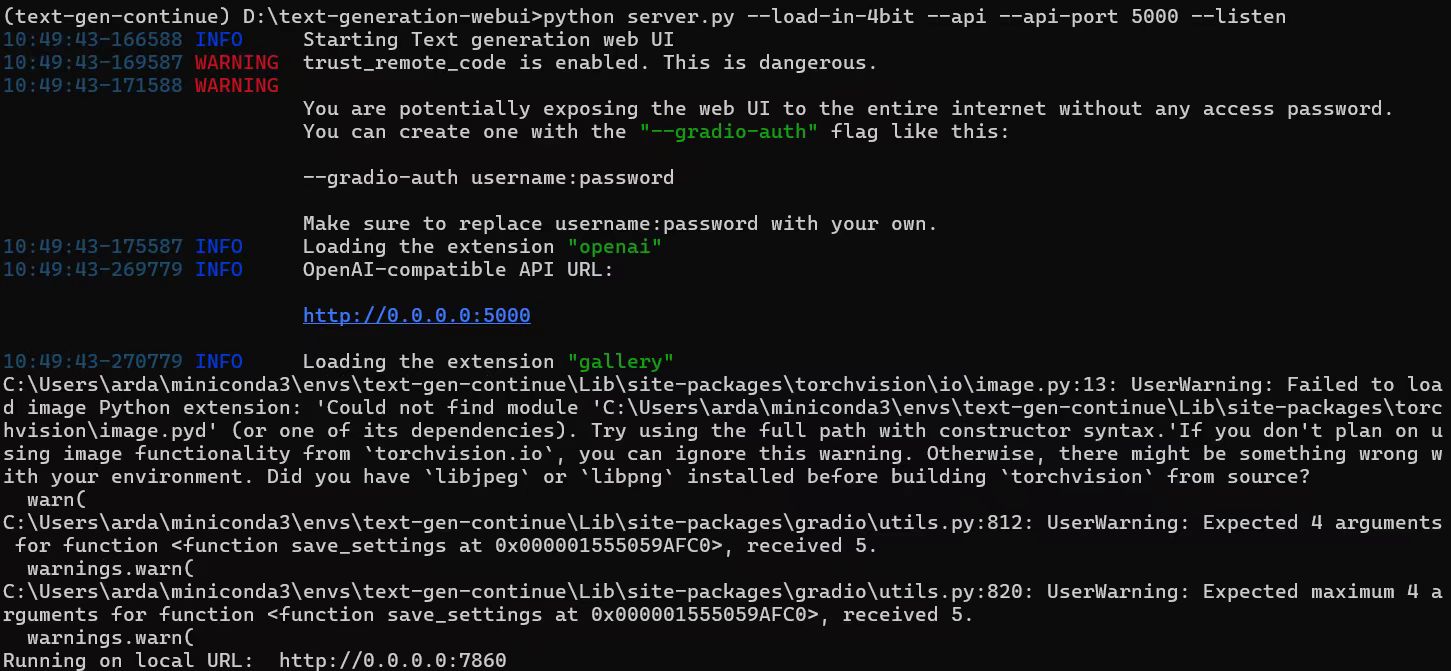
extensions/openai/requirements.txt:cd C:\text-generation-webui pip install -r requirements_cpu_only.txt pip install -r extensions/openai/requirements.txt - When following the instructios in Launch the Server, add a few additional command line arguments for the API service:
python server.py --load-in-4bit --api --api-port 5000 --listen
.. note::

   The API server will by default use port ``5000``. To change the port, use ``--api-port 1234`` in the command above. You can also specify using SSL or API Key in the command. Please see `this guide <https://github.com/intel-analytics/text-generation-webui/blob/ipex-llm/docs/12%20-%20OpenAI%20API.md>`_ for the full list of arguments.
2. Use WebUI to Load Model
Access the WebUI
Upon successful launch, URLs to access the WebUI will be displayed in the terminal as shown below. Open the provided local URL in your browser to interact with the WebUI.
Model Download and Loading
Here's a list of models that can be used for coding copilot on local PC.
- Code Llama:
- WizardCoder
- Mistral
- StarCoder
- DeepSeek Coder
Follow the steps in Model Download and Load Model to download and load your coding model.
.. note::

  If you don't need to use the API service anymore, you can follow the instructions in [Exit WebUI](https://ipex-llm.readthedocs.io/en/latest/doc/LLM/Quickstart/webui_quickstart.html#exit-the-webui) to stop the service.
3. Install Continue Extension
- Click
Installon the Continue extension in the Visual Studio Marketplace - This will open the Continue extension page in VS Code, where you will need to click
Installagain - Once you do this, you will see the Continue logo show up on the left side bar. If you click it, the Continue extension will open up:
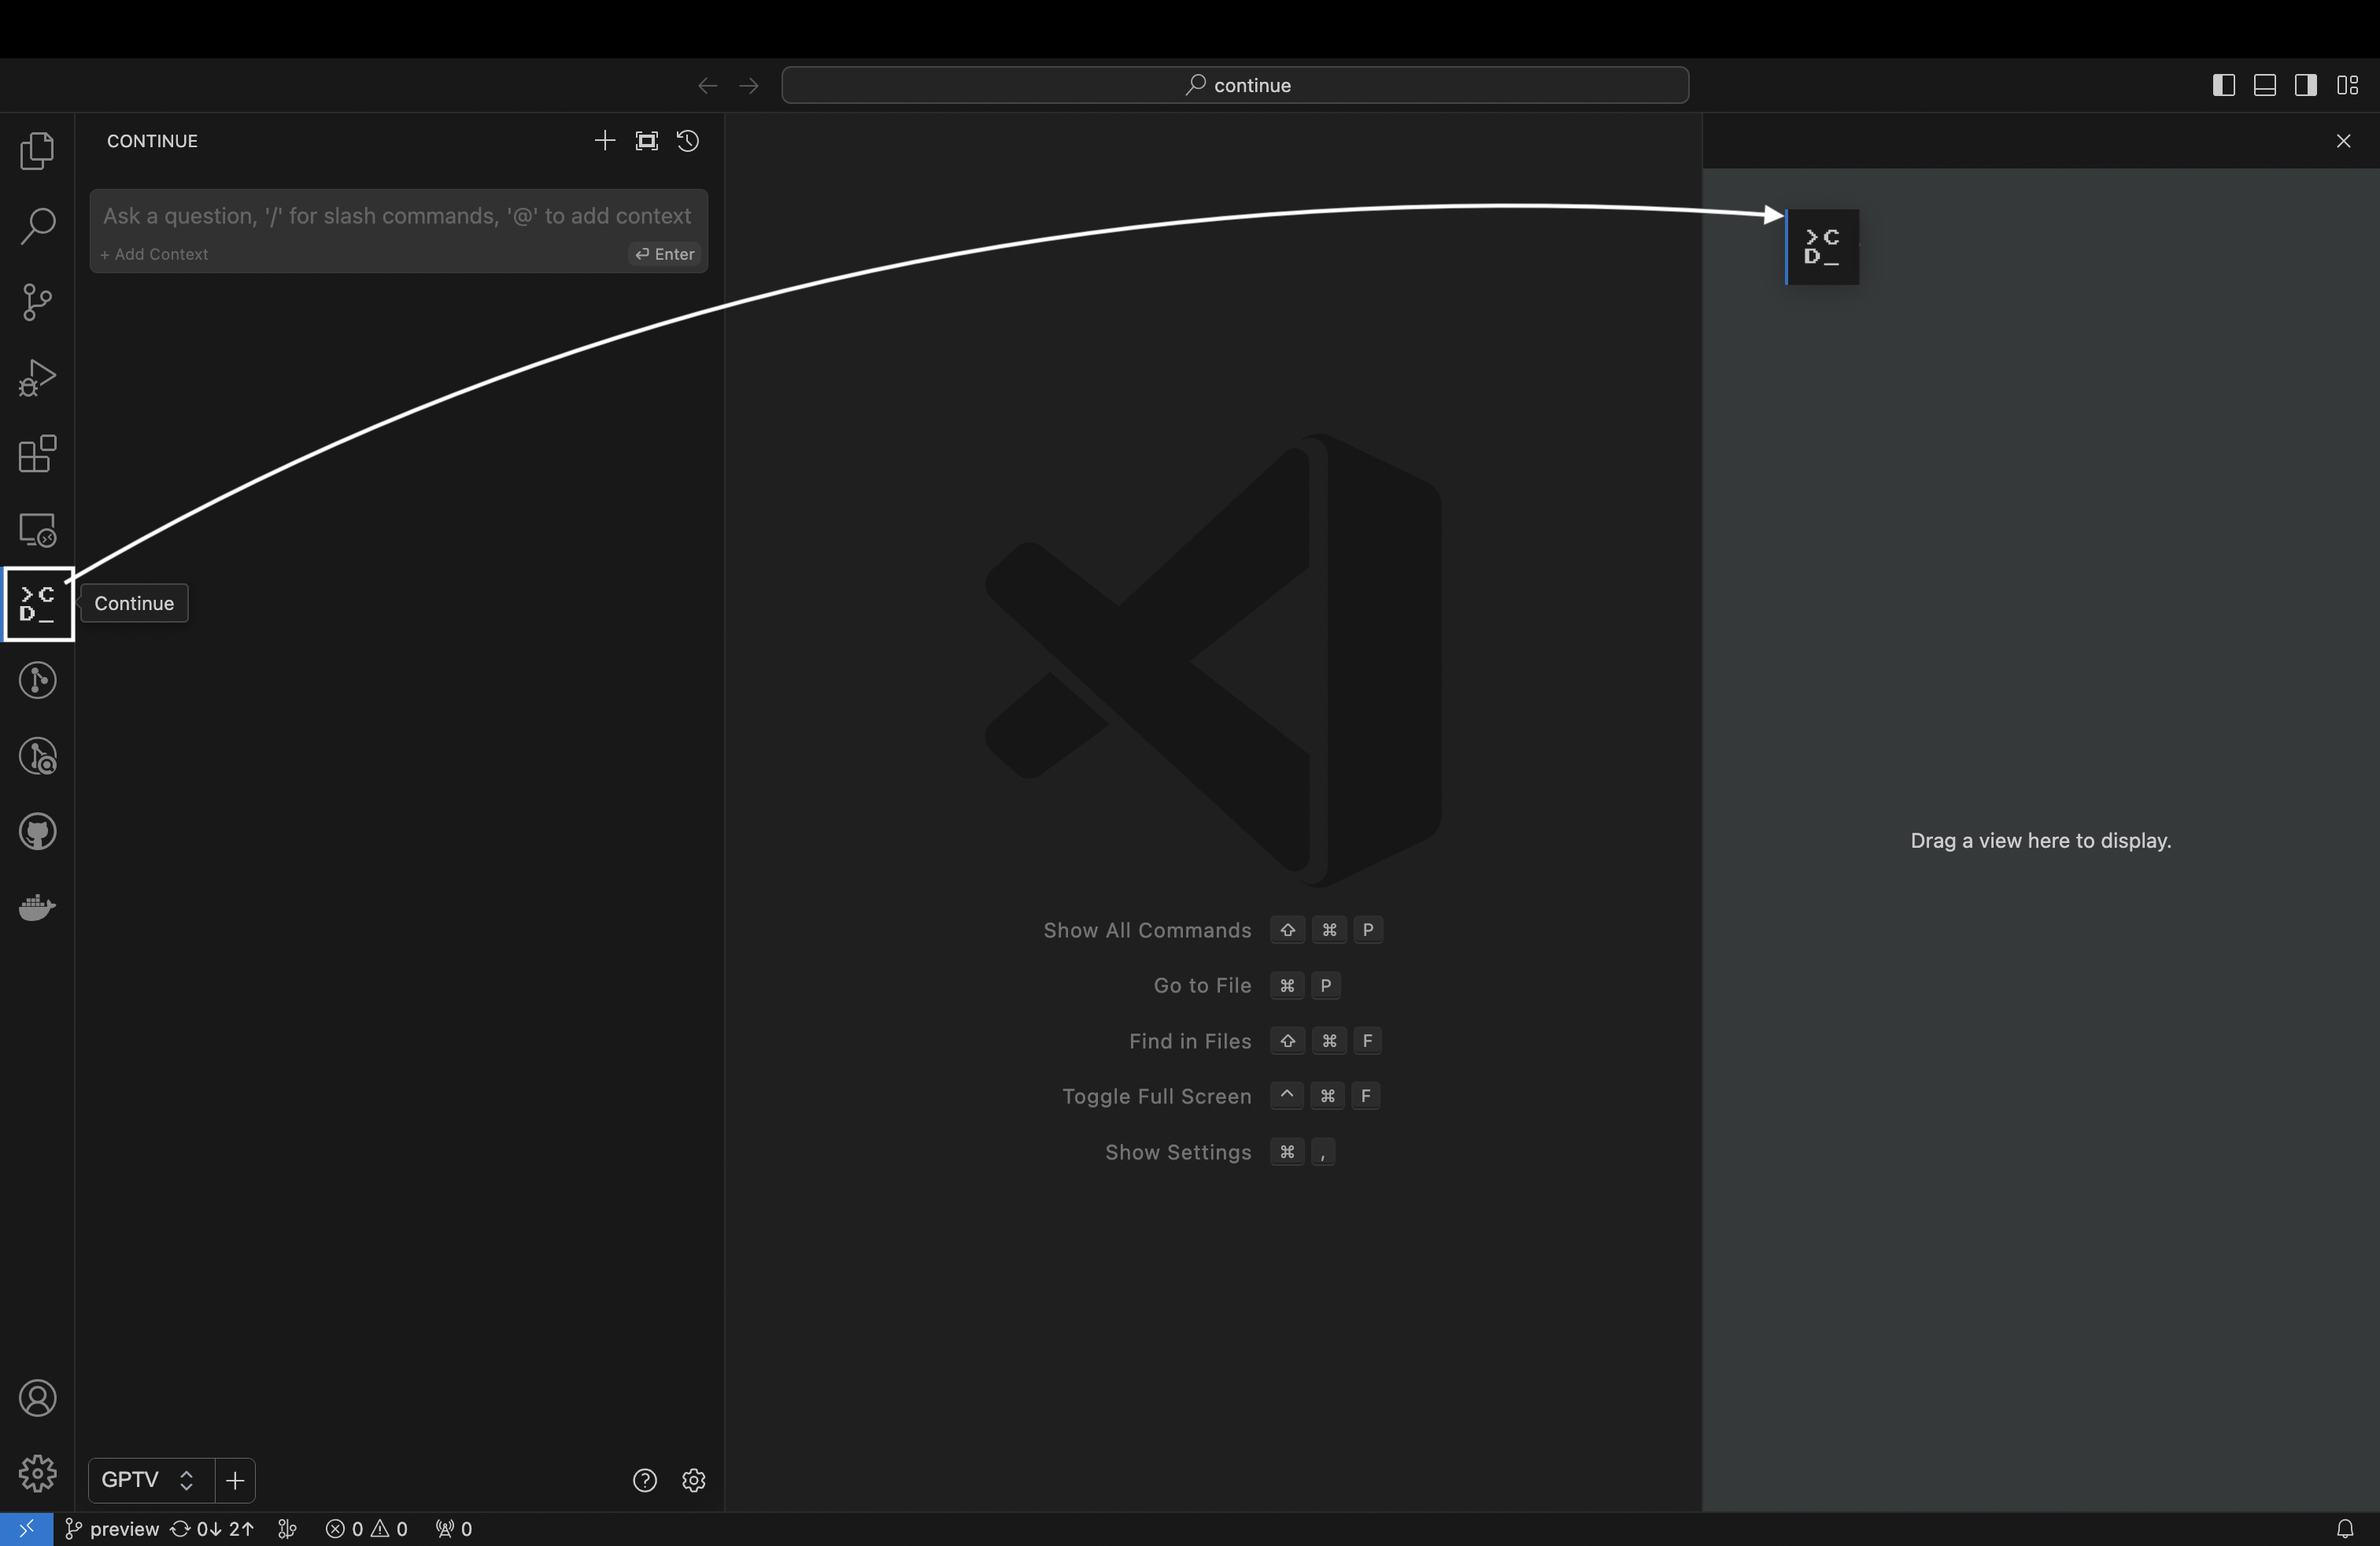
.. note::

   Note: We strongly recommend moving Continue to VS Code's right sidebar. This helps keep the file explorer open while using Continue, and the sidebar can be toggled with a simple keyboard shortcut.
4. Configure Continue
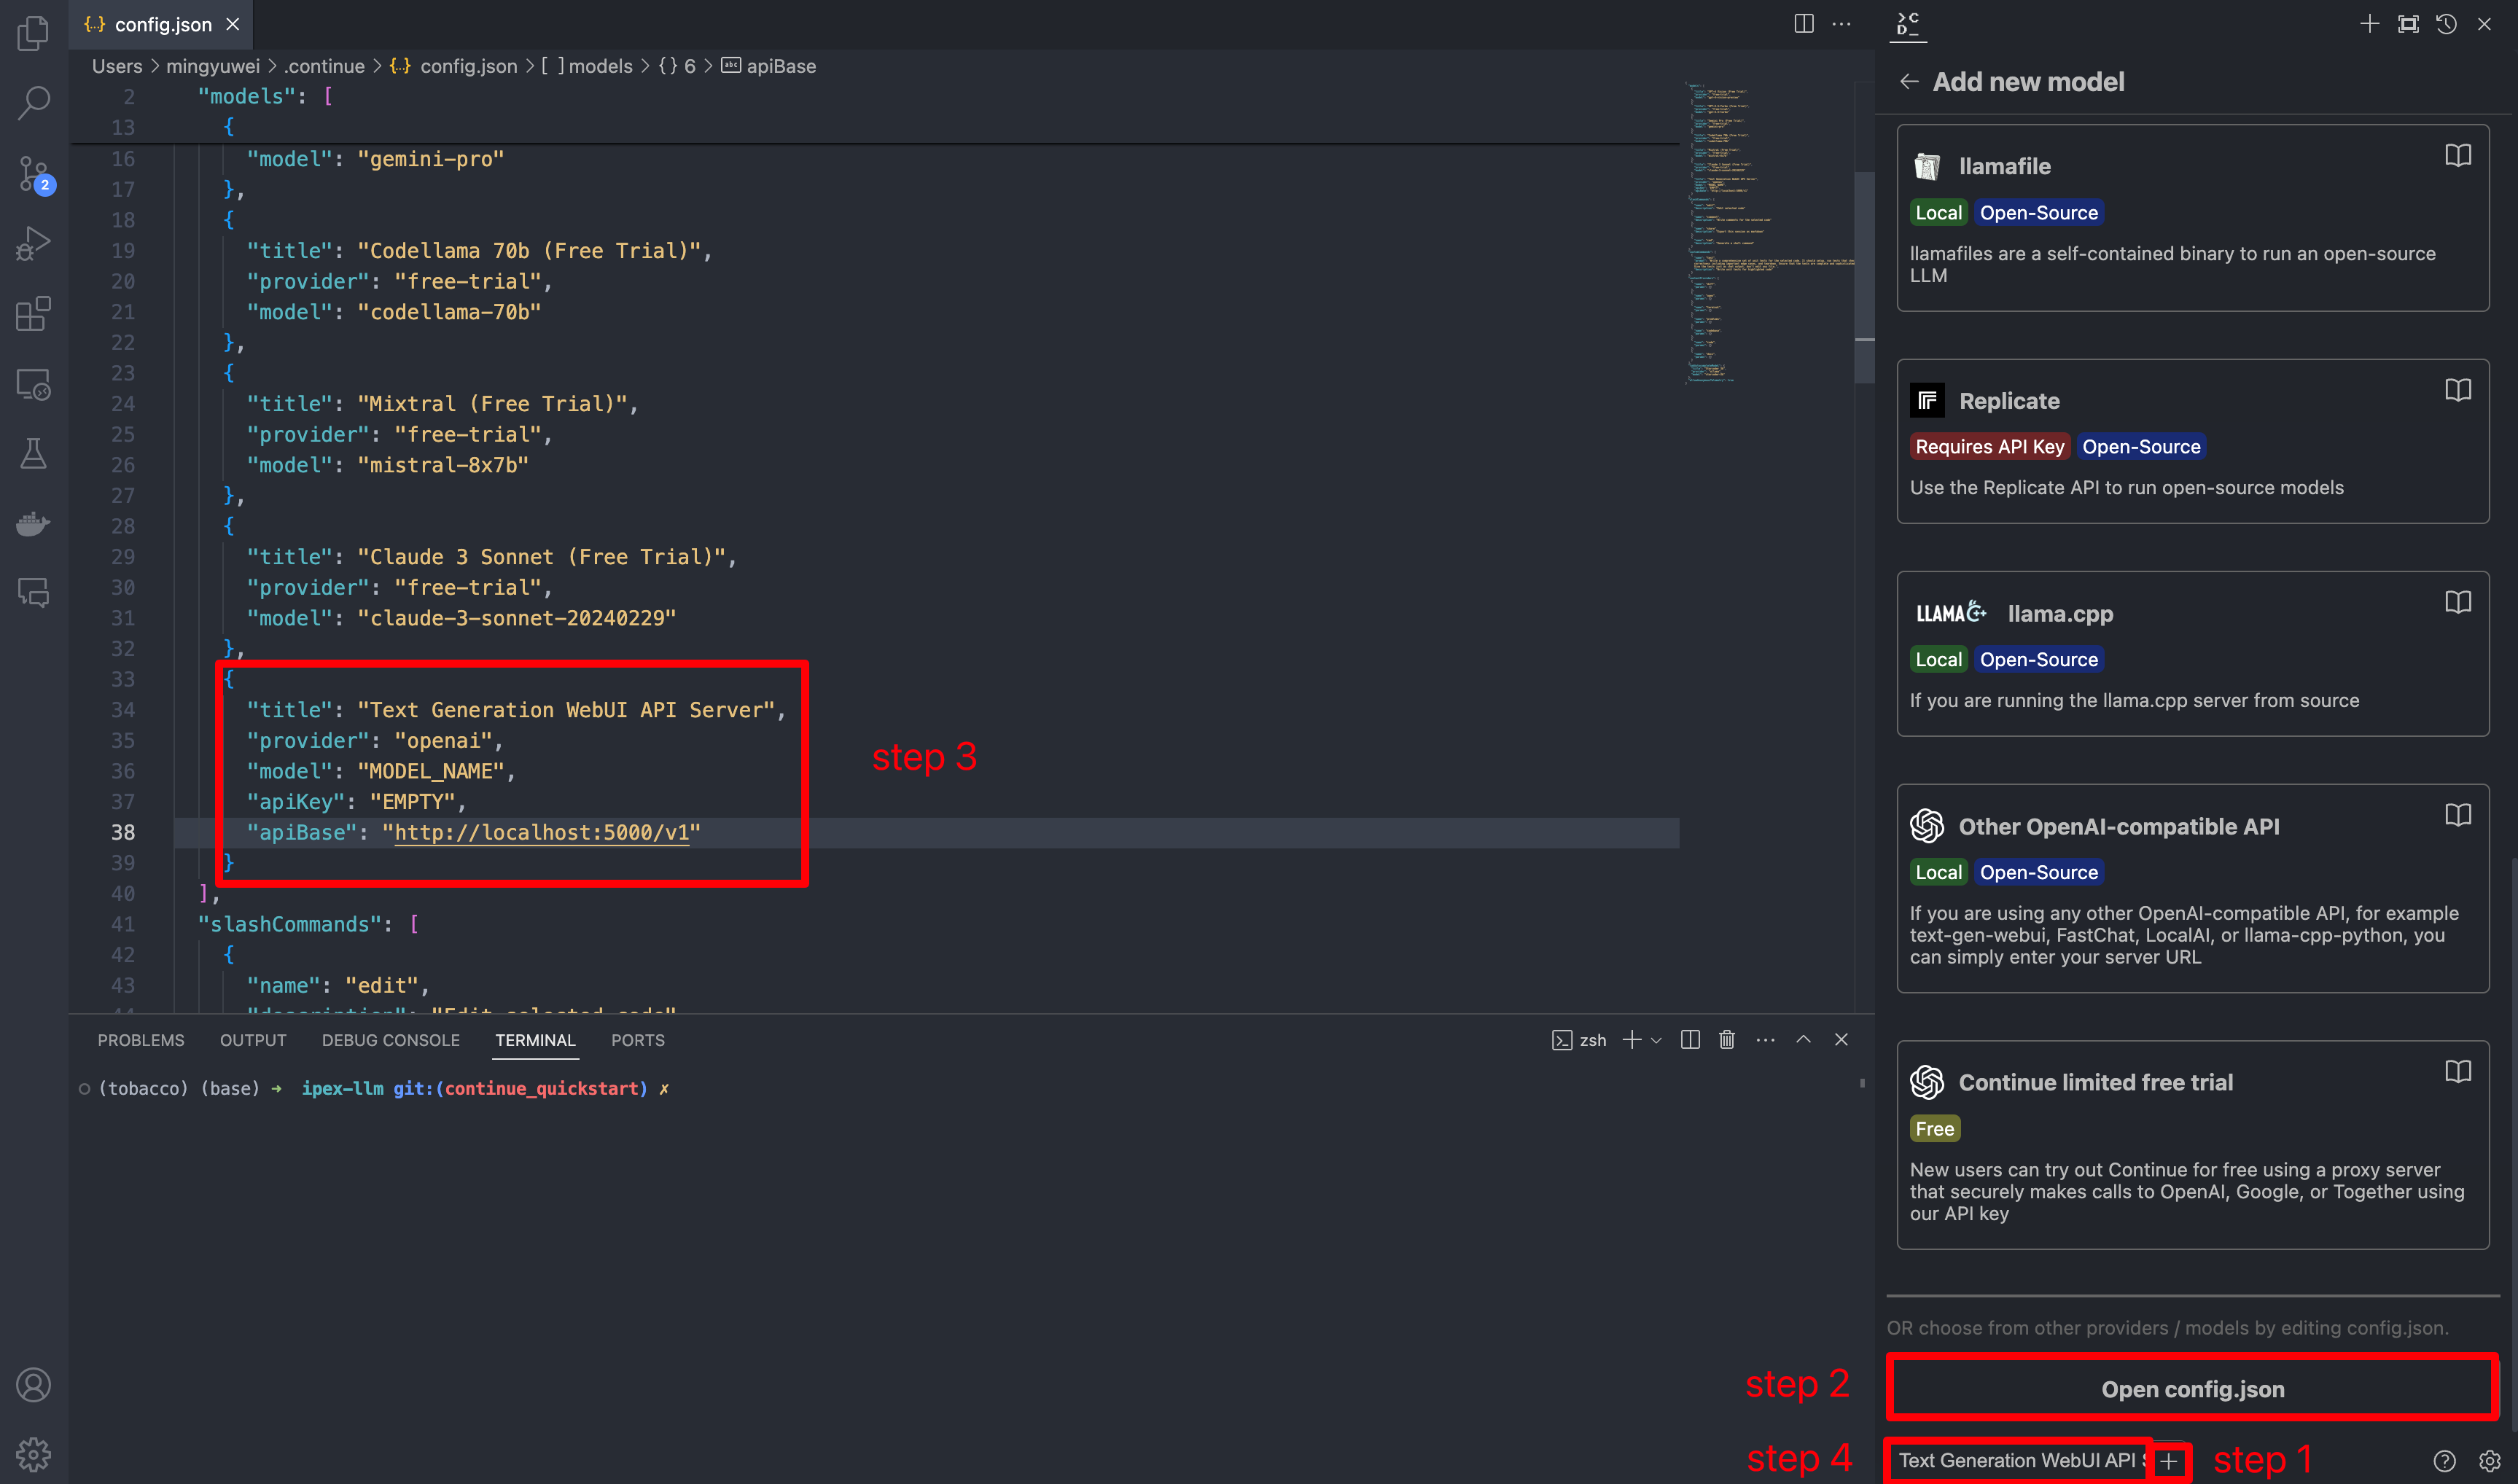
Once you've started the API server, you can now use your local LLMs on Continue. After opening Continue(you can either click the extension icon on the left sidebar or press Ctrl+Shift+L), you can click the + button next to the model dropdown, and scroll down to the bottom and click Open config.json.
In config.json, you'll find the models property, a list of the models that you have saved to use with Continue. Please add the following configuration to models. Note that model, apiKey, apiBase should align with what you specified when starting the Text Generation WebUI server. Finally, remember to select this model in the model dropdown menu.
{
  "models": [
    {
      "title": "Text Generation WebUI API Server",
      "provider": "openai",
      "model": "MODEL_NAME",
      "apiKey": "EMPTY",
      "apiBase": "http://localhost:5000/v1"
    }
  ]
}
5. How to Use Continue
For detailed tutorials please refer to this link. Here we are only showing the most common scenarios.
Ask about highlighted code or an entire file
If you don't understand how some code works, highlight(press Ctrl+Shift+L) it and ask "how does this code work?"

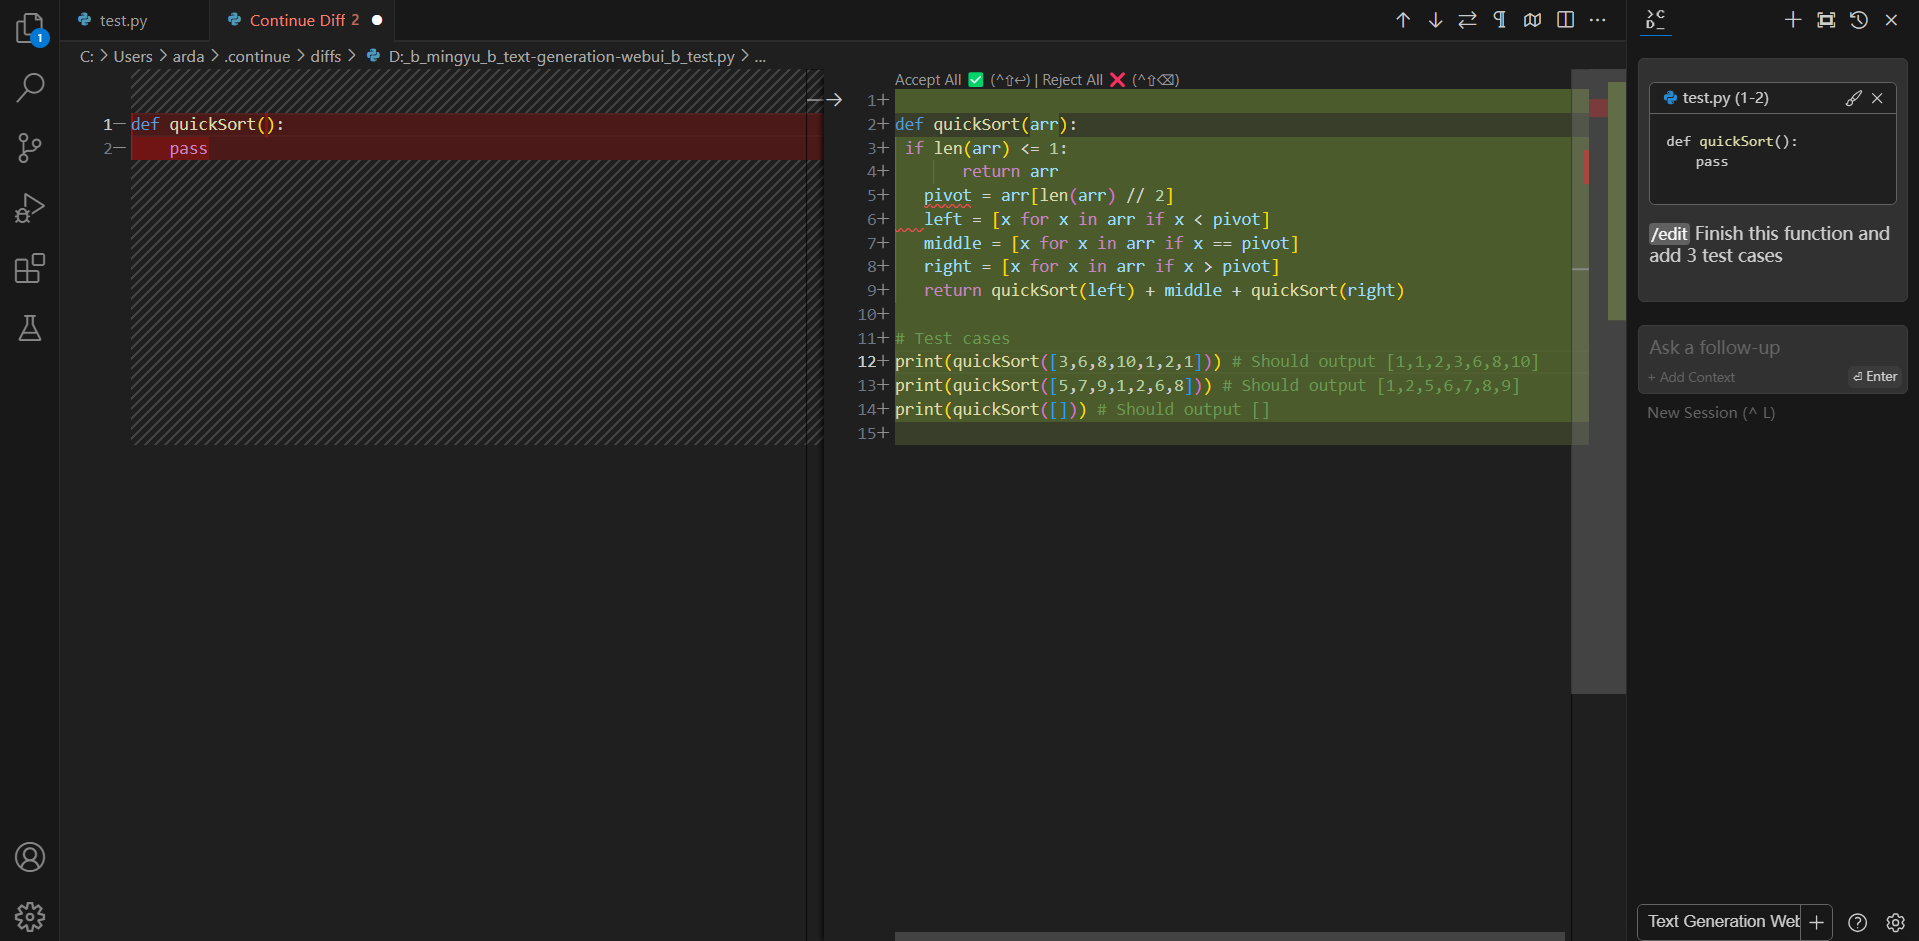
Editing existing code
You can ask Continue to edit your highlighted code with the command /edit.
Troubleshooting
Failed to load the extension openai
If you encounter TypeError: unsupported operand type(s) for |: 'type' and 'NoneType' when you run python server.py --load-in-4bit --api, please make sure you are using Python 3.11 instead of lower versions.