7.8 KiB
Run Open WebUI with Intel GPU
Open WebUI is a user friendly GUI for running LLM locally; by porting it to ipex-llm, users can now easily run LLM in Open WebUI on Intel GPU (e.g., local PC with iGPU, discrete GPU such as Arc, Flex and Max).
See the demo of running Mistral:7B on Intel Arc A770 below.
Quickstart
This quickstart guide walks you through setting up and using Open WebUI with Ollama (using the C++ interface of ipex-llm as an accelerated backend).
1 Run Ollama with Intel GPU
Follow the instructions on the Run Ollama with Intel GPU to install and run "Ollama Serve". Please ensure that the Ollama server continues to run while you're using the Open WebUI.
2 Install the Open-Webui
Install Node.js & npm
.. note::

  Package version requirements for running Open WebUI: Node.js (>= 20.10) or Bun (>= 1.0.21), Python (>= 3.11)
Please install Node.js & npm as below:
.. tabs::
   .. tab:: Linux

      Run below commands to install Node.js & npm. Once the installation is complete, verify the installation by running ```node -v``` and ```npm -v``` to check the versions of Node.js and npm, respectively.

      .. code-block:: bash

        sudo apt update
        sudo apt install nodejs
        sudo apt install npm

   .. tab:: Windows

      You may download Node.js installation package from https://nodejs.org/dist/v20.12.2/node-v20.12.2-x64.msi, which will install both Node.js & npm on your system.

      Once the installation is complete, verify the installation by running ```node -v``` and ```npm -v``` to check the versions of Node.js and npm, respectively.
Download the Open-Webui
Use git to clone the open-webui repo, or download the open-webui source code zip from this link and unzip it to a directory, e.g. ~/open-webui.
Install Dependencies
You may run below commands to install Open WebUI dependencies:
.. tabs::
   .. tab:: Linux

      .. code-block:: bash

         cd ~/open-webui/
         cp -RPp .env.example .env  # Copy required .env file

         # Build frontend
         npm i
         npm run build

         # Install Dependencies
         cd ./backend
         pip install -r requirements.txt -U

   .. tab:: Windows

      .. code-block:: bash

         cd ~\open-webui\
         copy .env.example .env

         # Build frontend
         npm install
         npm run build

         # Install Dependencies
         cd .\backend
         pip install -r requirements.txt -U
3. Start the Open-WebUI
Start the service
Run below commands to start the service:
.. tabs::
  .. tab:: Linux

    .. code-block:: bash

       export no_proxy=localhost,127.0.0.1
       bash start.sh

    .. note:

    If you have difficulty accessing the huggingface repositories, you may use a mirror, e.g. add `export HF_ENDPOINT=https://hf-mirror.com` before running `bash start.sh`.


  .. tab:: Windows

    .. code-block:: bash

       set no_proxy=localhost,127.0.0.1
       start_windows.bat

    .. note:

    If you have difficulty accessing the huggingface repositories, you may use a mirror, e.g. add `set HF_ENDPOINT=https://hf-mirror.com` before running `start_windows.bat`.
Access the WebUI
Upon successful launch, URLs to access the WebUI will be displayed in the terminal. Open the provided local URL in your browser to interact with the WebUI, e.g. http://localhost:8080/.
4. Using the Open-Webui
.. note::

  For detailed information about how to use Open WebUI, visit the README of `open-webui official repository <https://github.com/open-webui/open-webui>`_.
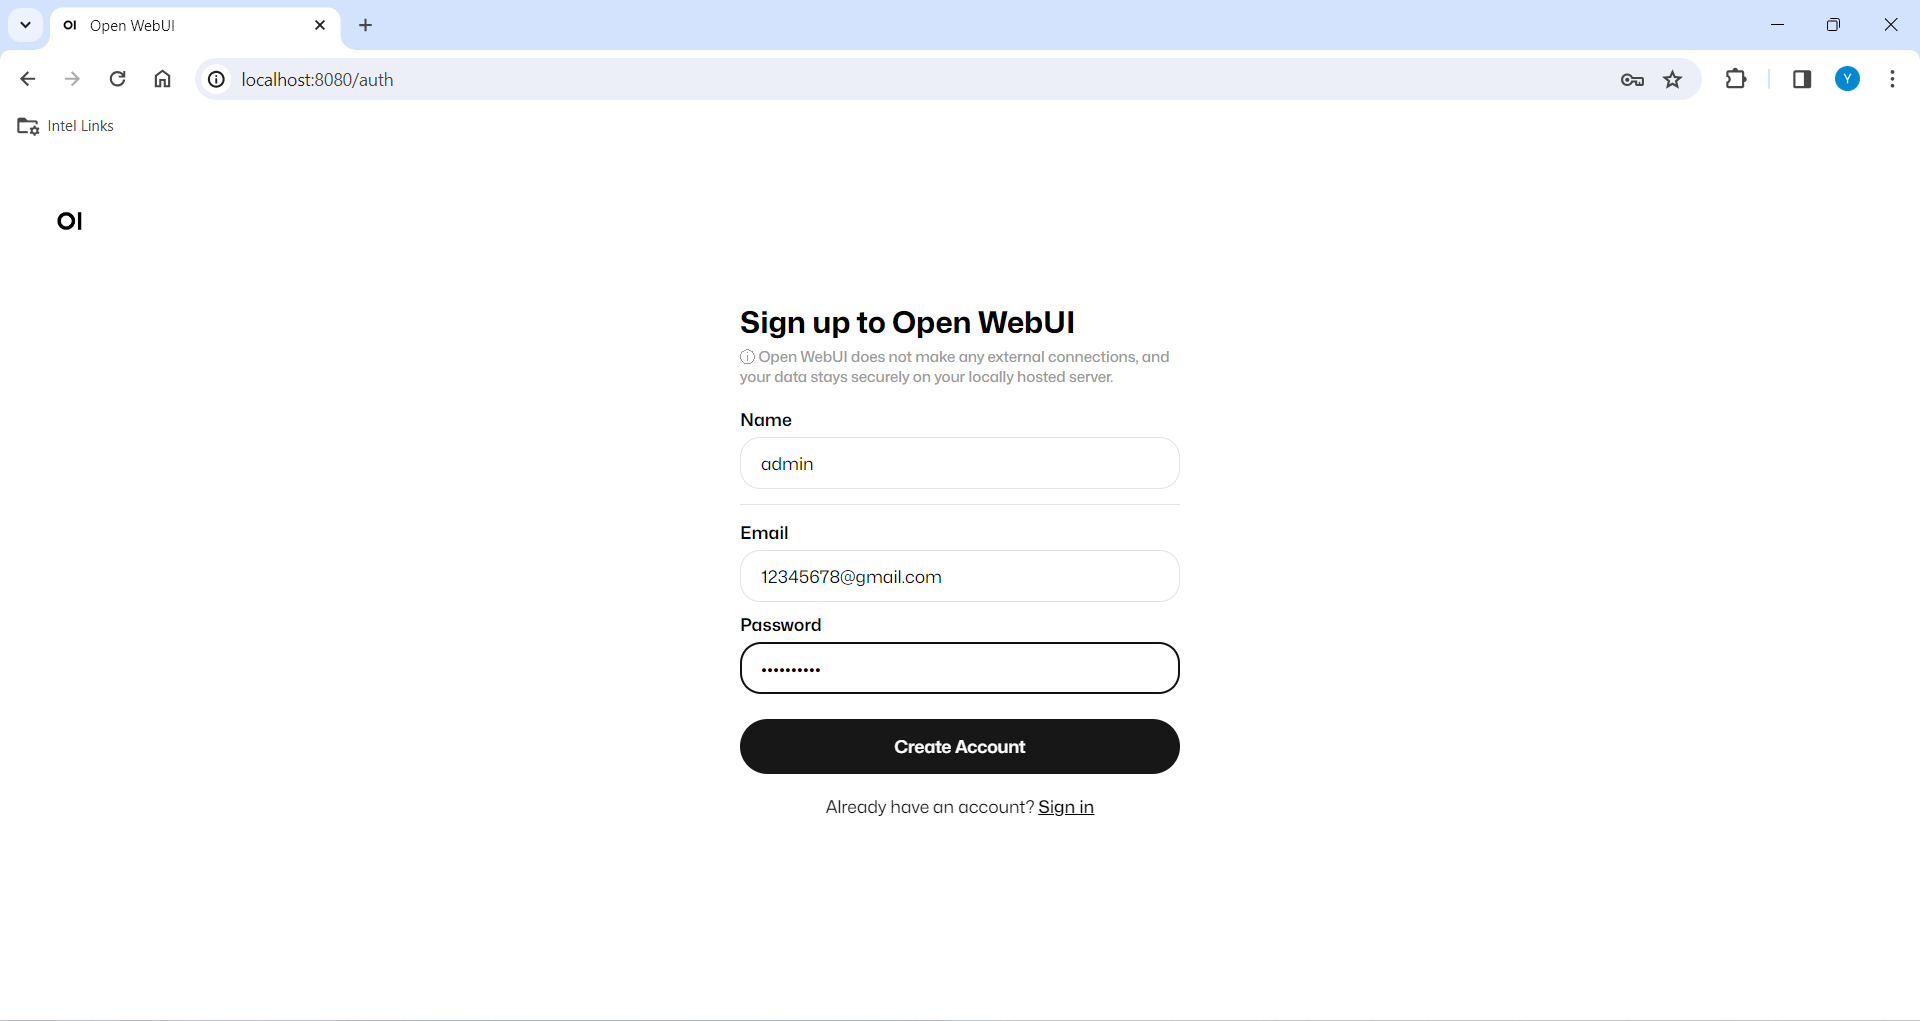
Log-in
If this is your first time using it, you need to register. After registering, log in with the registered account to access the interface.
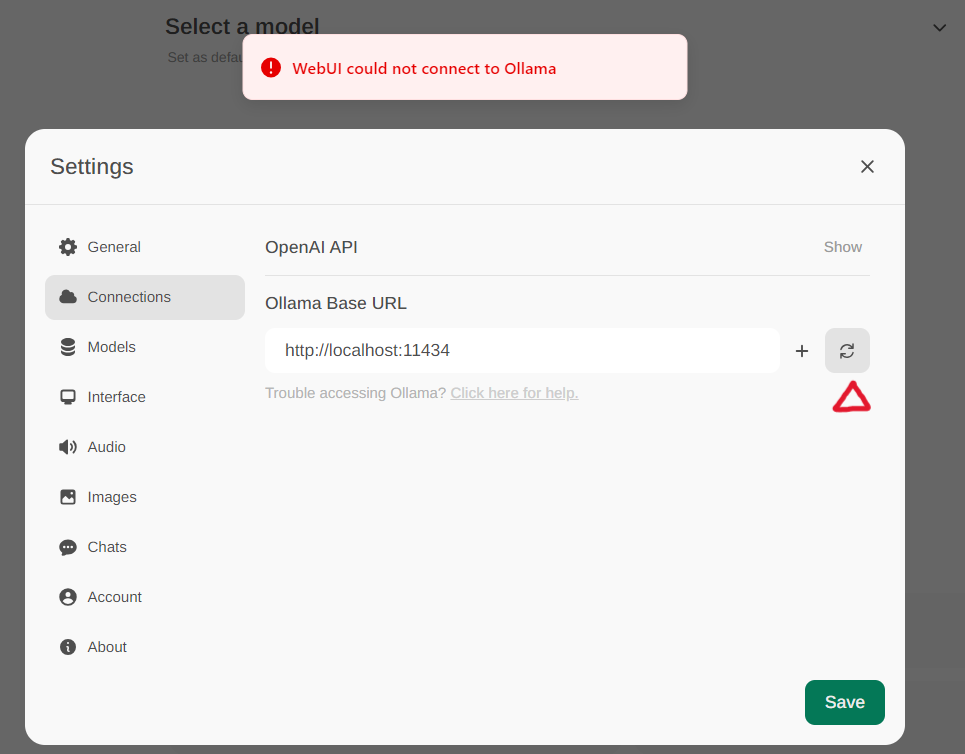
Configure Ollama service URL
Access the Ollama settings through Settings -> Connections in the menu. By default, the Ollama Base URL is preset to https://localhost:11434, as illustrated in the snapshot below. To verify the status of the Ollama service connection, click the Refresh button located next to the textbox. If the WebUI is unable to establish a connection with the Ollama server, you will see an error message stating, WebUI could not connect to Ollama.
If the connection is successful, you will see a message stating Service Connection Verified, as illustrated below.
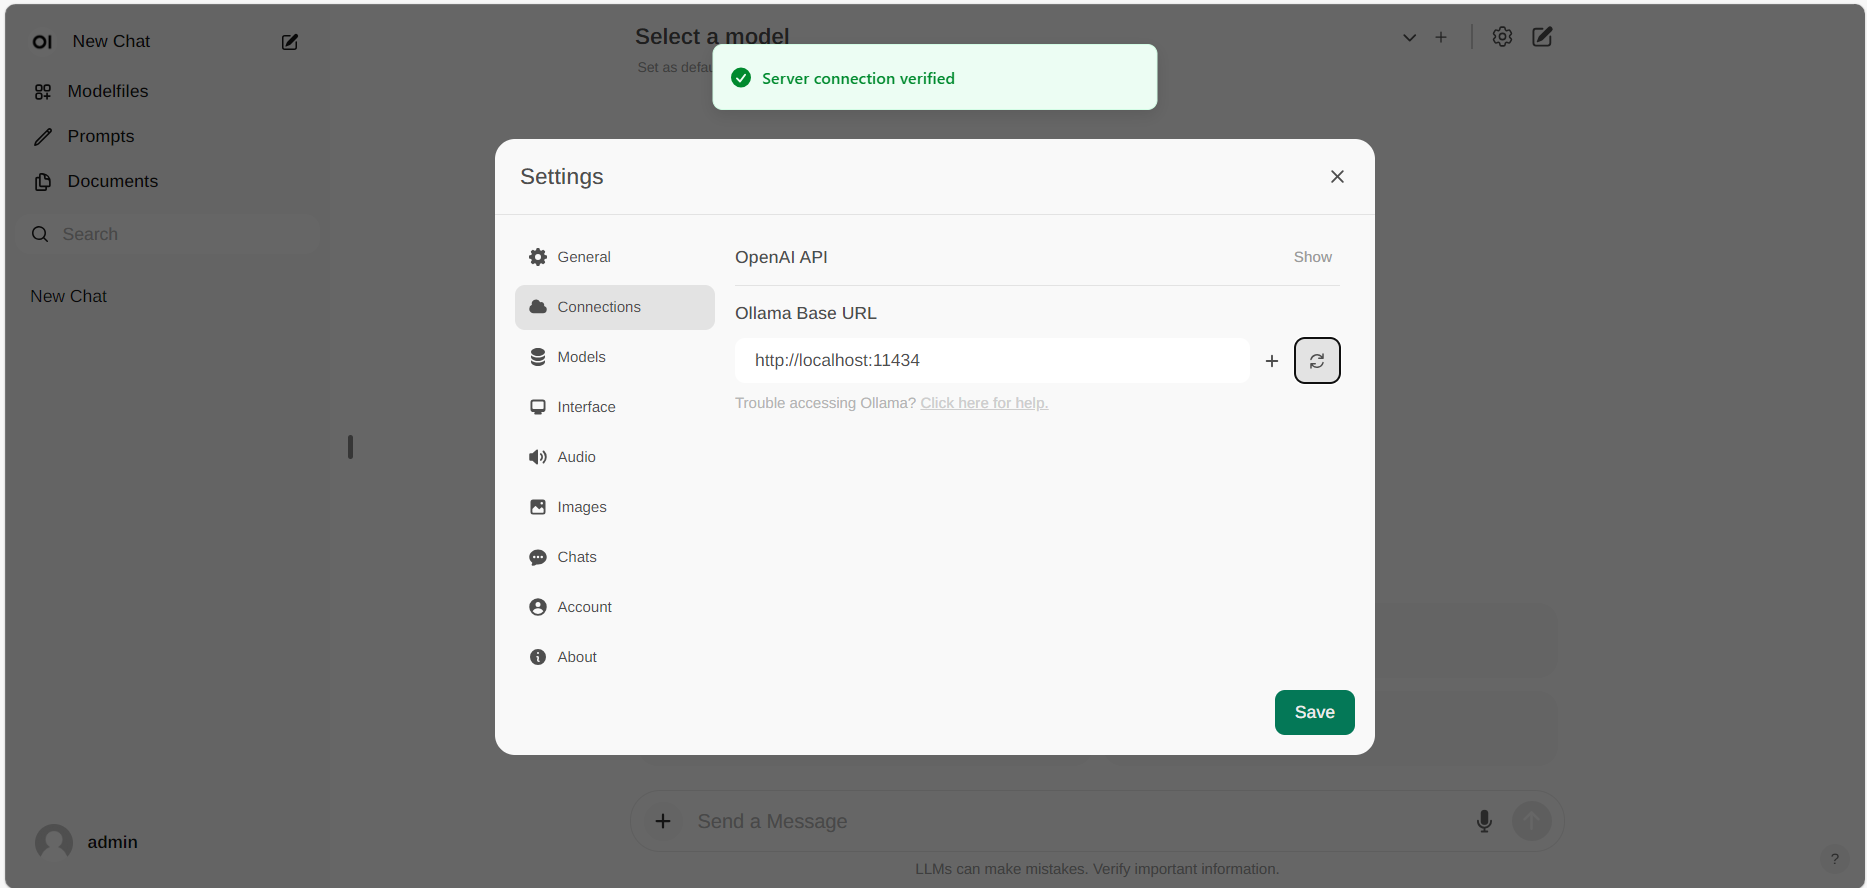
.. note::

  If you want to use an Ollama server hosted at a different URL, simply update the **Ollama Base URL** to the new URL and press the **Refresh** button to re-confirm the connection to Ollama.
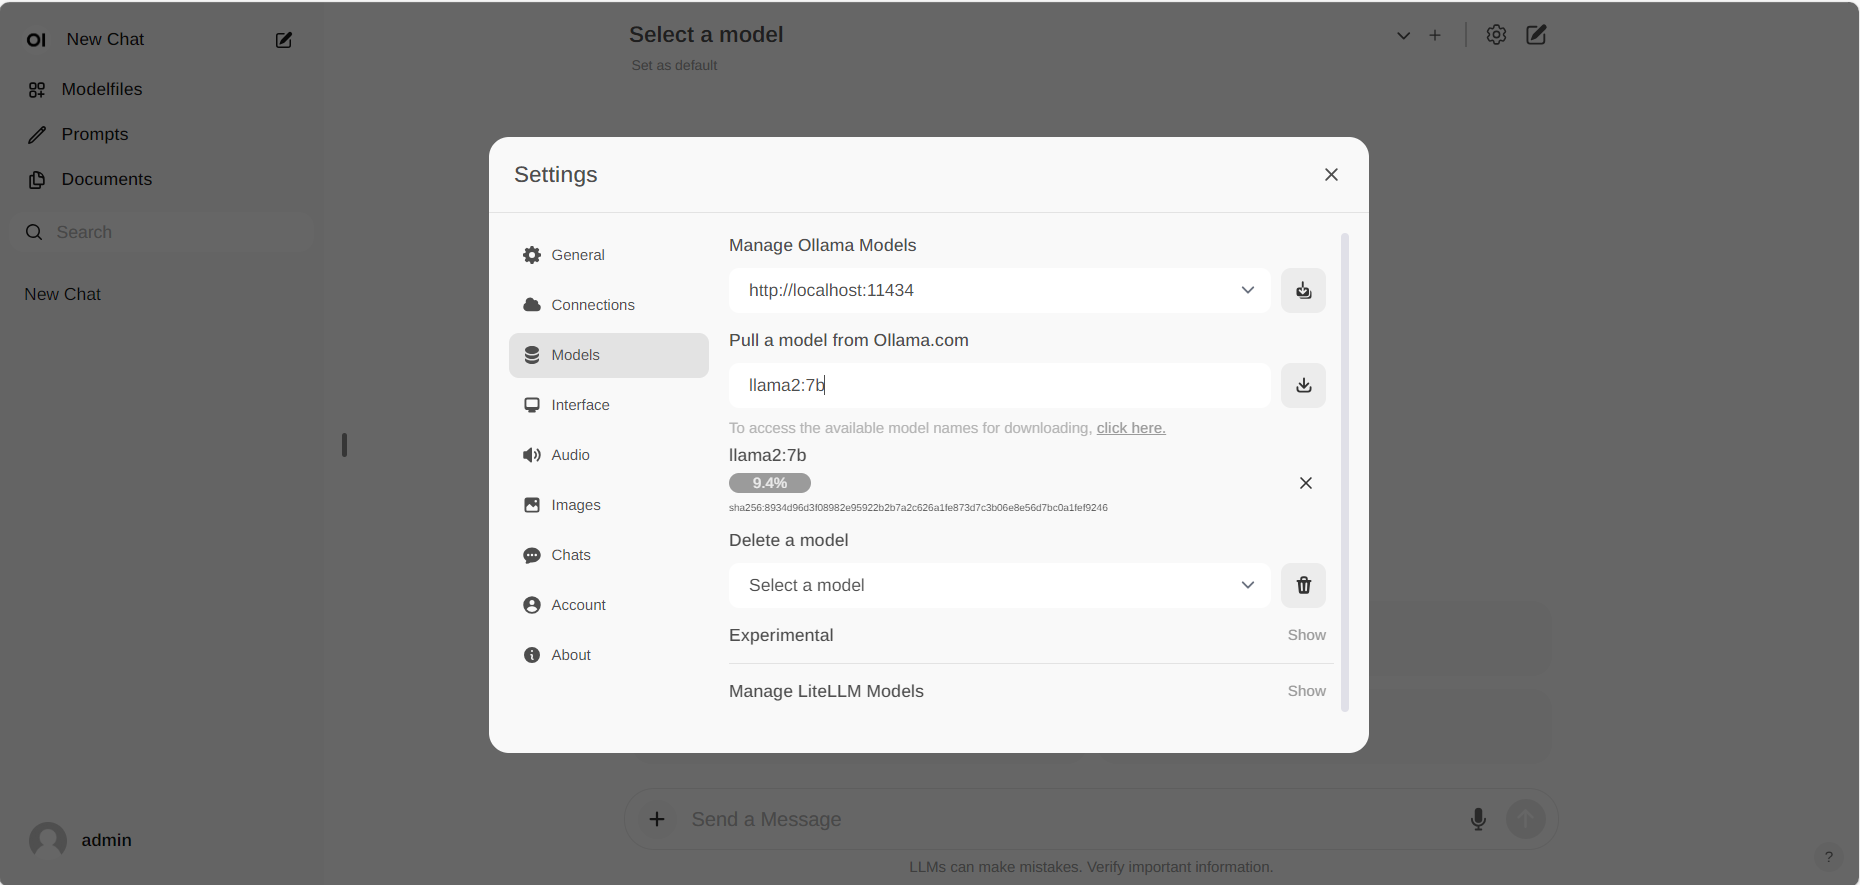
Pull Model
Go to Settings -> Models in the menu, choose a model under Pull a model from Ollama.com using the drop-down menu, and then hit the Download button on the right. Ollama will automatically download the selected model for you.
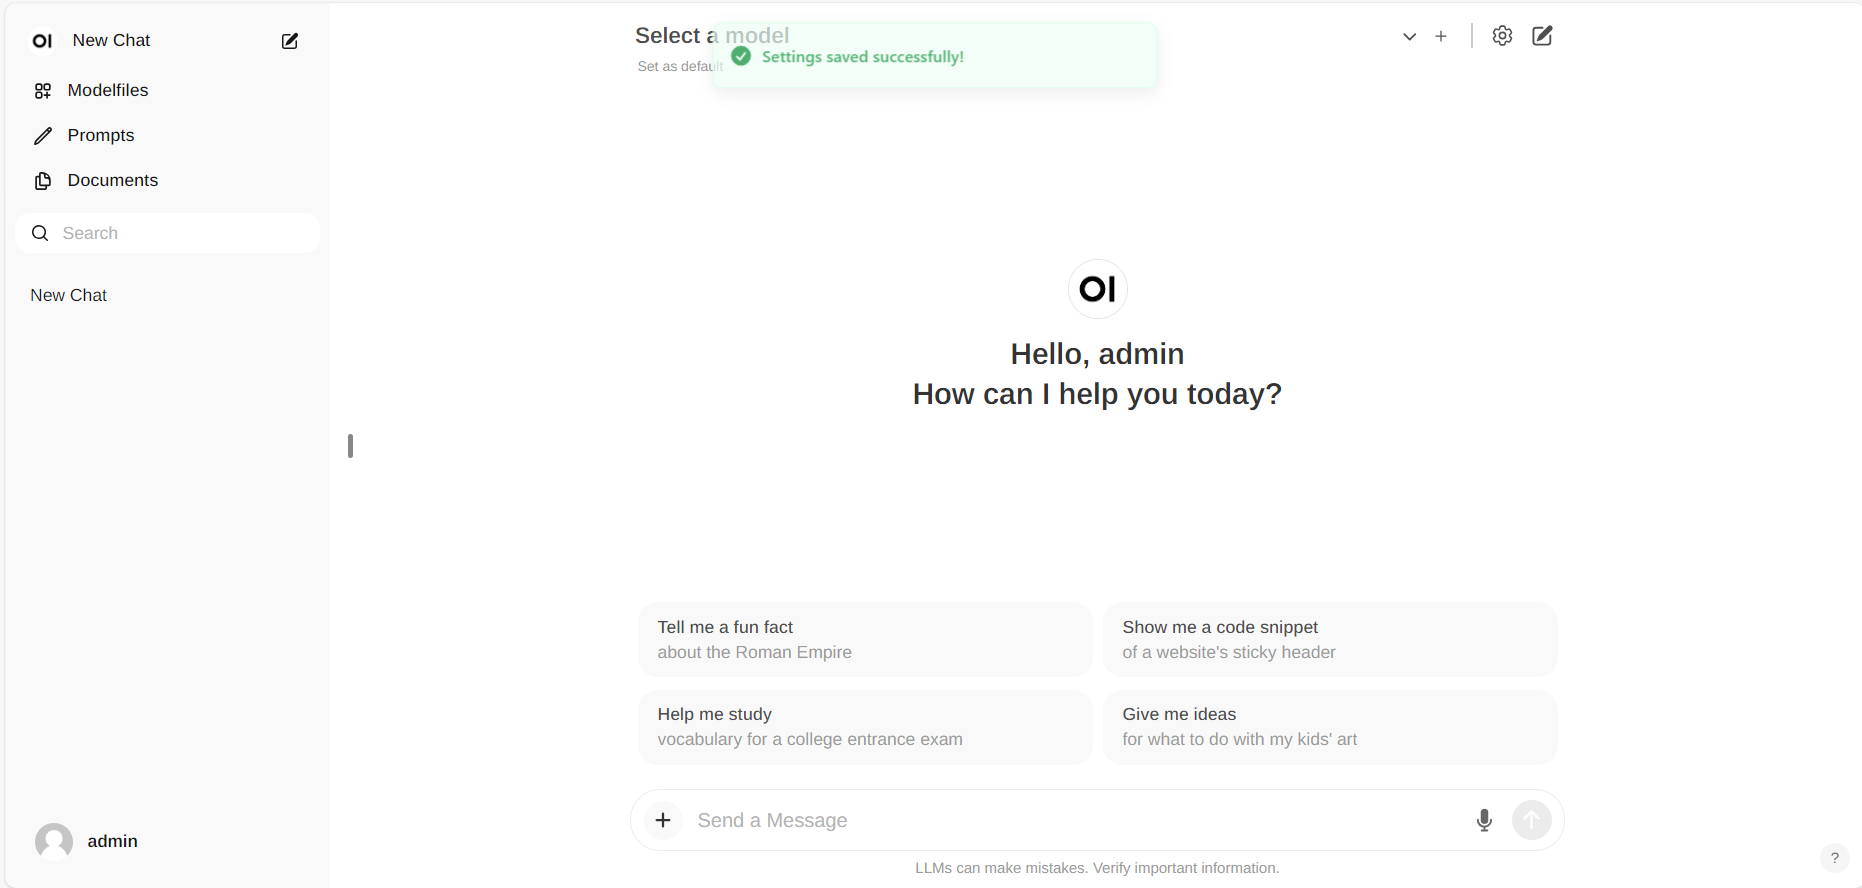
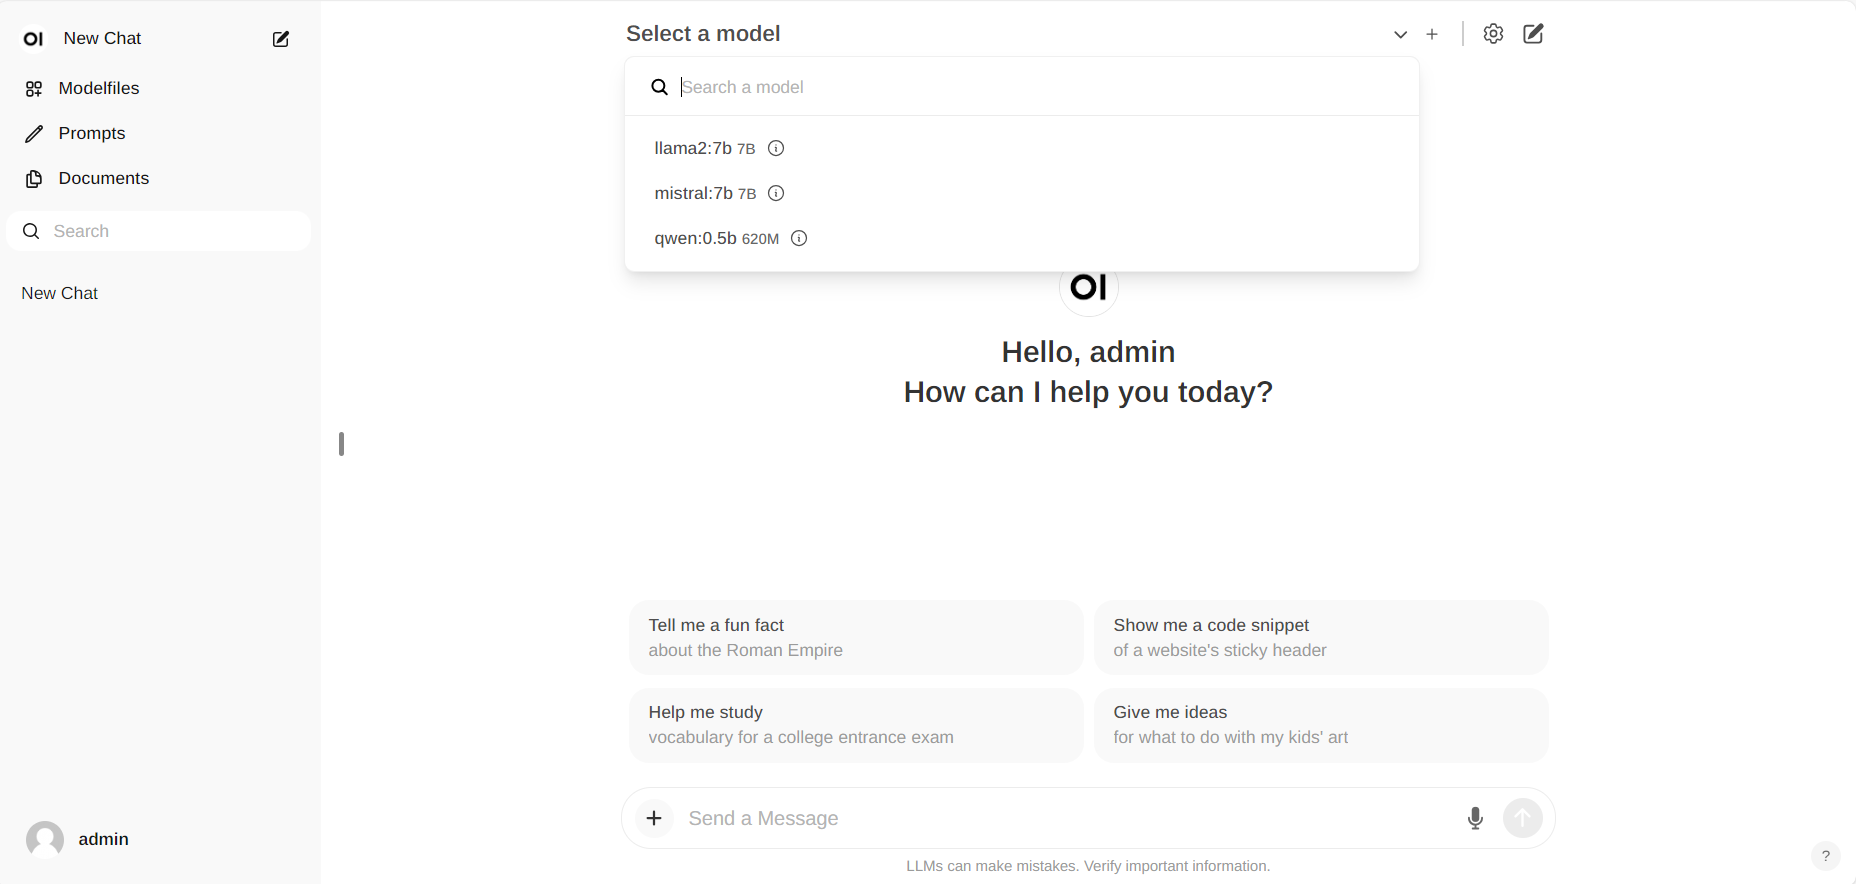
Chat with the Model
Start new conversations with New chat in the left-side menu.
On the right-side, choose a downloaded model from the Select a model drop-down menu at the top, input your questions into the Send a Message textbox at the bottom, and click the button on the right to get responses.
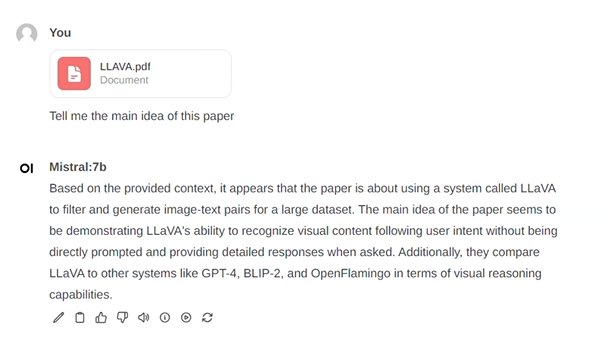
Additionally, you can drag and drop a document into the textbox, allowing the LLM to access its contents. The LLM will then generate answers based on the document provided.
Exit Open-Webui
To shut down the open-webui server, use Ctrl+C in the terminal where the open-webui server is runing, then close your browser tab.
5. Troubleshooting
Error No module named 'torch._C
When you encounter the error ModuleNotFoundError: No module named 'torch._C' after executing bash start.sh, you can resolve it by reinstalling PyTorch. First, use pip uninstall torch to remove the existing PyTorch installation, and then reinstall it along with its dependencies by running pip install torch torchvision torchaudio.