10 KiB
Use Continue in VS Code with Intel GPU
This quickstart guide walks you through setting up and using the Continue extension in VS Code (a coding assistant using Large Language Models) with local LLMs using Text Generation WebUI and ipex-llm.
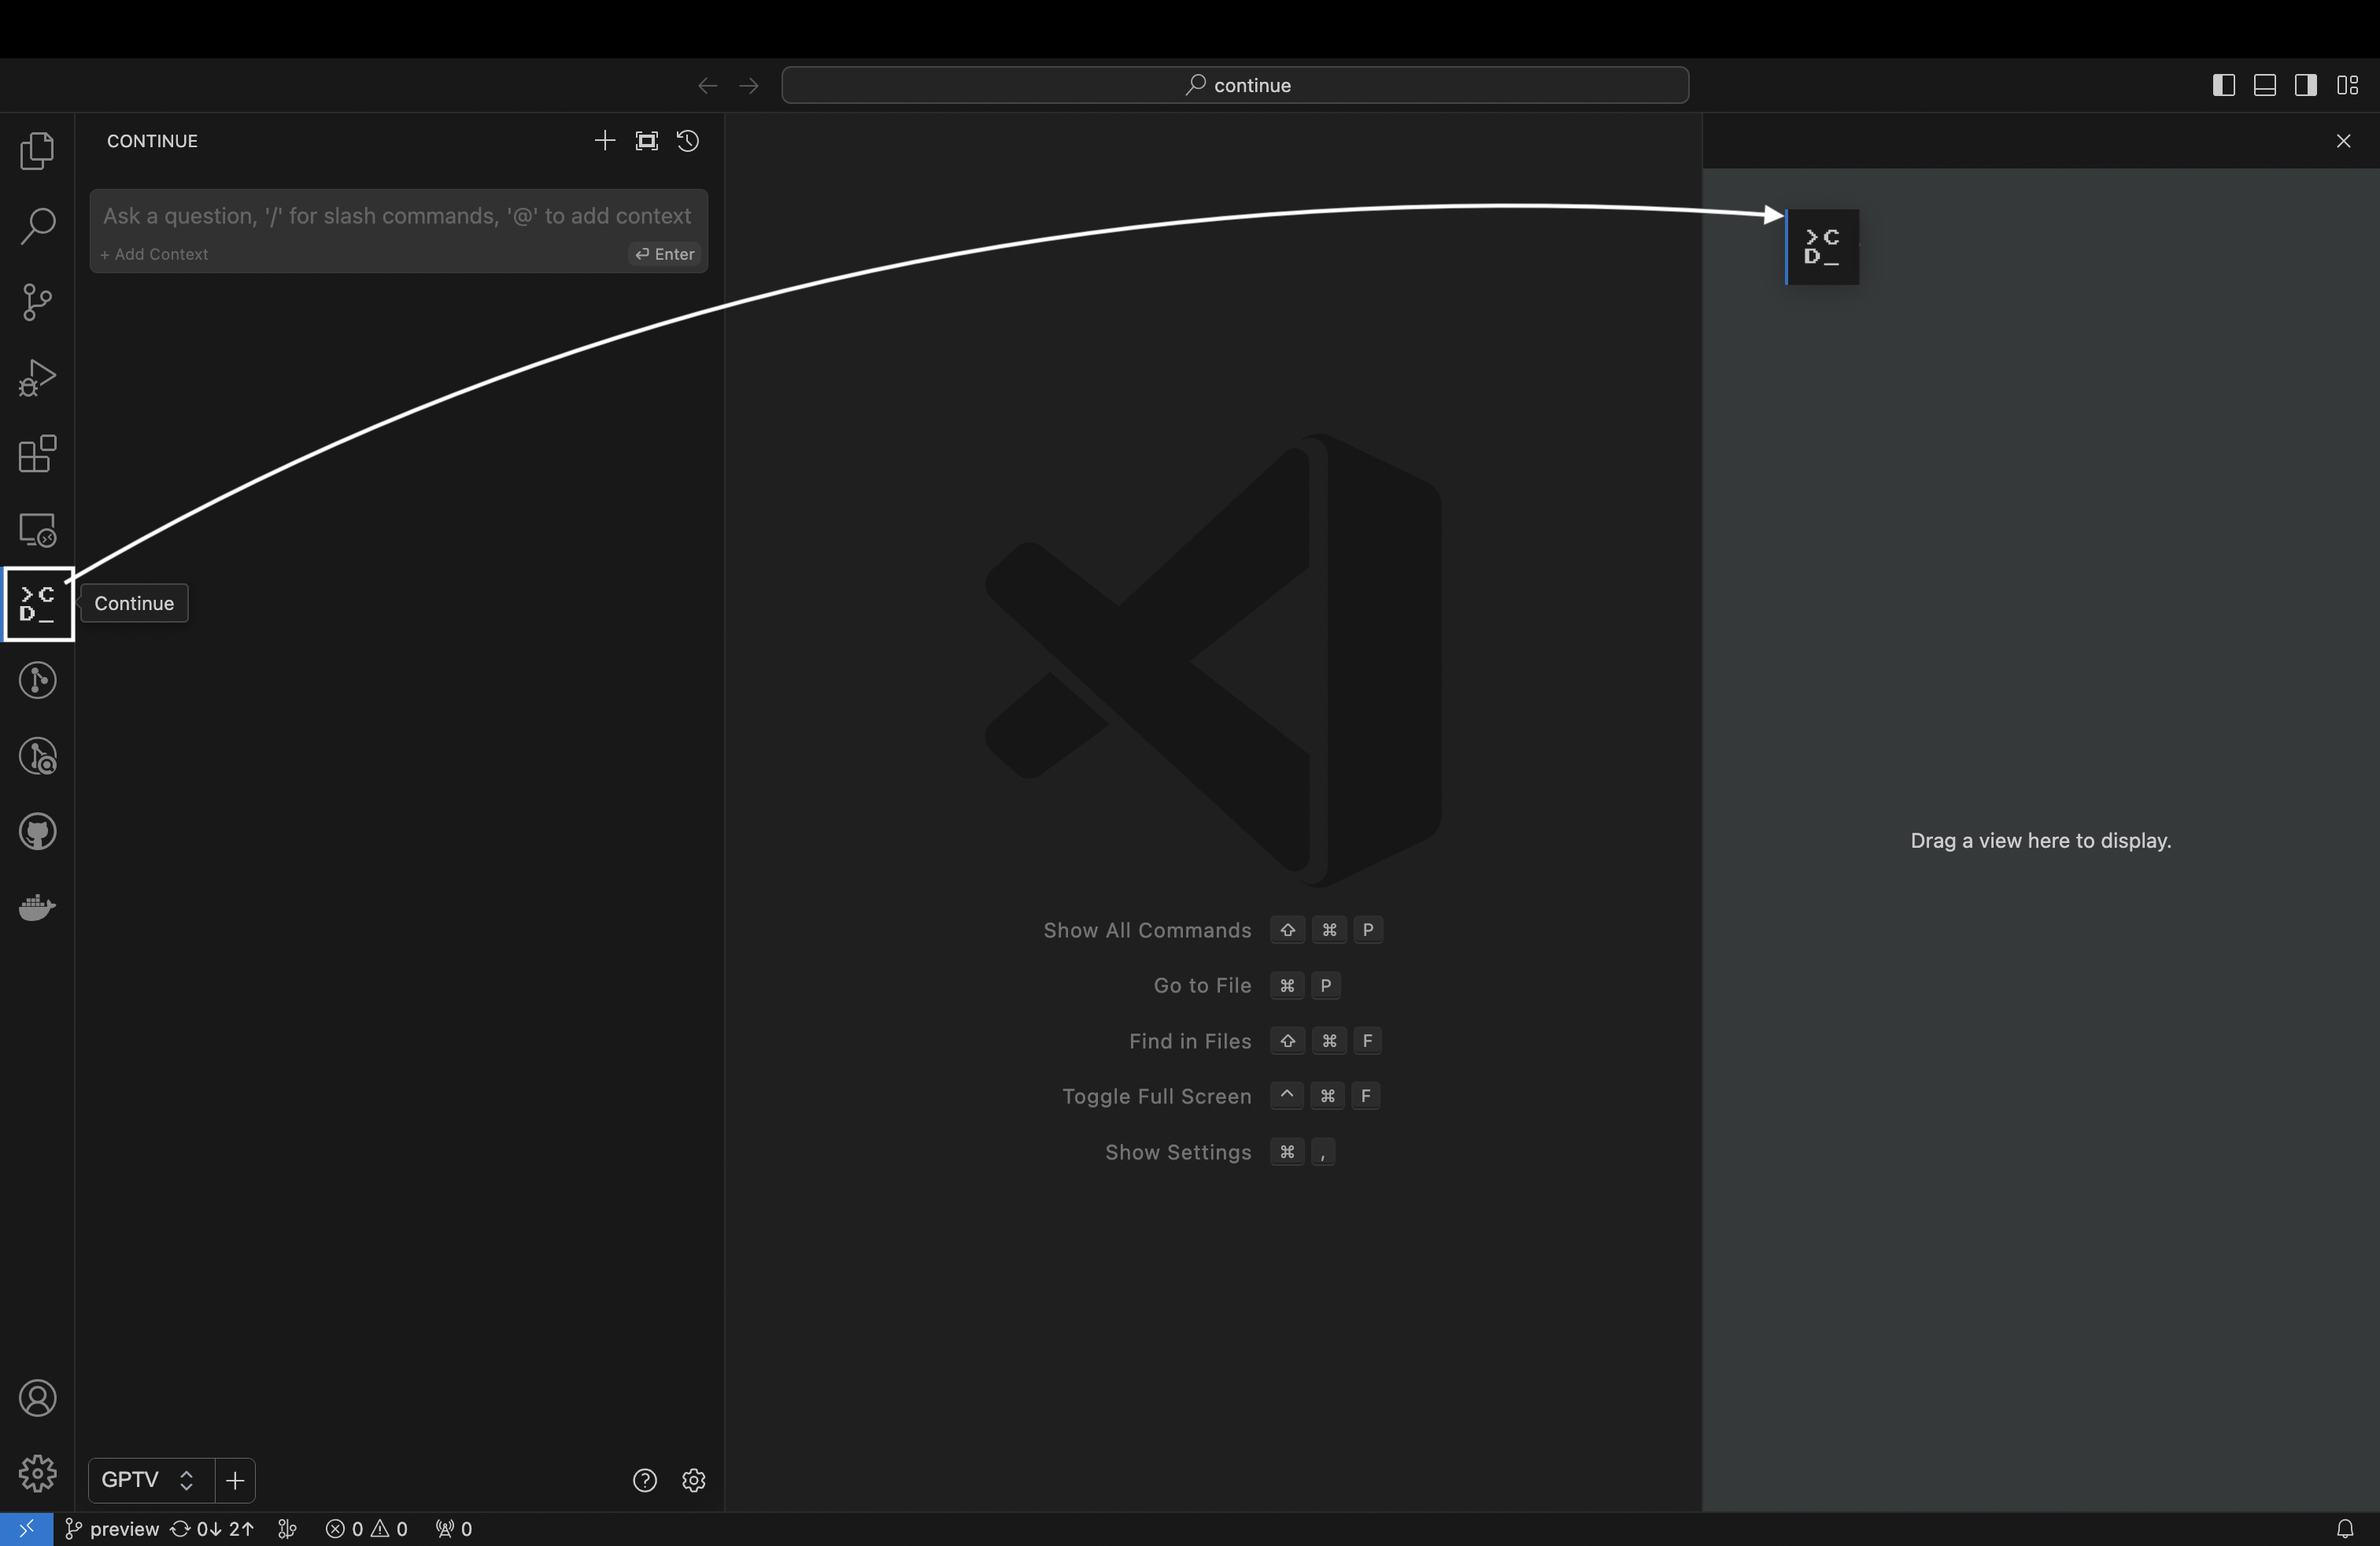
A preview of Continue in action is shown below:
0. Install Continue Extension
- Click
Installon the Continue extension in the Visual Studio Marketplace - This will open the Continue extension page in VS Code, where you will need to click
Installagain - Once you do this, you will see the Continue logo show up on the left side bar. If you click it, the Continue extension will open up:
.. note::

   Note: We strongly recommend moving Continue to VS Code's right sidebar. This helps keep the file explorer open while using Continue, and the sidebar can be toggled with a simple keyboard shortcut.
1. Install IPEX-LLM
To use Continue with local LLMs on Intel GPU, first ensure that IPEX-LLM is installed. Follow the instructions on the IPEX-LLM Installation Quickstart for Windows with Intel GPU.
After the installation, you should have created a conda environment, named llm for instance, for running ipex-llm applications.
.. note::

   Please note that Text Generation WebUI API service only supports ``Python >= 3.10``. We recommend using ``Python 3.11``here.
2. Install Text Generation WebUI
Download the WebUI
Download the text-generation-webui with IPEX-LLM integrations from this link. Unzip the content into a directory, e.g.,C:\text-generation-webui.
Install Dependencies
Open Anaconda Prompt and activate the conda environment you have created in section 1, e.g., llm.
conda activate llm
Then, change to the directory of WebUI (e.g.,C:\text-generation-webui) and install the necessary dependencies:
cd C:\text-generation-webui
pip install -r requirements_cpu_only.txt
pip install -r extensions/openai/requirements.txt
3. Start the WebUI Server
Set Environment Variables
Configure oneAPI variables by running the following command in Anaconda Prompt:
call "C:\Program Files (x86)\Intel\oneAPI\setvars.bat"
.. note::

   For more details about runtime configurations, `refer to this guide <https://ipex-llm.readthedocs.io/en/latest/doc/LLM/Overview/install_gpu.html#runtime-configuration>`_
If you're running on iGPU, set additional environment variables by running the following commands:
set SYCL_CACHE_PERSISTENT=1
set BIGDL_LLM_XMX_DISABLED=1
Launch the Server
In Anaconda Prompt with the conda environment llm activated, navigate to the text-generation-webui folder and start the server using the following command:
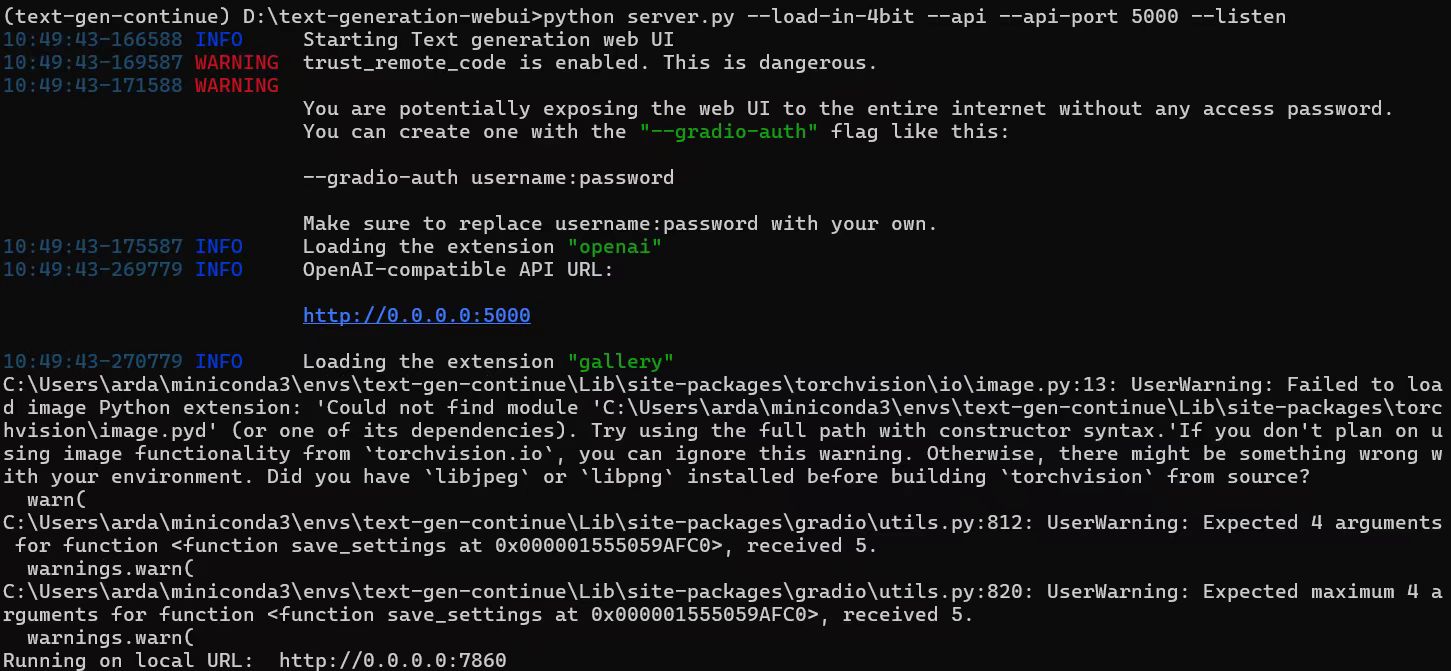
python server.py --load-in-4bit --api --api-port 5000 --listen
.. note::

   with ``--load-in-4bit`` option, the models will be optimized and run at 4-bit precision. For configuration for other formats and precisions, refer to `this link <https://github.com/intel-analytics/text-generation-webui?tab=readme-ov-file#32-optimizations-for-other-percisions>`_
.. note::

   The API server will by default use port ``5000``. To change the port, use ``--api-port 1234`` in the command above. You can also specify using SSL or API Key in the command. Please see `this guide <https://github.com/intel-analytics/text-generation-webui/blob/ipex-llm/docs/12%20-%20OpenAI%20API.md>`_ for the full list of arguments.
Access the WebUI
Upon successful launch, URLs to access the WebUI will be displayed in the terminal as shown below. Open the provided local URL in your browser to interact with the WebUI.
4. Use WebUI to Load Model
Recommended Model Series
- Code Llama
- WizardCoder
- Mistral
- StarCoder
- DeepSeek Coder
Model Download
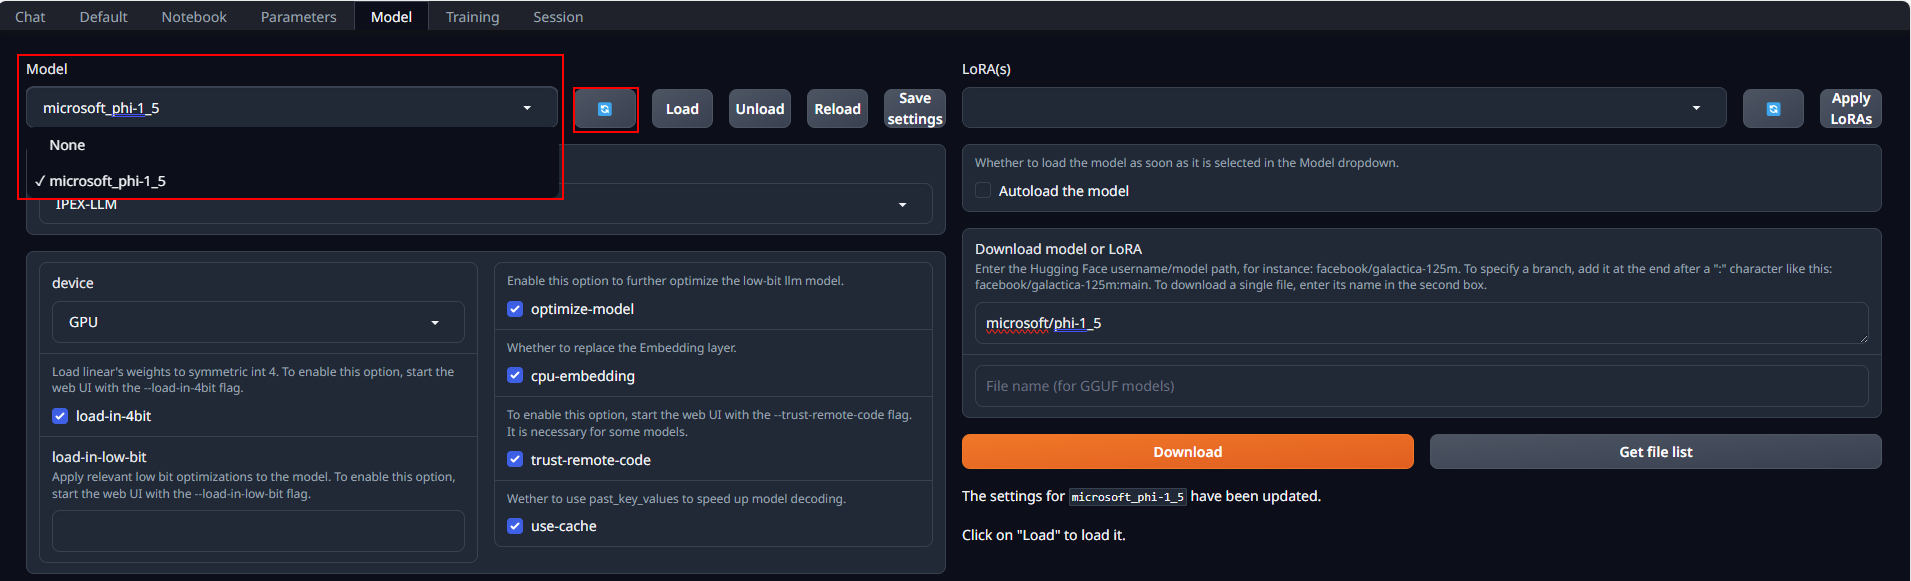
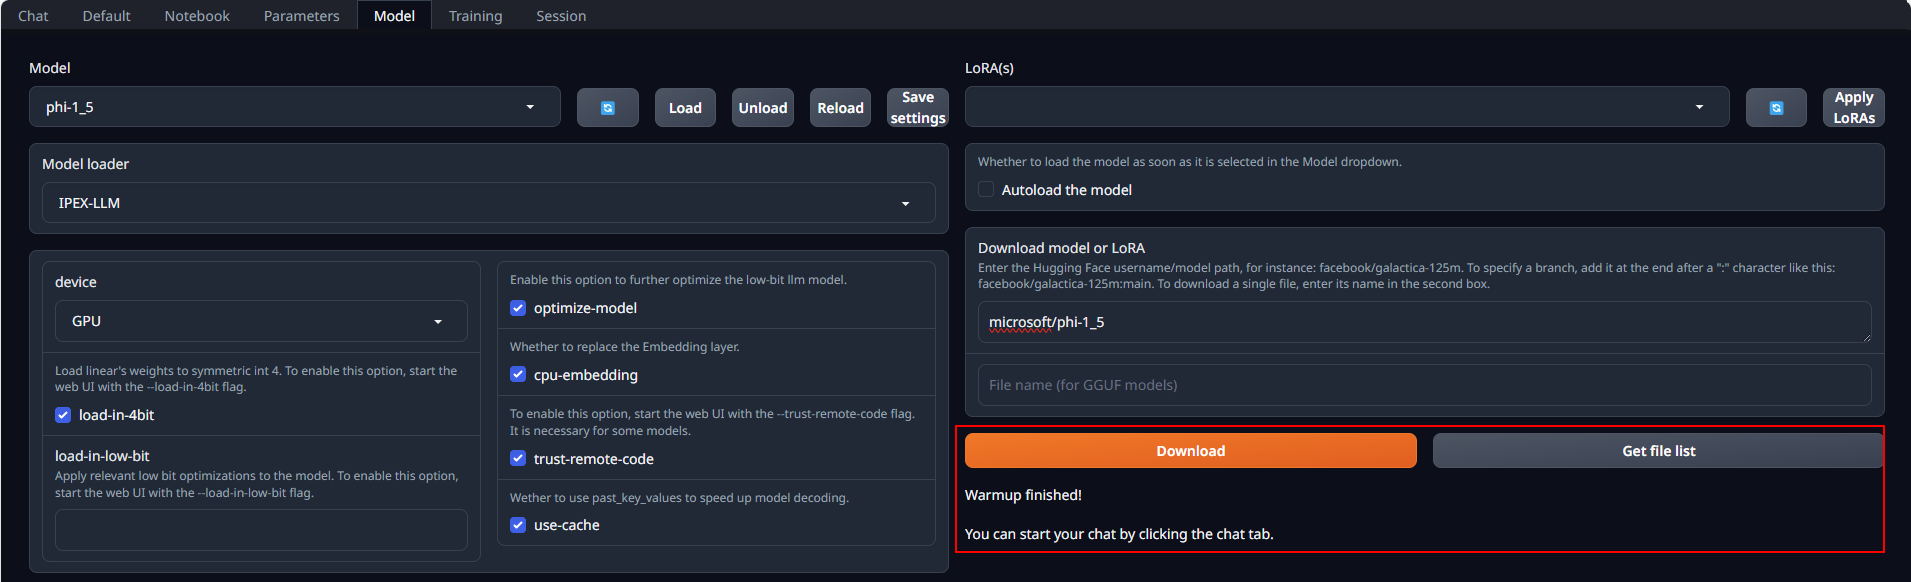
Place Huggingface models in C:\text-generation-webui\models by either copying locally or downloading via the WebUI. To download, navigate to the Model tab, enter the model's huggingface id (for instance, microsoft/phi-1_5) in the Download model or LoRA section, and click Download, as illustrated below.

After copying or downloading the models, click on the blue refresh button to update the Model drop-down menu. Then, choose your desired model from the newly updated list.
Load Model
Default settings are recommended for most users. Click Load to activate the model. Address any errors by installing missing packages as prompted, and ensure compatibility with your version of the transformers package. Refer to troubleshooting section for more details.
If everything goes well, you will get a message as shown below.
Exit the WebUI
To shut down the WebUI server, use Ctrl+C in the Anaconda Prompt terminal where the WebUI Server is runing, then close your browser tab.
5. Configure Continue
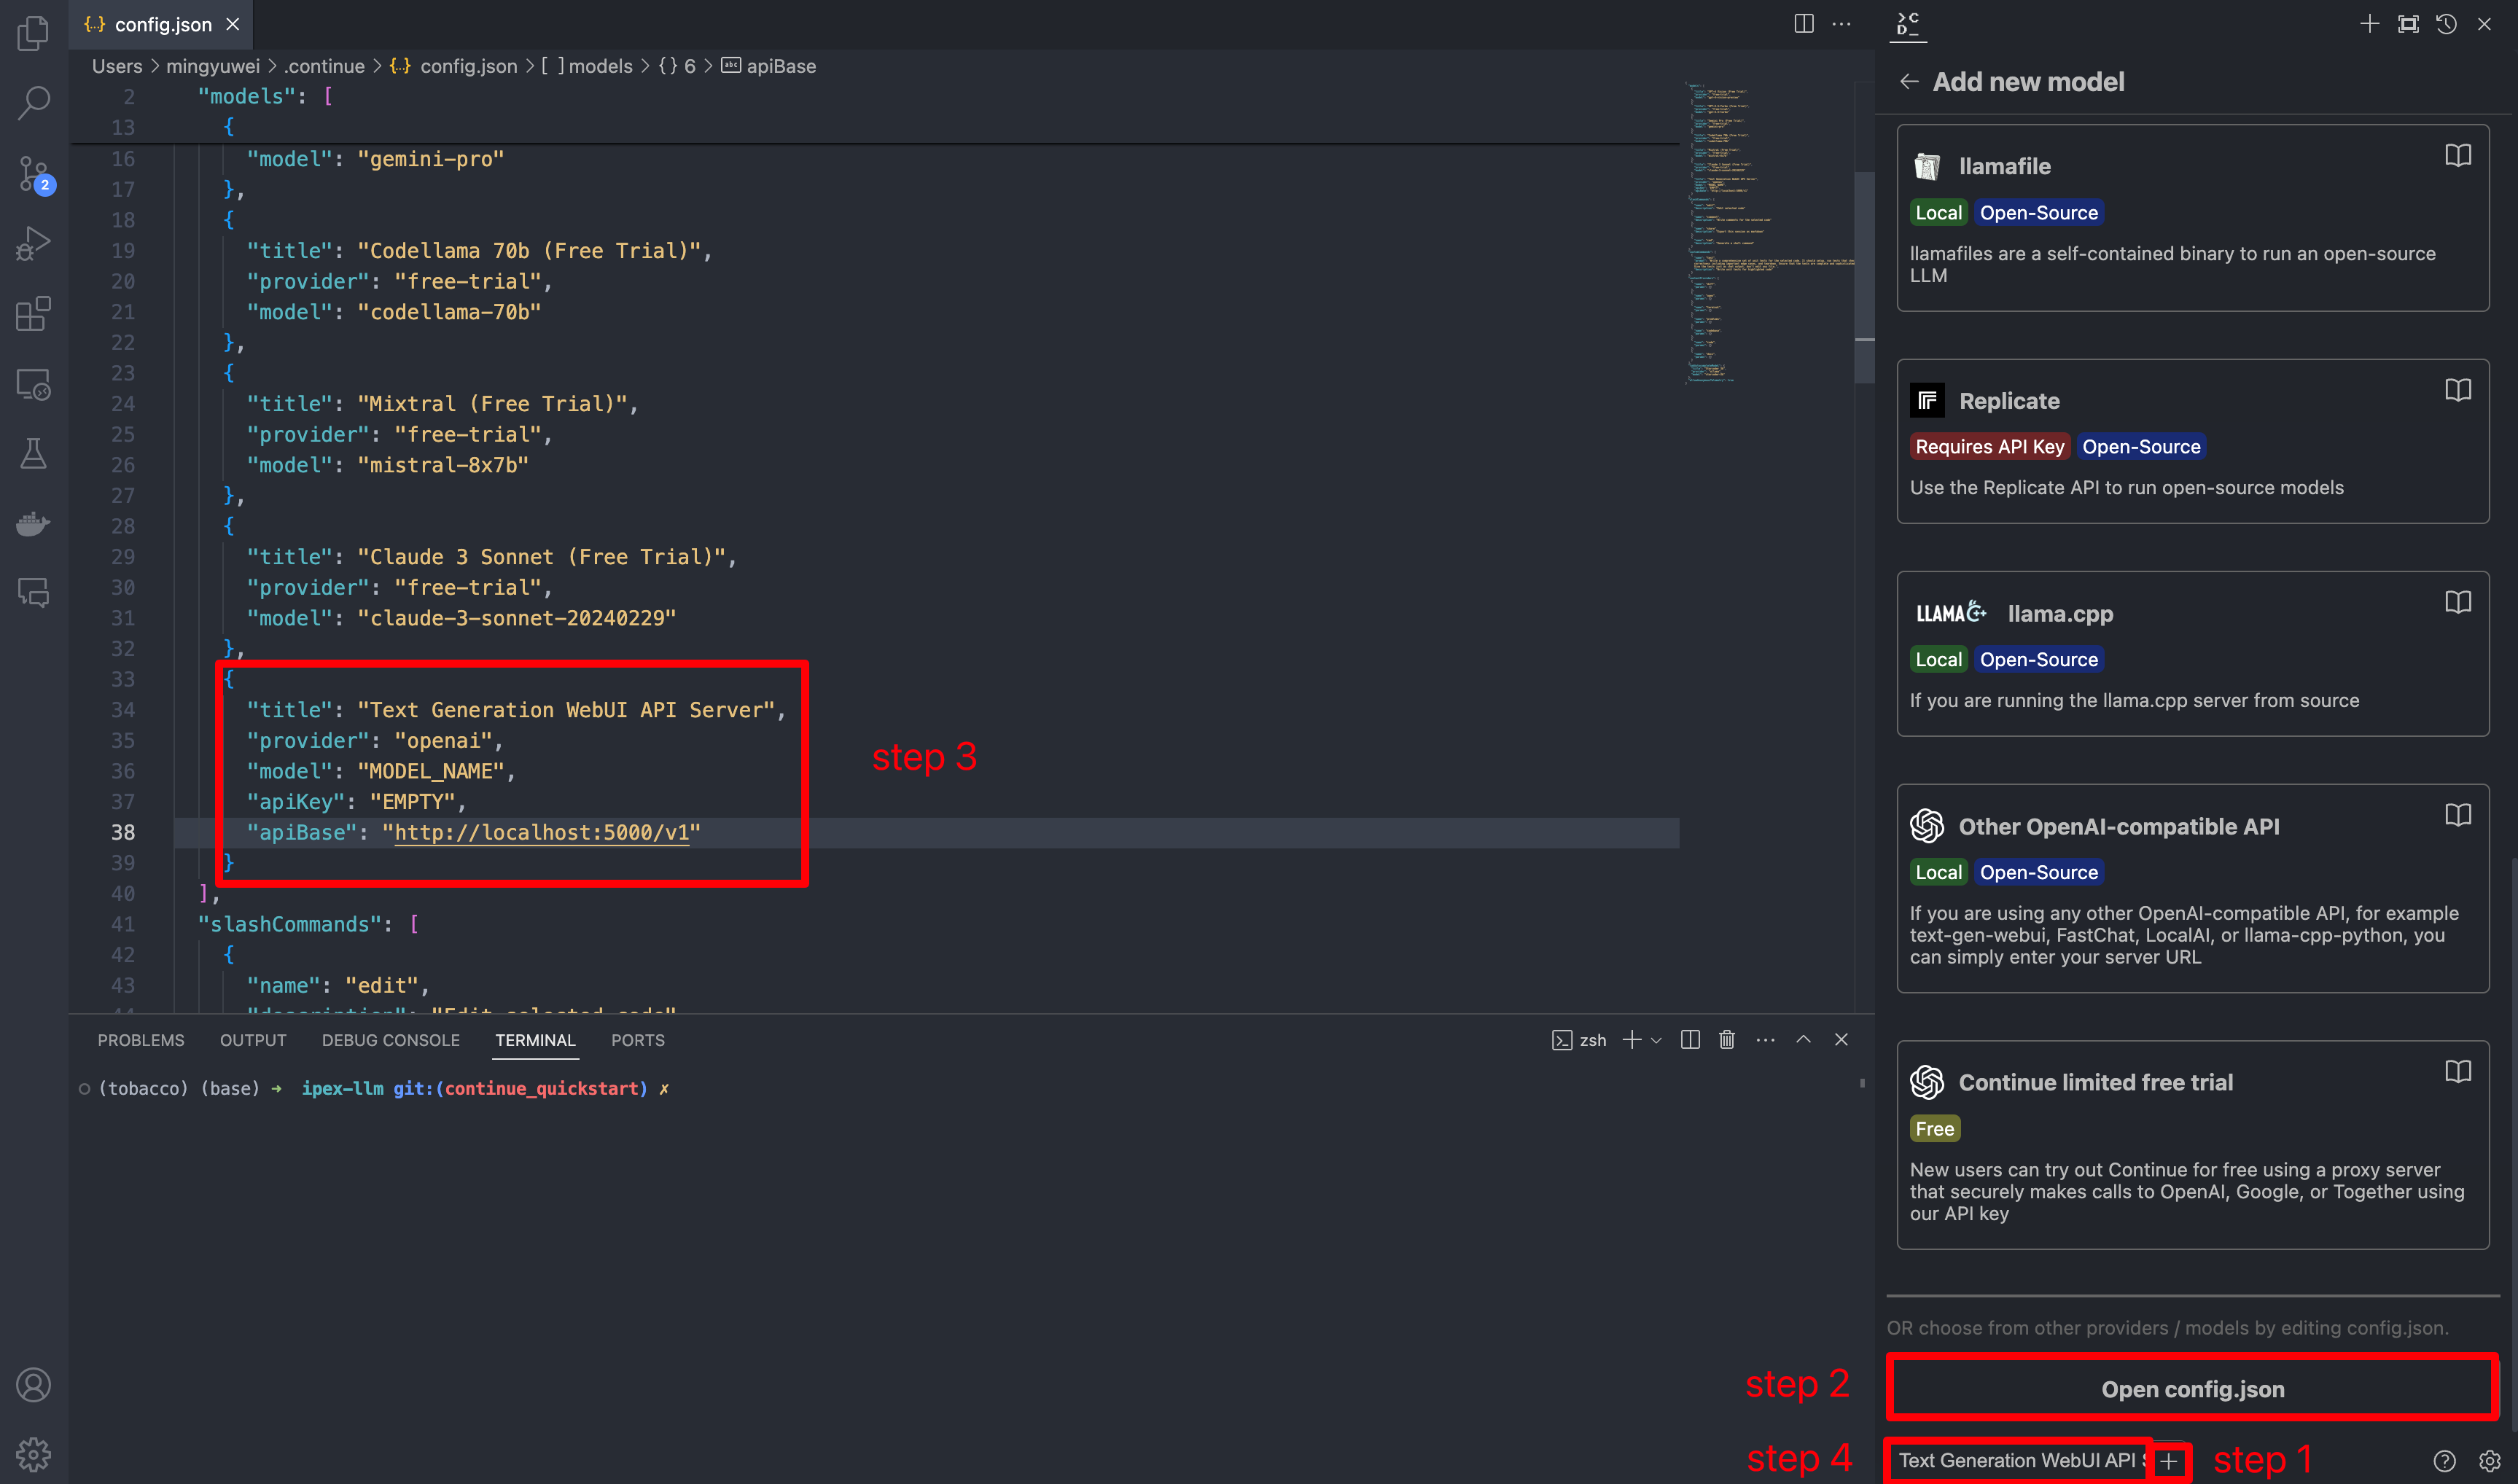
Once you've started the API server, you can now use your local LLMs on Continue. After opening Continue(you can either click the extension icon on the left sidebar or press Ctrl+Shift+L), you can click the + button next to the model dropdown, and scroll down to the bottom and click Open config.json.
In config.json, you'll find the models property, a list of the models that you have saved to use with Continue. Please add the following configuration to models. Note that model, apiKey, apiBase should align with what you specified when starting the Text Generation WebUI server. Finally, remember to select this model in the model dropdown menu.
{
  "models": [
    {
      "title": "Text Generation WebUI API Server",
      "provider": "openai",
      "model": "MODEL_NAME",
      "apiKey": "EMPTY",
      "apiBase": "http://localhost:5000/v1"
    }
  ]
}
6. How to Use Continue
For detailed tutorials please refer to this link. Here we are only showing the most common scenarios.
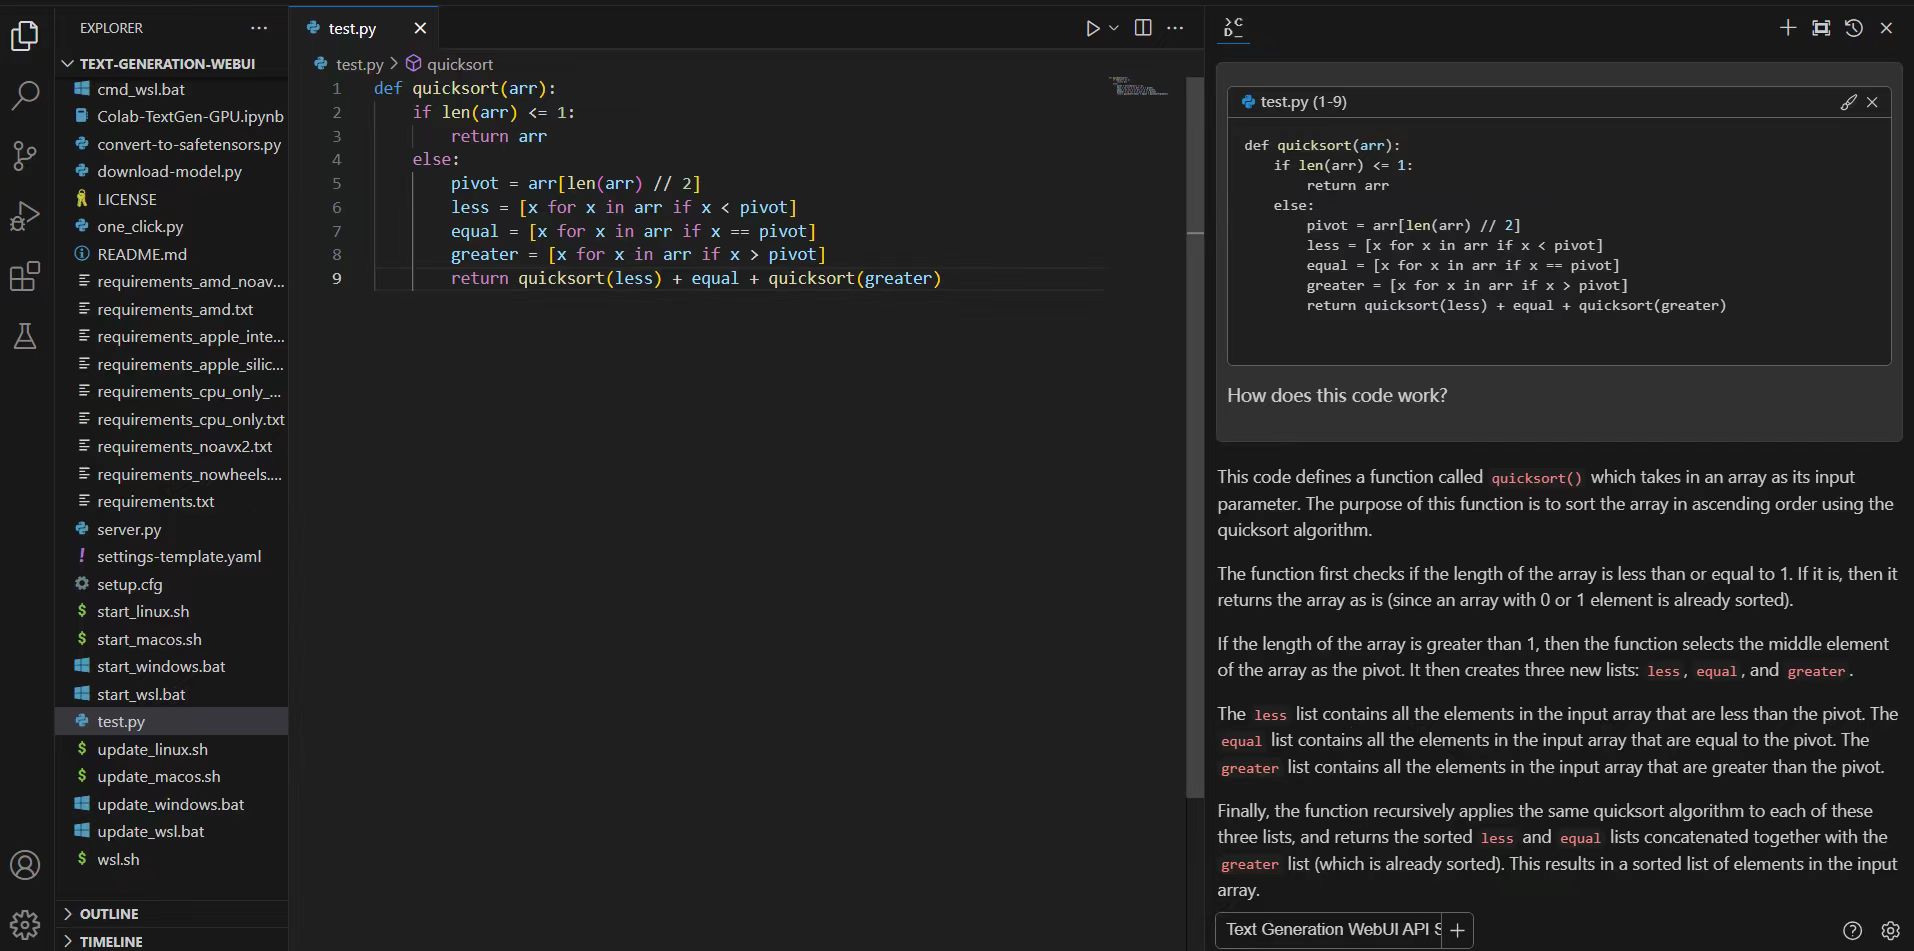
Ask about highlighted code or an entire file
If you don't understand how some code works, highlight(press Ctrl+Shift+L) it and ask "how does this code work?"

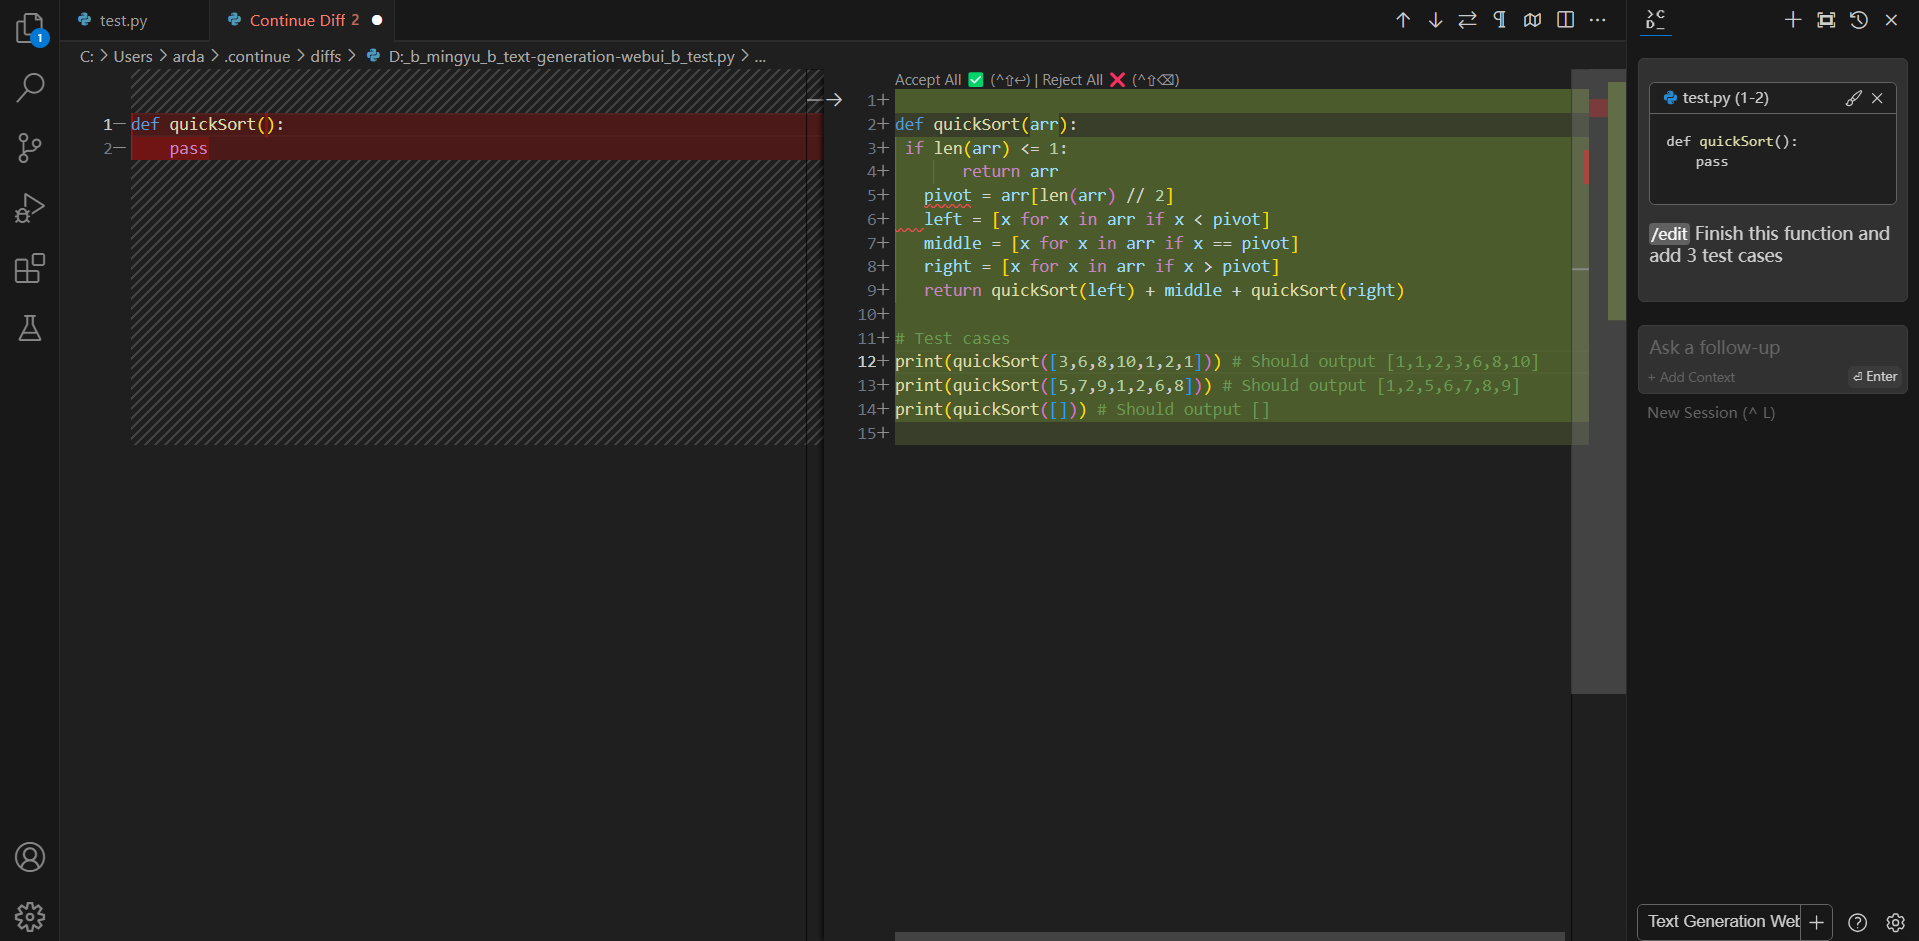
Editing existing code
You can ask Continue to edit your highlighted code with the command /edit.
Troubleshooting
Failed to load the extension openai
If you encounter TypeError: unsupported operand type(s) for |: 'type' and 'NoneType' when you run python server.py --load-in-4bit --api, please make sure you are using Python 3.11 instead of lower versions.
Potentially slower first response
The first response to user prompt might be slower than expected, with delays of up to several minutes before the response is generated. This delay occurs because the GPU kernels require compilation and initialization, which varies across different GPU types.
Missing Required Dependencies
During model loading, you may encounter an ImportError like ImportError: This modeling file requires the following packages that were not found in your environment. This indicates certain packages required by the model are absent from your environment. Detailed instructions for installing these necessary packages can be found at the bottom of the error messages. Take the following steps to fix these errors:
- Exit the WebUI Server by pressing Ctrl+C in the Anaconda Prompt terminal.
- Install the missing pip packages as specified in the error message
- Restart the WebUI Server.
If there are still errors on missing packages, repeat the installation process for any additional required packages.
Compatiblity issues
If you encounter AttributeError errors like AttributeError: 'BaichuanTokenizer' object has no attribute 'sp_model', it may be due to some models being incompatible with the current version of the transformers package because the models are outdated. In such instances, using a more recent model is recommended.