* add quick start

* modify

* modify

* add

* add

* resize

* add mp4

* add vedio

* add video

* video

* add

* modify

* add

* modify
4.5 KiB
4.5 KiB
Run Dify on Intel GPU
We recommend start the project following Dify docs
Server Deployment
Clone code
git clone https://github.com/langgenius/dify.git
Installation of the basic environment
Server startup requires Python 3.10.x. Anaconda is recommended to create and manage python environment.
conda create -n dify python=3.10
conda activate dify
cd api
cp .env.example .env
openssl rand -base64 42
sed -i 's/SECRET_KEY=.*/SECRET_KEY=<your_value>/' .env
pip install -r requirements.txt
openssl is pre-installed with Ubuntu 22.04.
Prepare for redis, postgres, node and npm.
- Install Redis by
sudo apt-get install redis-server. Refer to page to setup the Redis environment, including password, demon, etc. - install postgres by
sudo apt-get install postgresandsudo apt-get install postgres-client. Setup username, create a database and grant previlidge according to page - install npm and node by prebuilt installer, binaries or packet manager according to nodejs page
Note that set redis and postgres related environment in .env under dify/api/ and set web related environment variable in .env.local under dify/web.
Example in dify/api/.env and modify settings in redis and postgres.
REDIS_HOST=localhost
REDIS_PORT=6379
REDIS_USERNAME=
REDIS_PASSWORD=xxxx
REDIS_DB=0
DB_USERNAME=xxxx
DB_PASSWORD=xxxx
DB_HOST=localhost
DB_PORT=5432
DB_DATABASE=dify
Example .env.local
# For production release, change this to PRODUCTION
NEXT_PUBLIC_DEPLOY_ENV=DEVELOPMENT
NEXT_PUBLIC_EDITION=SELF_HOSTED
NEXT_PUBLIC_API_PREFIX=http://localhost:5001/console/api
NEXT_PUBLIC_PUBLIC_API_PREFIX=http://localhost:5001/api
NEXT_PUBLIC_SENTRY_DSN=
Install Ollama
Please install ollama refer to ollama quick start. Ensure that ollama could run successfully on Intel GPU.
Start service
- Open the terminal and set
export no_proxy=localhost,127.0.0.1
flask db upgrade
flask run --host 0.0.0.0 --port=5001 --debug
You will see log like below if successfully start the service.
INFO:werkzeug:
* Running on all addresses (0.0.0.0)
* Running on http://127.0.0.1:5001
* Running on http://10.239.44.83:5001
INFO:werkzeug:Press CTRL+C to quit
INFO:werkzeug: * Restarting with stat
WARNING:werkzeug: * Debugger is active!
INFO:werkzeug: * Debugger PIN: 227-697-894
- Open another terminal and also set
export no_proxy=localhost,127.0.0.1. If Linux system, use the command below.
celery -A app.celery worker -P gevent -c 1 -Q dataset,generation,mail --loglevel INFO
If windows system, use the command below.
celery -A app.celery worker -P solo --without-gossip --without-mingle -Q dataset,generation,mail --loglevel INFO
- Open another terminal and also set
export no_proxy=localhost,127.0.0.1. Run the commands below to start the front-end service.
cd web
npm install
npm run build
npm run start
Example: RAG
See the demo of running dify with Ollama on an Intel Core Ultra laptop below.
- Set up the environment
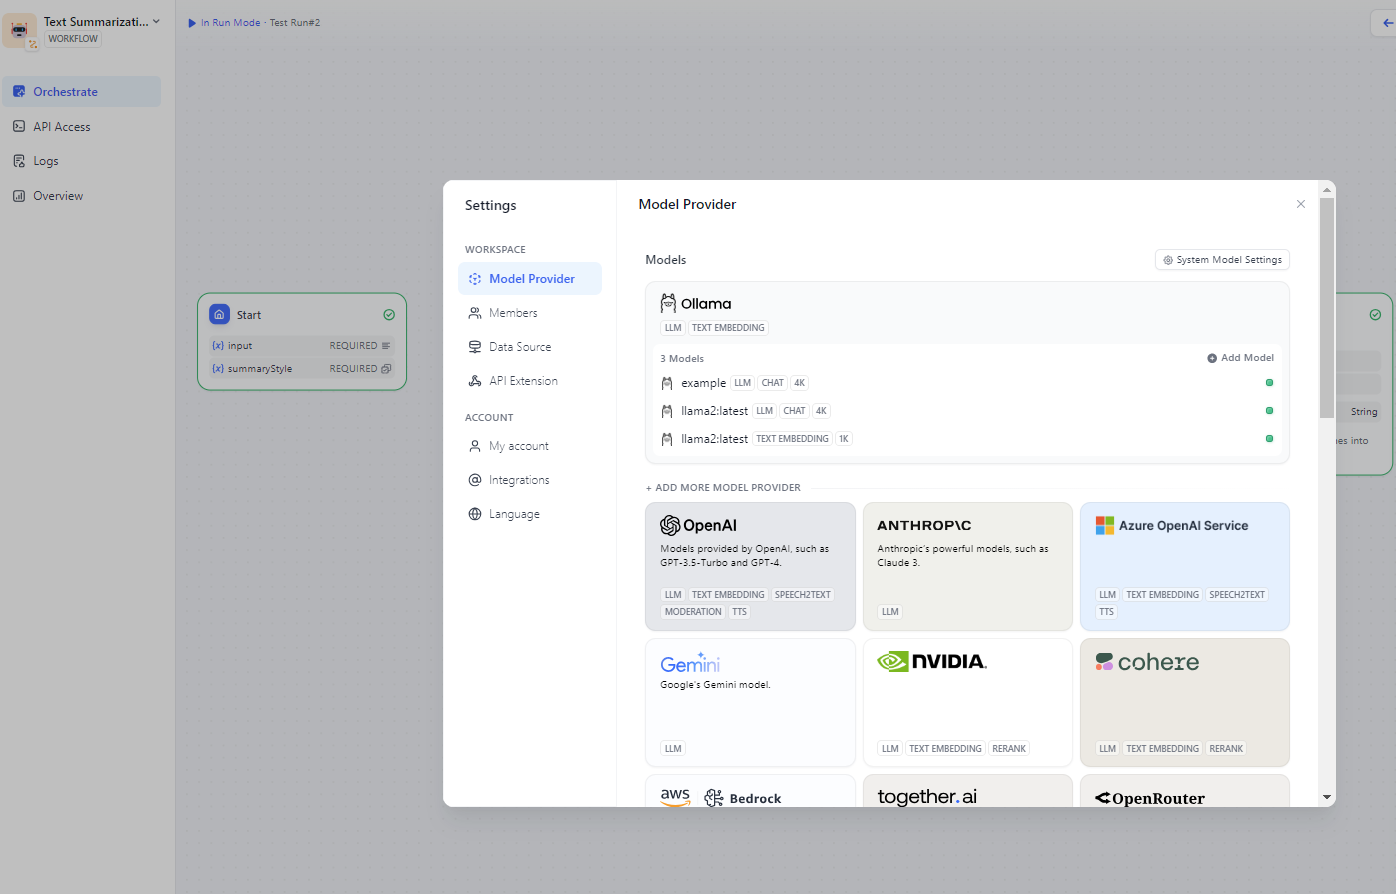
export no_proxy=localhost,127.0.0.1and start Ollama locally byollama serve. - Open http://localhost:3000 to view dify and change the model provider in setting including both LLM and embedding. For example, choose ollama.
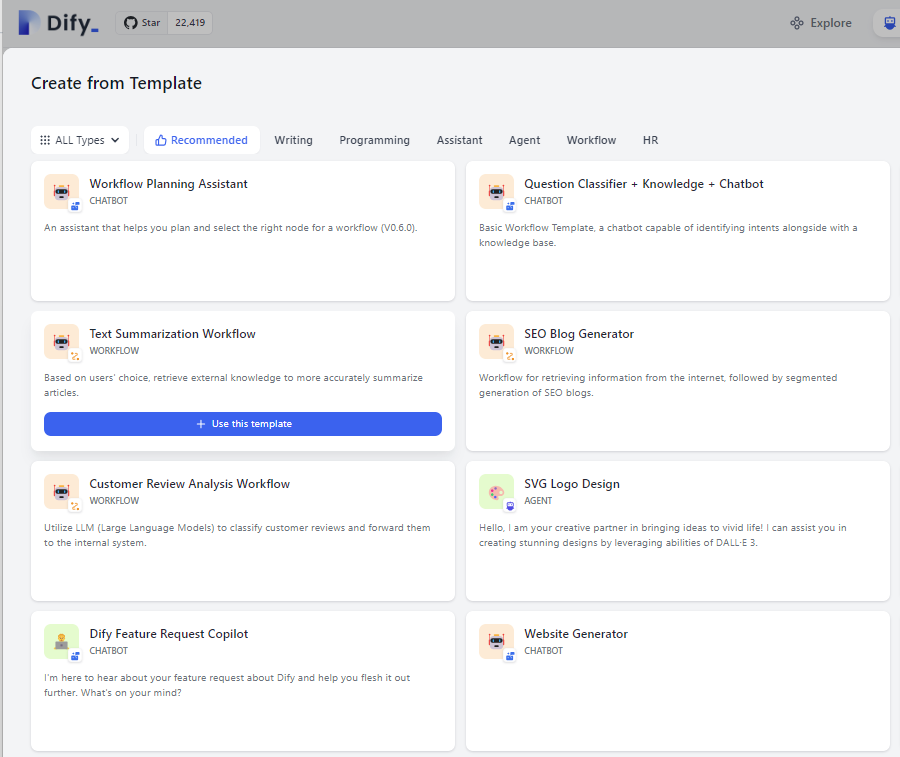
- Use text summarization workflow template from studio.
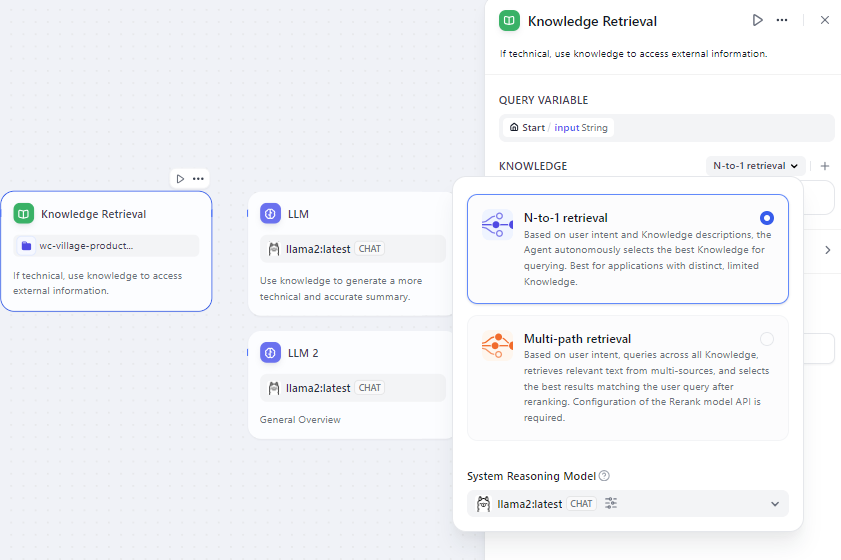
- Add knowledge base and specify which type of embedding model to use.
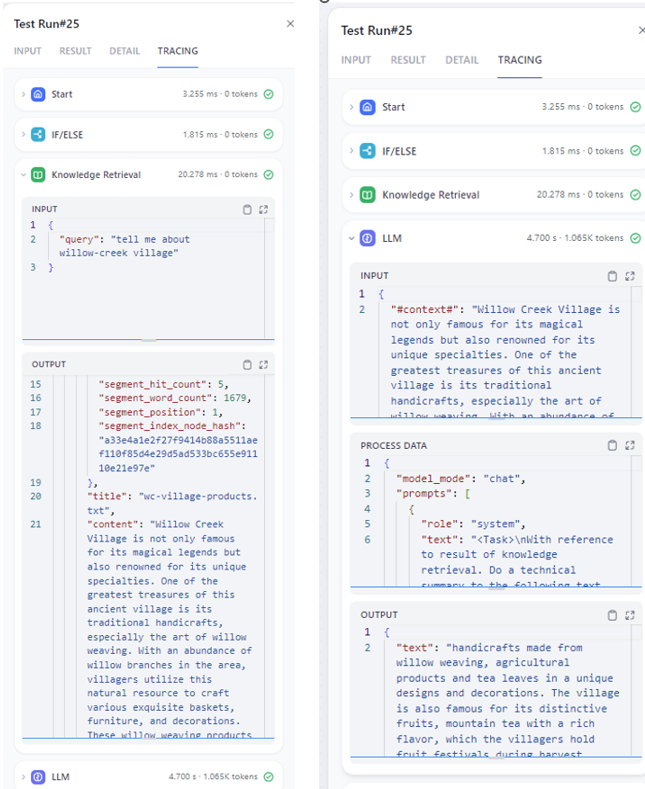
- Enter input and start to generate. You could find retrieval results and answers generated on the right.
- Add knowledge base and specify which type of embedding model to use.