# Run Coding Copilot in VSCode with Intel GPU
[**Continue**](https://marketplace.visualstudio.com/items?itemName=Continue.continue) is a coding copilot extension in [Microsoft Visual Studio Code](https://code.visualstudio.com/); by integrating it with [`ipex-llm`](https://github.com/intel-analytics/ipex-llm), users can now easily leverage local LLMs running on Intel GPU (e.g., local PC with iGPU, discrete GPU such as Arc, Flex and Max) for code explanation, code generation/completion, etc.
Below is a demo of using `Continue` with [CodeQWen1.5-7B](https://huggingface.co/Qwen/CodeQwen1.5-7B-Chat) running on Intel A770 GPU. This demo illustrates how a programmer used `Continue` to find a solution for the [Kaggle's _Titanic_ challenge](https://www.kaggle.com/competitions/titanic/), which involves asking `Continue` to complete the code for model fitting, evaluation, hyper parameter tuning, feature engineering, and explain generated code.
## Quickstart
This guide walks you through setting up and running **Continue** within _Visual Studio Code_, empowered by local large language models served via [Ollama](./ollama_quickstart.html) with `ipex-llm` optimizations.
### 1. Install and Run Ollama Serve
Visit [Run Ollama with IPEX-LLM on Intel GPU](./ollama_quickstart.html), and follow the steps 1) [Install IPEX-LLM for Ollama](./ollama_quickstart.html#install-ipex-llm-for-ollama), 2) [Initialize Ollama](./ollama_quickstart.html#initialize-ollama) 3) [Run Ollama Serve](./ollama_quickstart.html#run-ollama-serve) to install, init and start the Ollama Service.
```eval_rst
.. important::
If the `Continue` plugin is not installed on the same machine where Ollama is running (which means `Continue` needs to connect to a remote Ollama service), you must configure the Ollama service to accept connections from any IP address. To achieve this, set or export the environment variable `OLLAMA_HOST=0.0.0.0` before executing the command `ollama serve`.
.. tip::
If your local LLM is running on Intel Arc™ A-Series Graphics with Linux OS (Kernel 6.2), it is recommended to additionaly set the following environment variable for optimal performance before executing `ollama serve`:
.. code-block:: bash
export SYCL_PI_LEVEL_ZERO_USE_IMMEDIATE_COMMANDLISTS=1
```
### 2. Pull and Prepare the Model
#### 2.1 Pull Model
Now we need to pull a model for coding. Here we use [CodeQWen1.5-7B](https://huggingface.co/Qwen/CodeQwen1.5-7B-Chat) model as an example. Open a new terminal window, run the following command to pull [`codeqwen:latest`](https://ollama.com/library/codeqwen).
```eval_rst
.. tabs::
.. tab:: Linux
.. code-block:: bash
export no_proxy=localhost,127.0.0.1
./ollama pull codeqwen:latest
.. tab:: Windows
Please run the following command in Miniforge Prompt.
.. code-block:: cmd
set no_proxy=localhost,127.0.0.1
ollama pull codeqwen:latest
.. seealso::
Besides CodeQWen, there are other coding models you might want to explore, such as Magicoder, Wizardcoder, Codellama, Codegemma, Starcoder, Starcoder2, and etc. You can find these models in the `Ollama model library `_. Simply search for the model, pull it in a similar manner, and give it a try.
```
#### 2.2 Prepare the Model and Pre-load
To make `Continue` run more smoothly with Ollama, we will create a new model in Ollama using the original model with an adjusted num_ctx parameter of 4096.
Start by creating a file named `Modelfile` with the following content:
```dockerfile
FROM codeqwen:latest
PARAMETER num_ctx 4096
```
Next, use the following commands in the terminal (Linux) or Miniforge Prompt (Windows) to create a new model in Ollama named `codeqwen:latest-continue`:
```bash
ollama create codeqwen:latest-continue -f Modelfile
```
After creation, run `ollama list` to see `codeqwen:latest-continue` in the list of models.
Finally, preload the new model by executing the following command in a new terminal (Linux) or Miniforge Prompt (Windows):
```bash
ollama run codeqwen:latest-continue
```
### 3. Install `Continue` Extension
Search for `Continue` in the VSCode `Extensions Marketplace` and install it just like any other extension.
Once installed, the `Continue` icon will appear on the left sidebar. You can drag and drop the icon to the right sidebar for easy access to the `Continue` view.
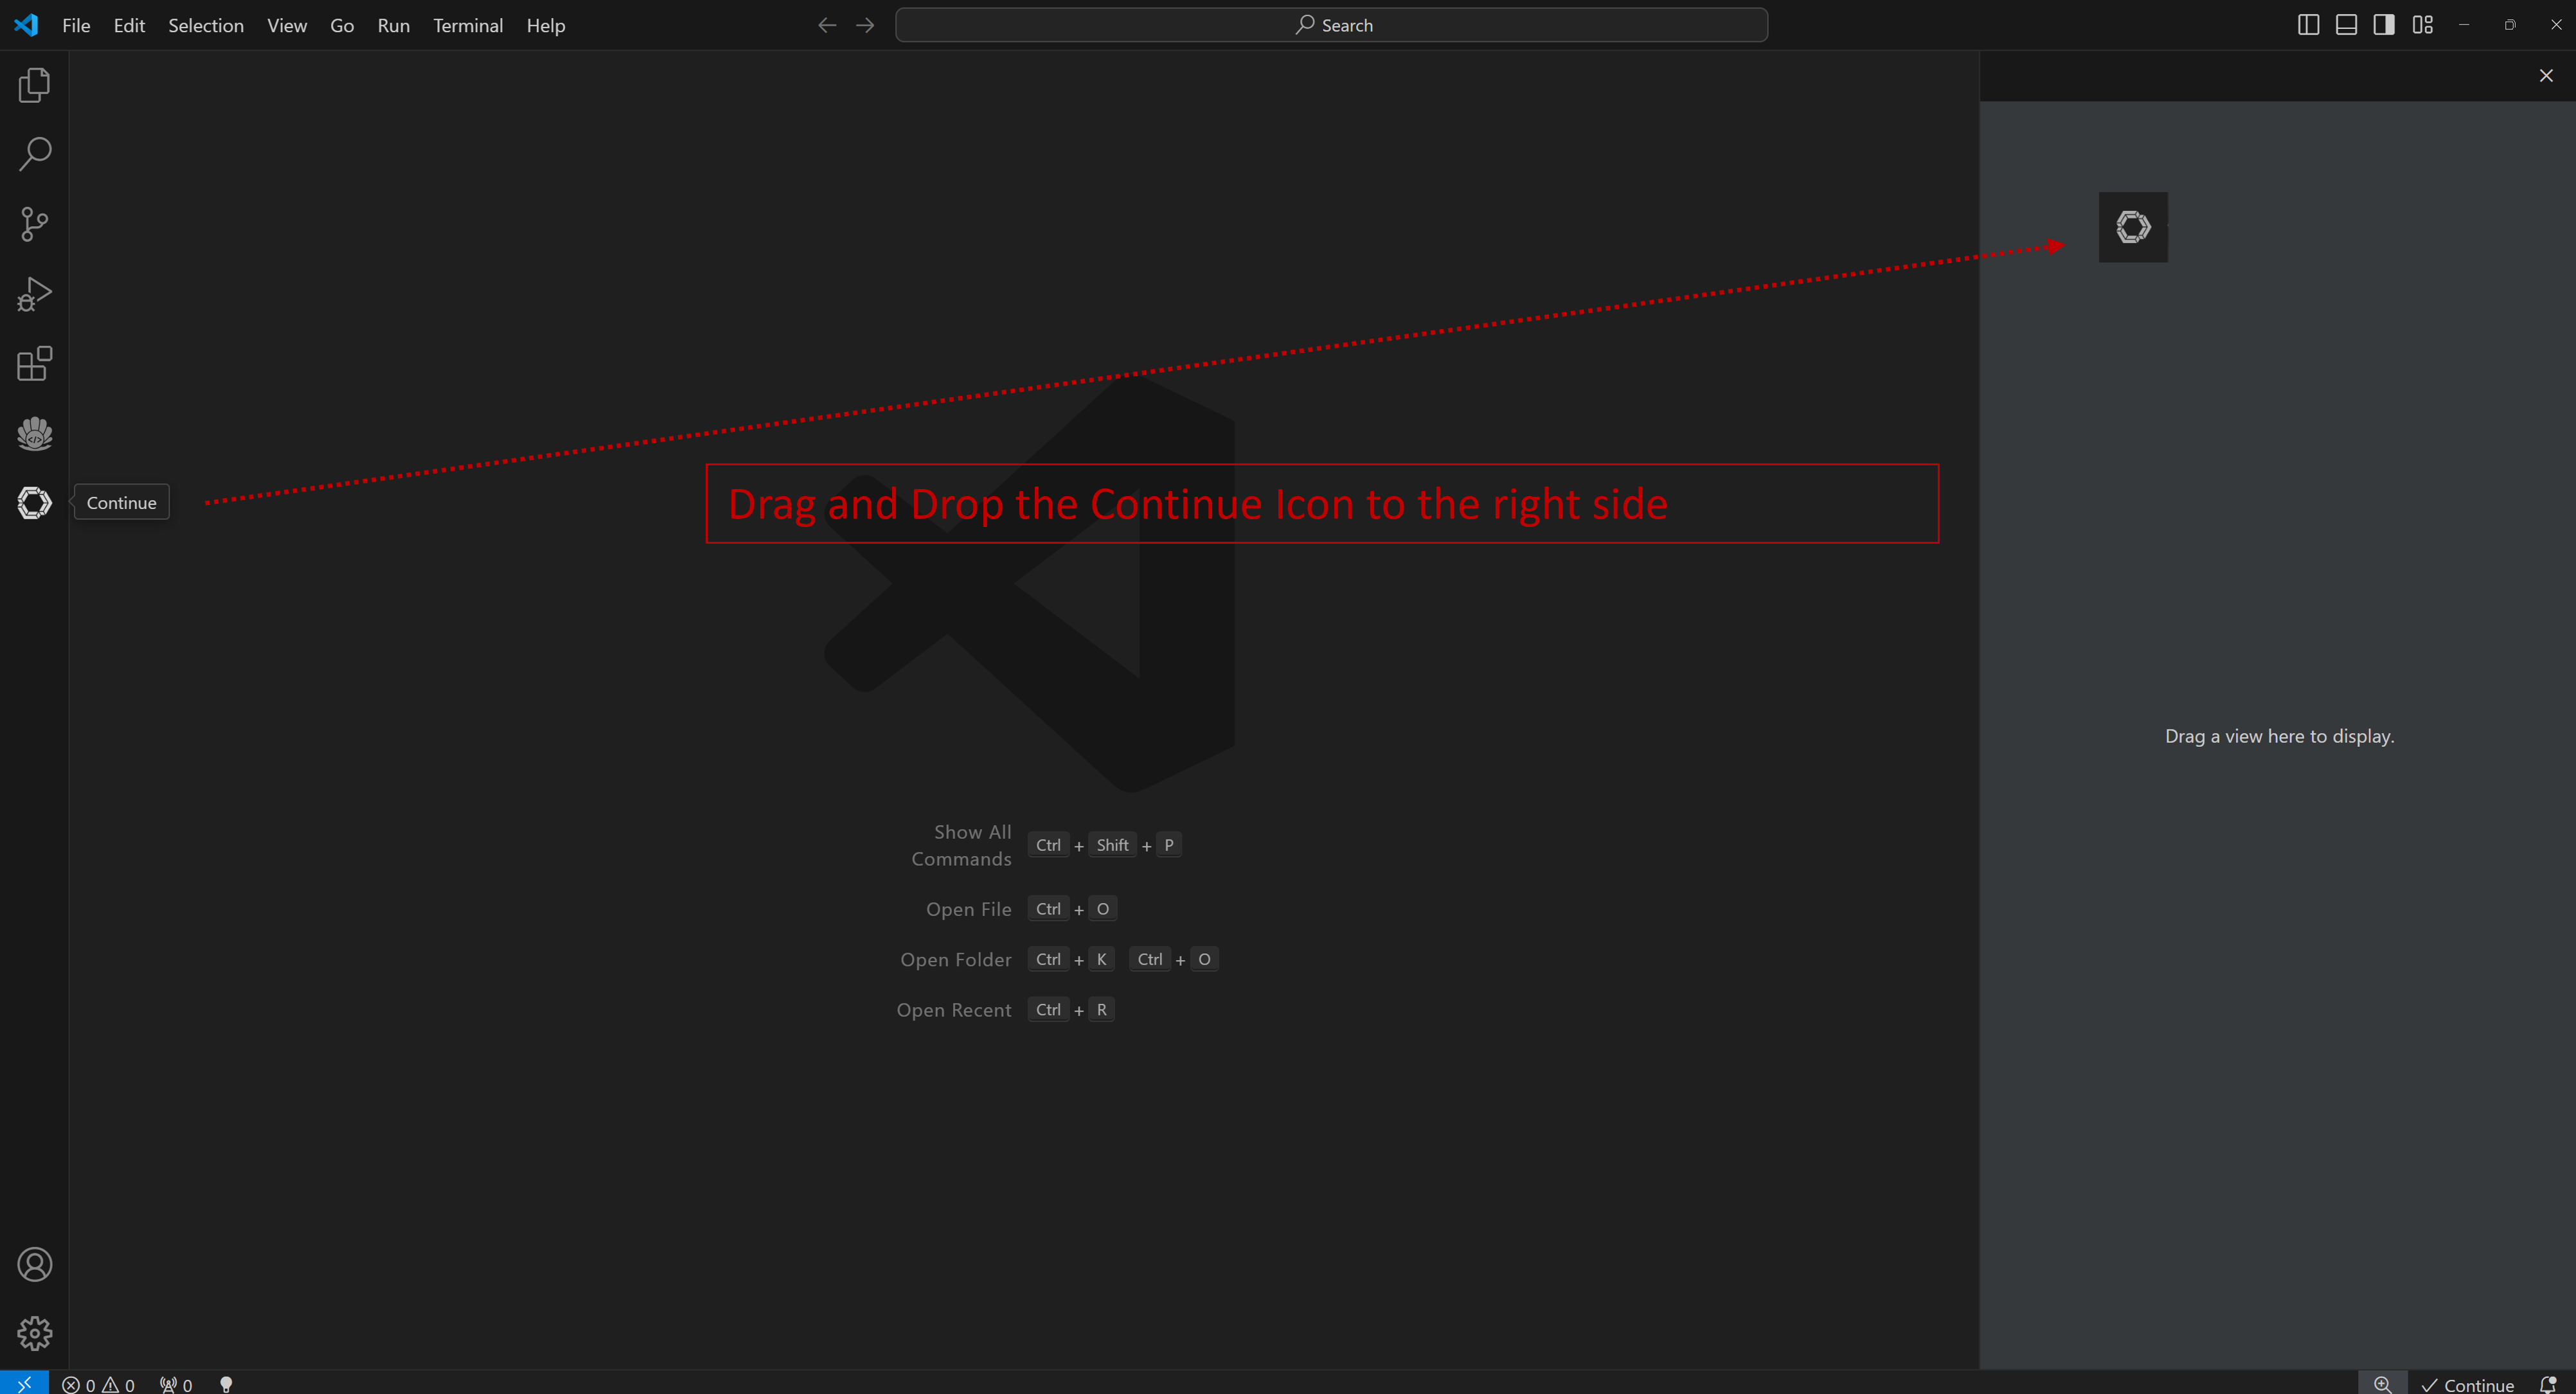
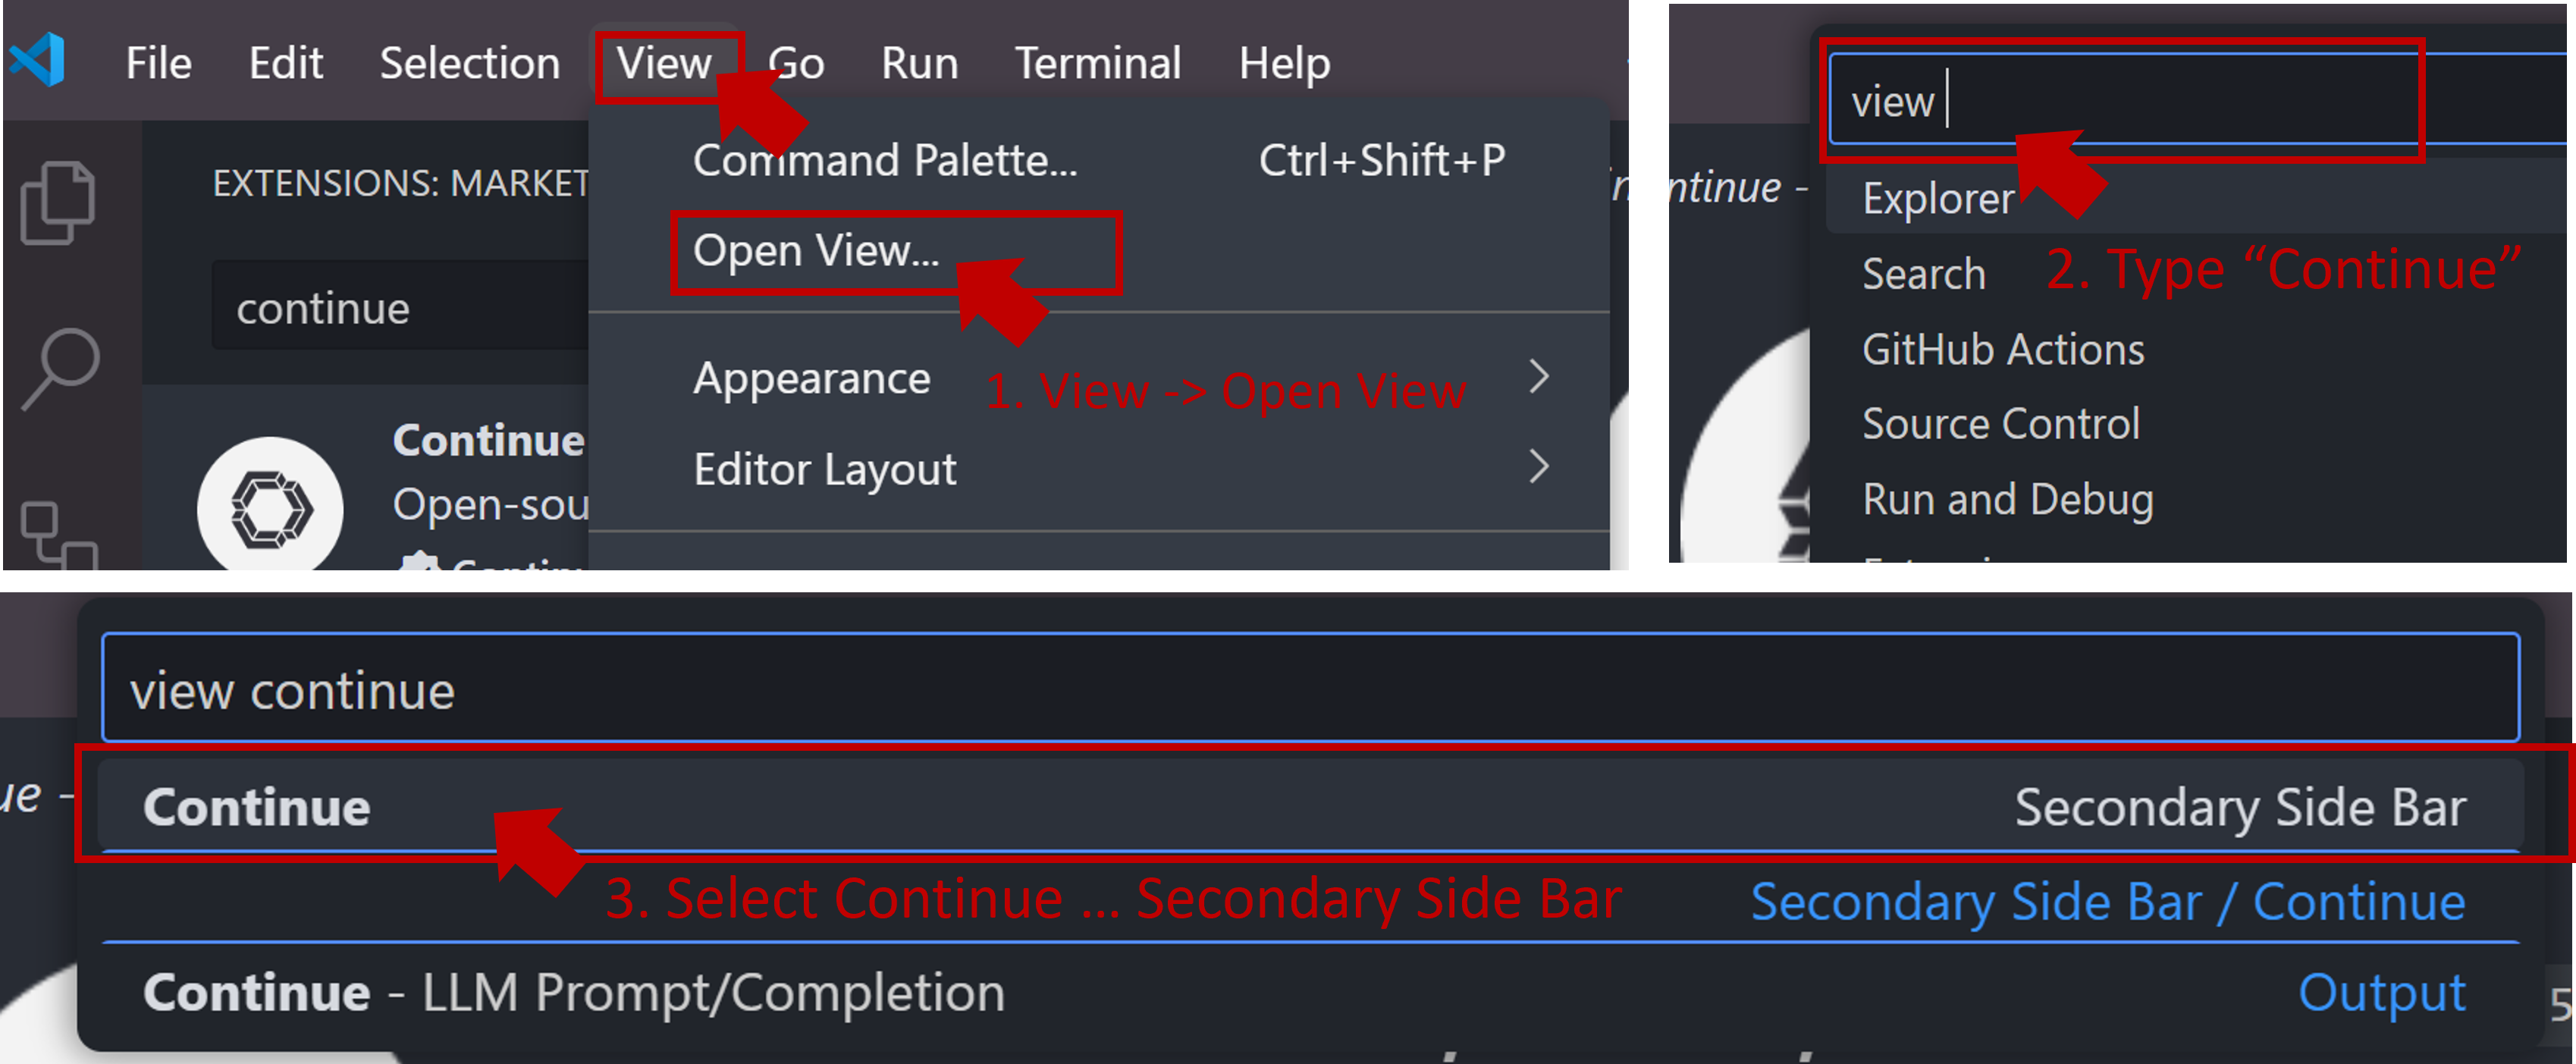
If the icon does not appear or you cannot open the view, press `Ctrl+Shift+L` or follow the steps below to open the `Continue` view on the right side.
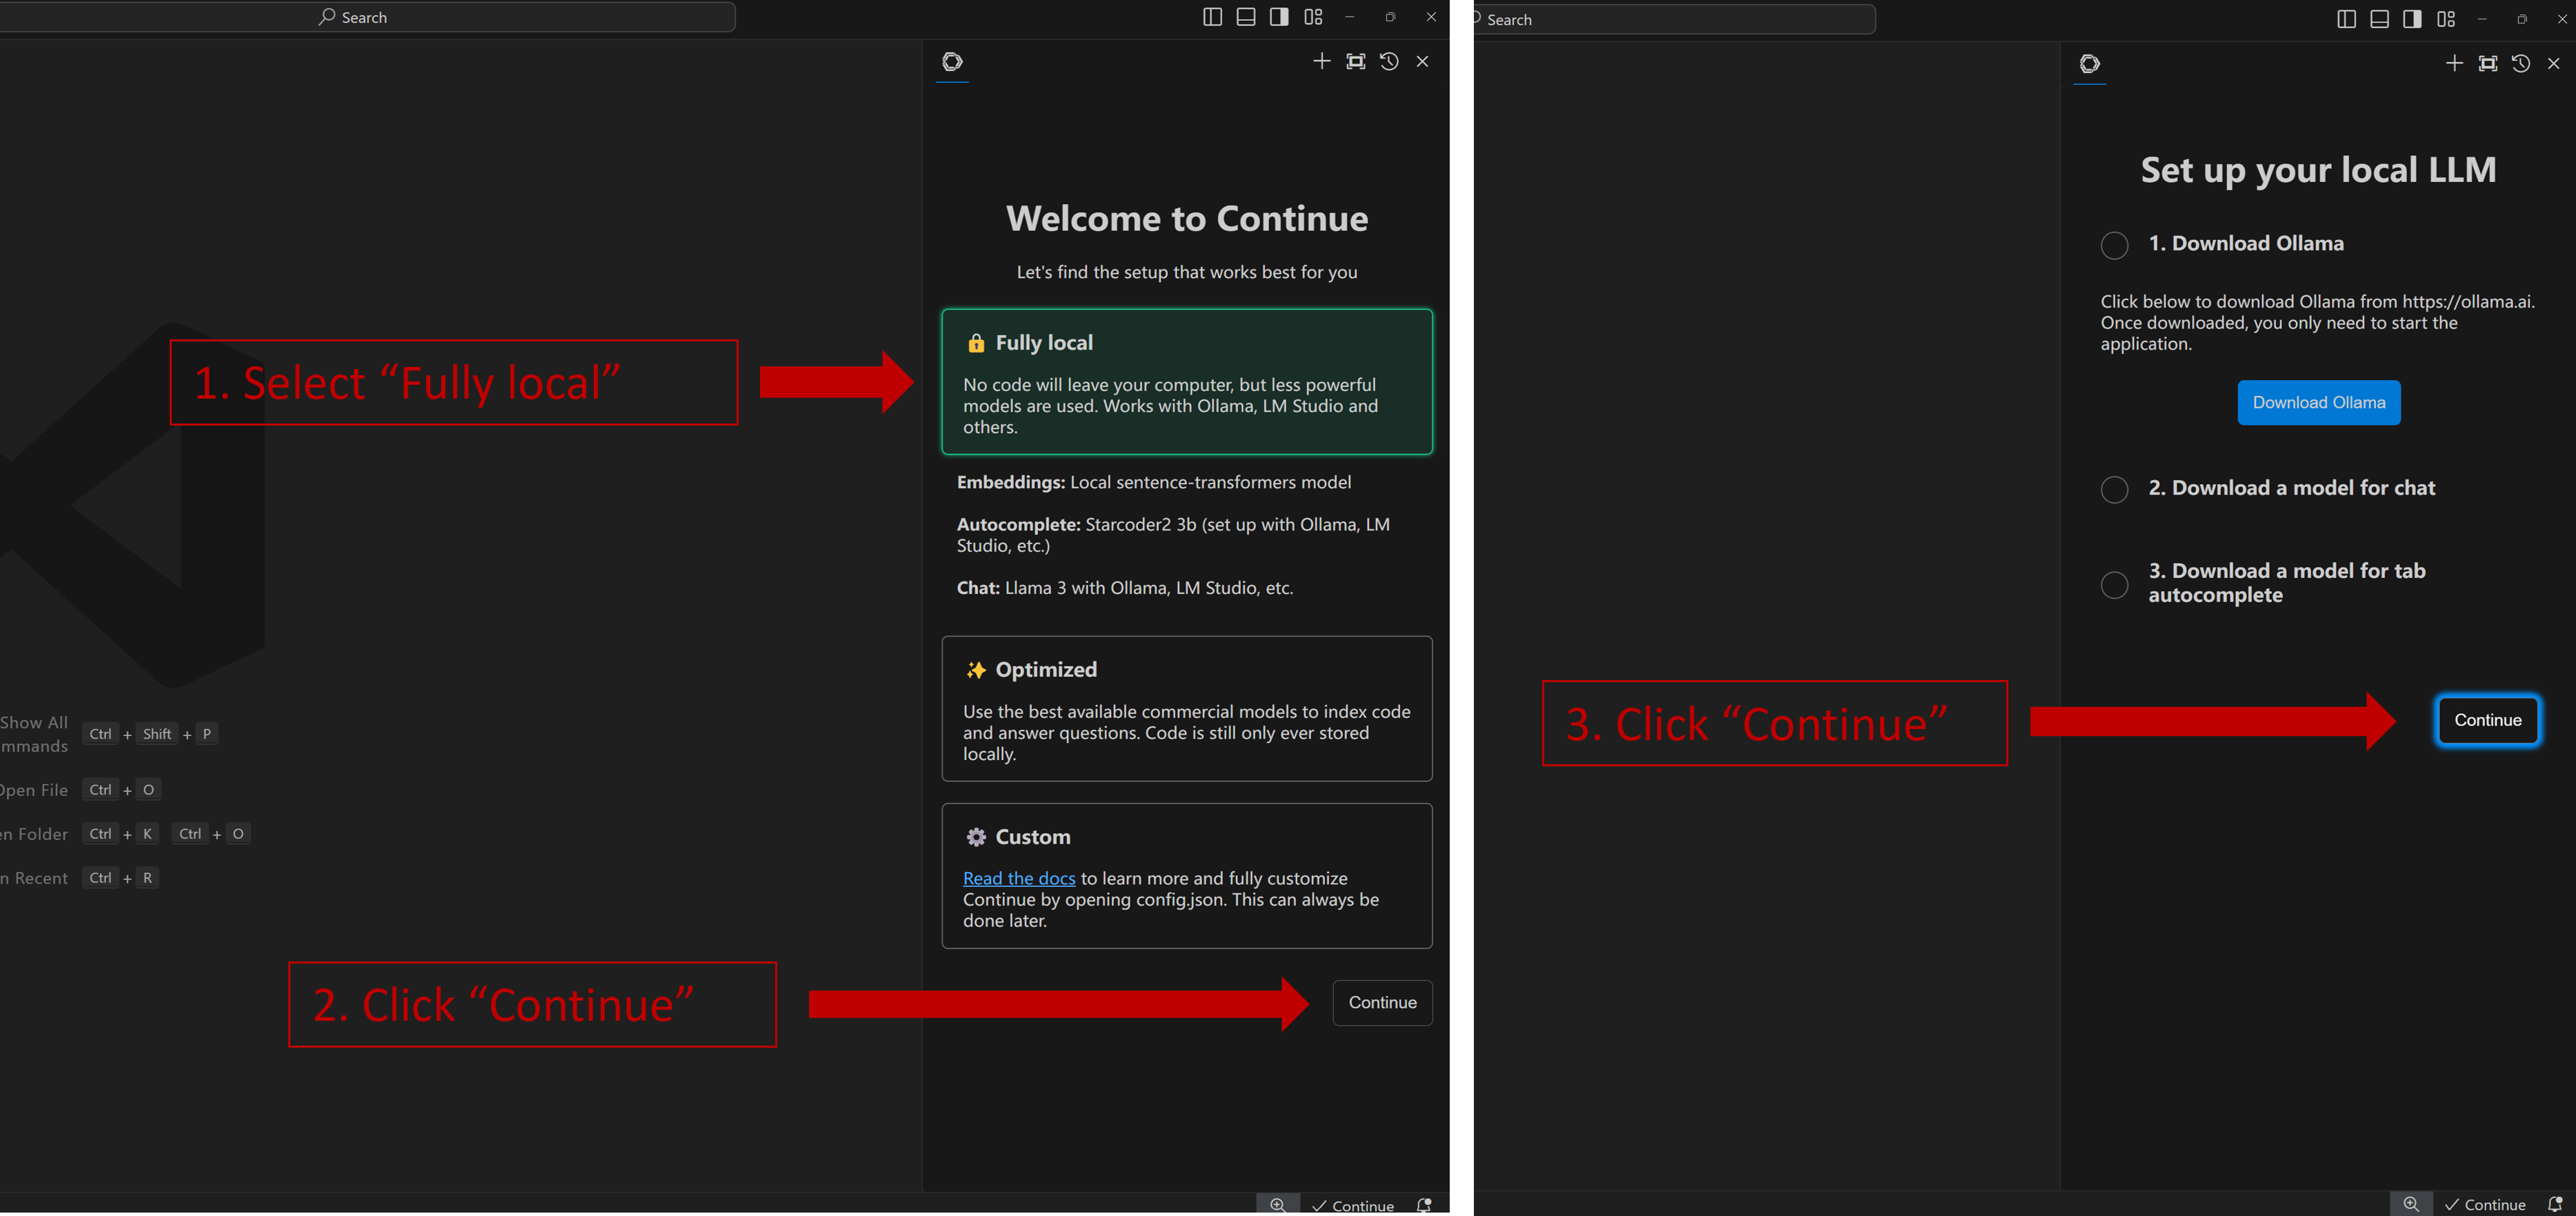
Once you have successfully opened the `Continue` view, you will see the welcome screen as shown below. Select **Fully local** -> **Continue** -> **Continue** as illustrated.
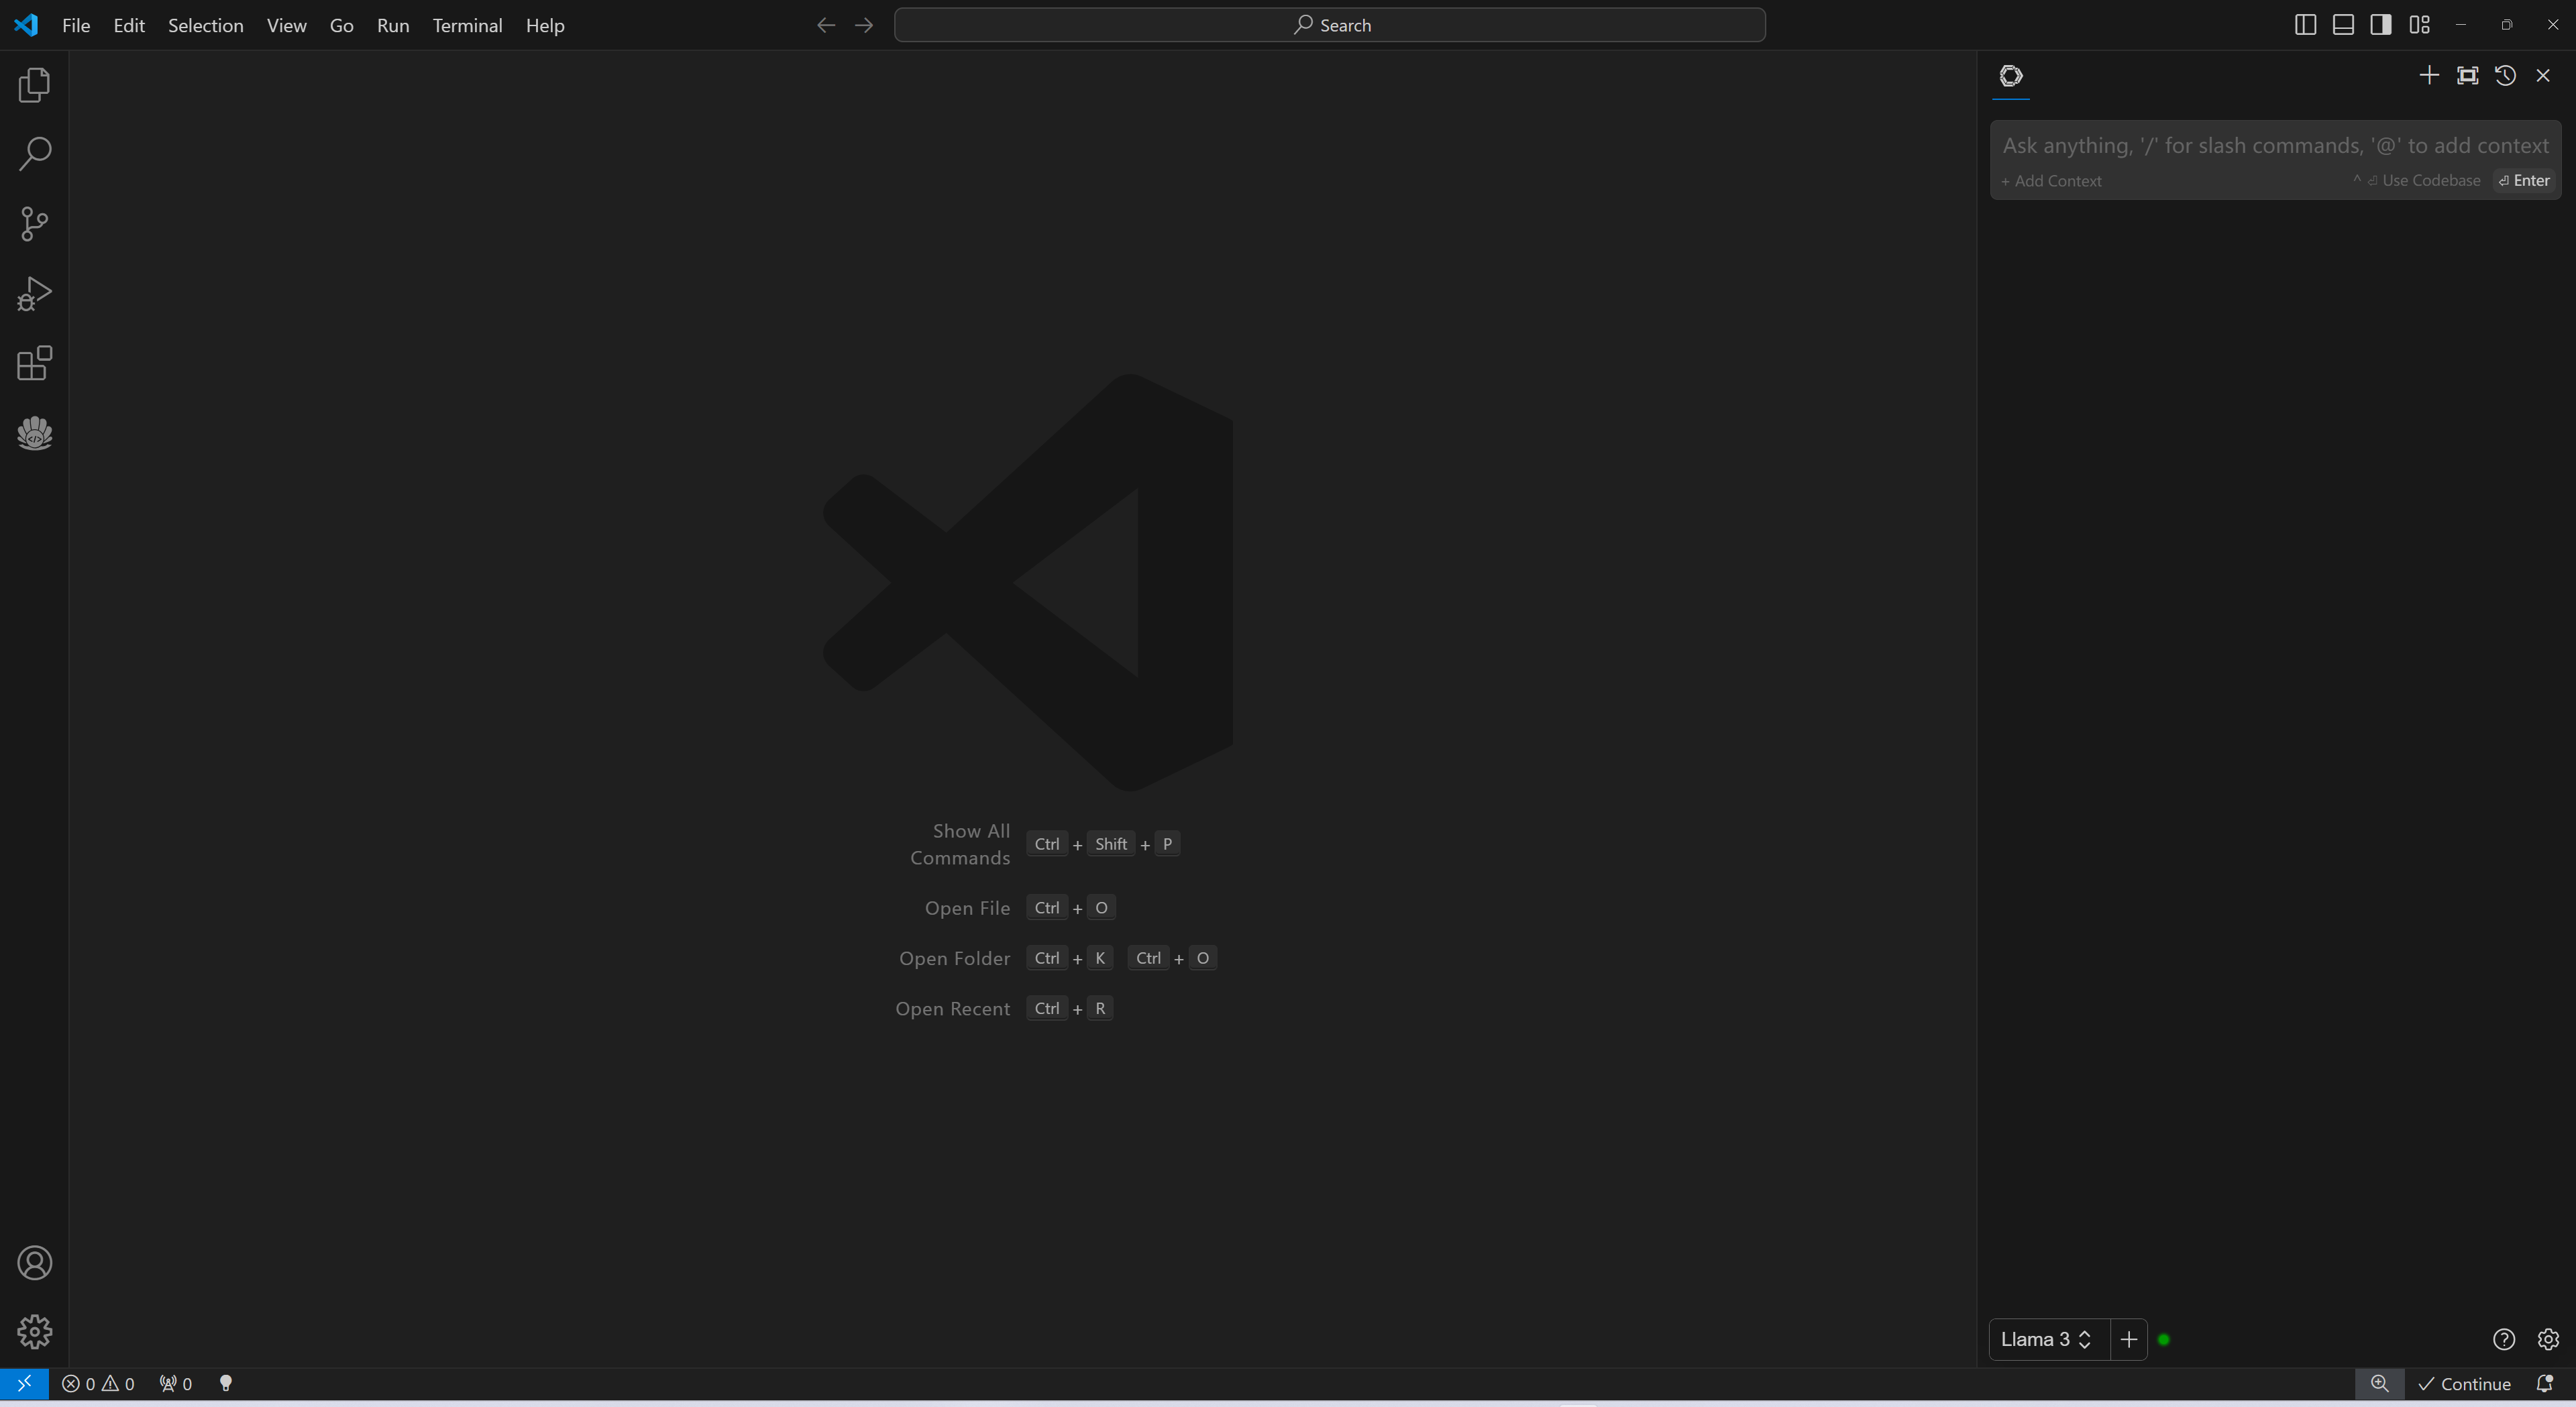
 When you see the screen below, your plug-in is ready to use.
 ### 4. `Continue` Configuration
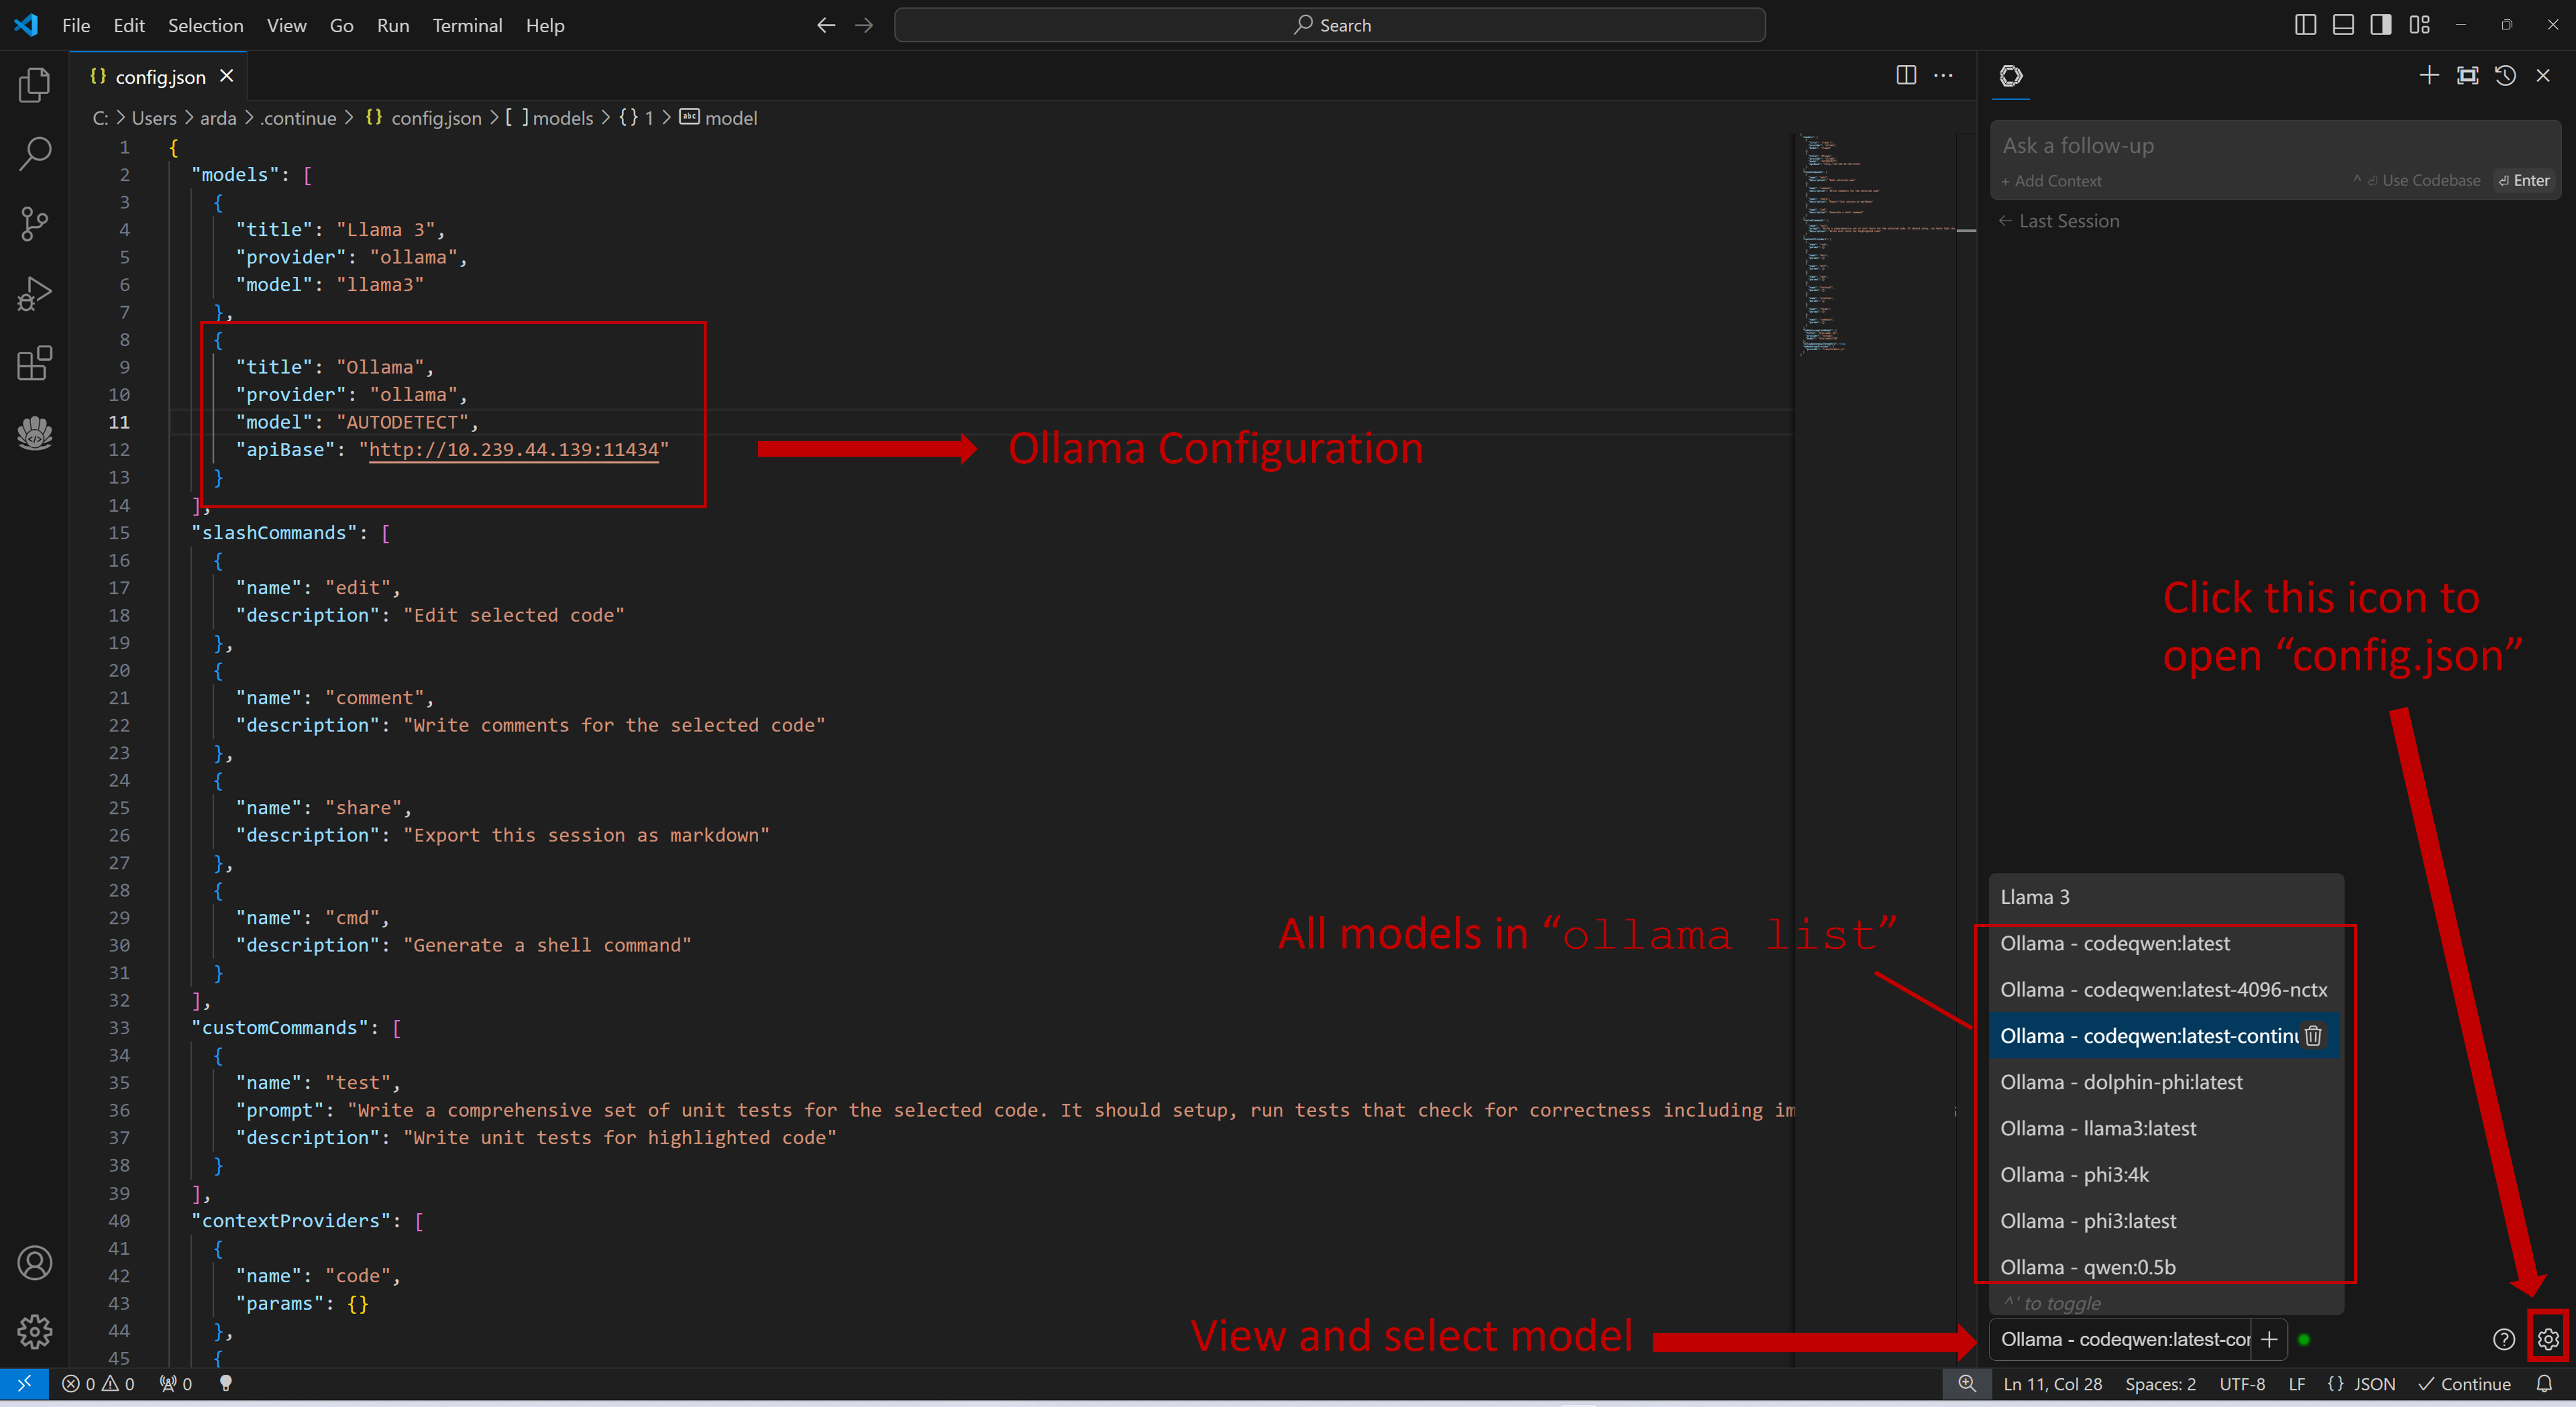
Once `Continue` is installed and ready, simply select the model "`Ollama - codeqwen:latest-continue`" from the bottom of the `Continue` view (all models in `ollama list` will appear in the format `Ollama-xxx`).
Now you can start using `Continue`.
#### Connecting to Remote Ollama Service
You can configure `Continue` by clicking the small gear icon located at the bottom right of the `Continue` view to open `config.json`. In `config.json`, you will find all necessary configuration settings.
If you are running Ollama on the same machine as `Continue`, no changes are necessary. If Ollama is running on a different machine, you'll need to update the `apiBase` key in `Ollama` item in `config.json` to point to the remote Ollama URL, as shown in the example below and in the figure.
```json
{
"title": "Ollama",
"provider": "ollama",
"model": "AUTODETECT",
"apiBase": "http://your-ollama-service-ip:11434"
}
```
### 4. `Continue` Configuration
Once `Continue` is installed and ready, simply select the model "`Ollama - codeqwen:latest-continue`" from the bottom of the `Continue` view (all models in `ollama list` will appear in the format `Ollama-xxx`).
Now you can start using `Continue`.
#### Connecting to Remote Ollama Service
You can configure `Continue` by clicking the small gear icon located at the bottom right of the `Continue` view to open `config.json`. In `config.json`, you will find all necessary configuration settings.
If you are running Ollama on the same machine as `Continue`, no changes are necessary. If Ollama is running on a different machine, you'll need to update the `apiBase` key in `Ollama` item in `config.json` to point to the remote Ollama URL, as shown in the example below and in the figure.
```json
{
"title": "Ollama",
"provider": "ollama",
"model": "AUTODETECT",
"apiBase": "http://your-ollama-service-ip:11434"
}
```
 ### 5. How to Use `Continue`
For detailed tutorials please refer to [this link](https://continue.dev/docs/how-to-use-continue). Here we are only showing the most common scenarios.
#### Q&A over specific code
If you don't understand how some code works, highlight(press `Ctrl+Shift+L`) it and ask "how does this code work?"
### 5. How to Use `Continue`
For detailed tutorials please refer to [this link](https://continue.dev/docs/how-to-use-continue). Here we are only showing the most common scenarios.
#### Q&A over specific code
If you don't understand how some code works, highlight(press `Ctrl+Shift+L`) it and ask "how does this code work?"
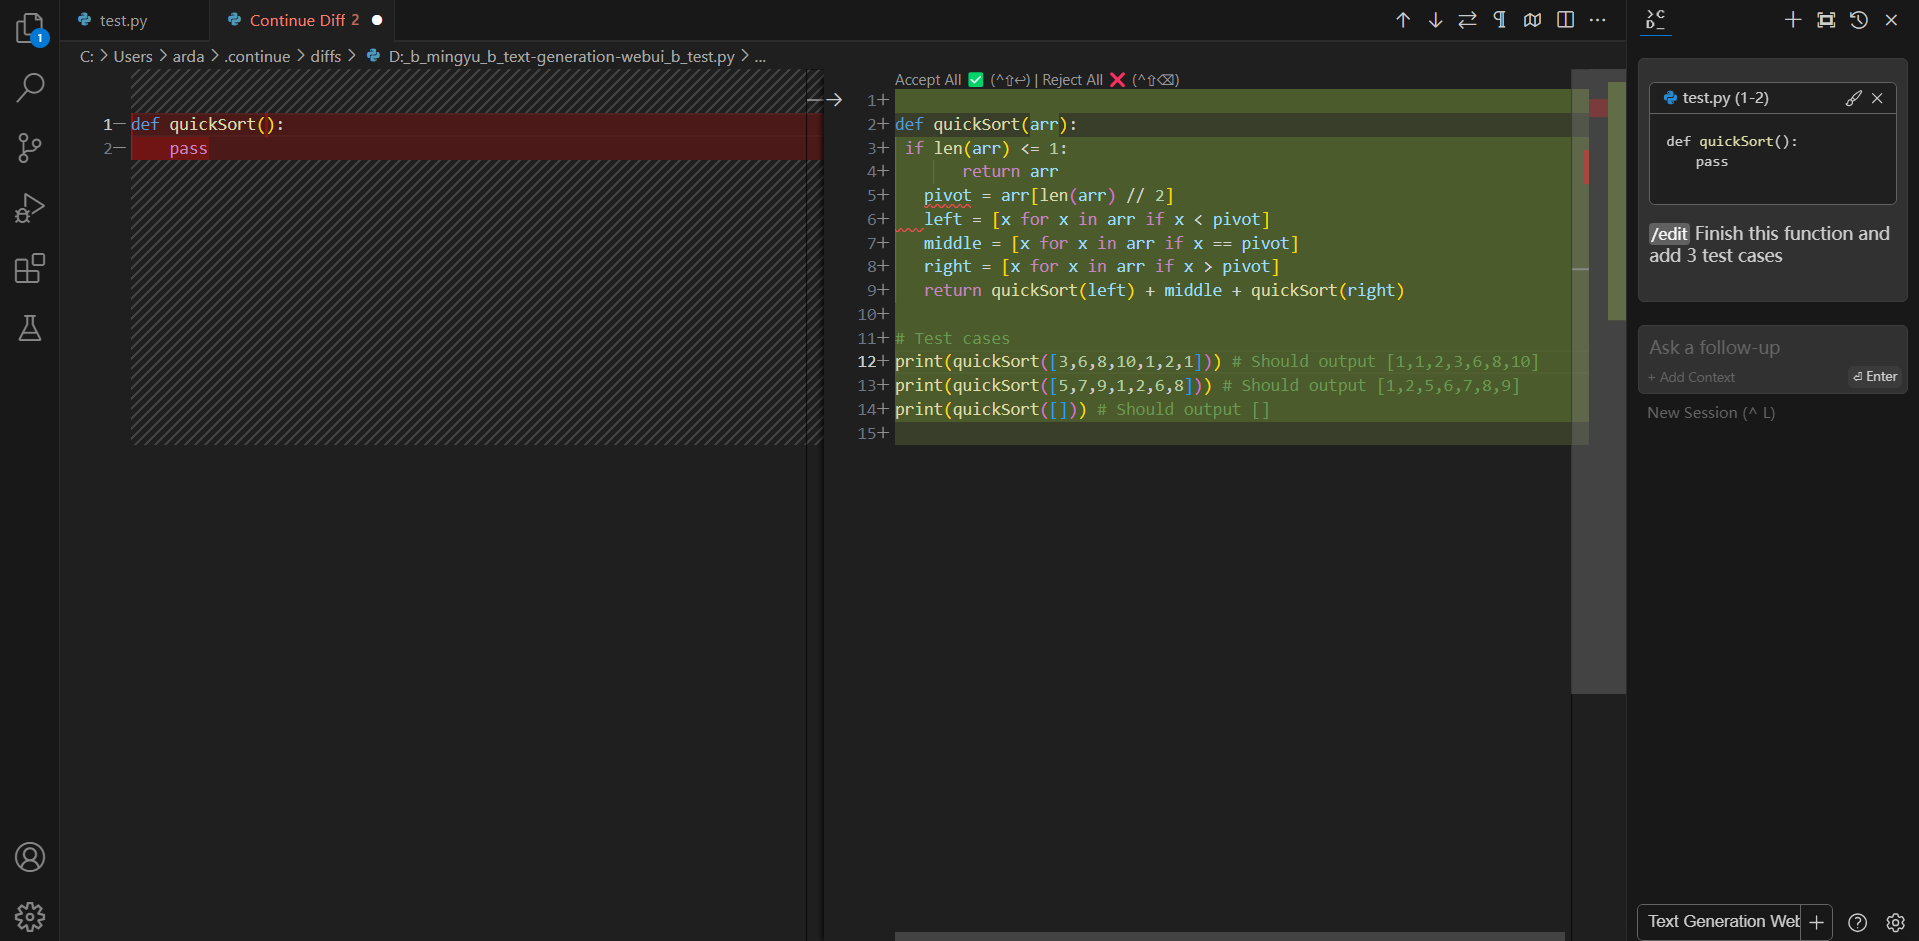
 #### Editing code
You can ask Continue to edit your highlighted code with the command `/edit`.
#### Editing code
You can ask Continue to edit your highlighted code with the command `/edit`.