
< English | 中文 >
本指南将引导你如何在具有 Intel GPUs 的 Windows 系统上安装 IPEX-LLM。 > [!NOTE] > 如果是在 Intel Arc B 系列 GPU 上安装(例,**B580**),请参阅本[指南](./bmg_quickstart.md)。 > [!NOTE] > 如果是在 Linux 系统上安装,请参阅本[指南](./install_linux_gpu.zh-CN.md)。 适用于 Intel Core Ultra 和 Core 11-14 代集成的 GPUs (iGPUs),以及 Intel Arc 系列 GPU。 ## 目录 - [系统环境安装](./install_windows_gpu.zh-CN.md#系统环境安装) - [安装 ipex-llm](./install_windows_gpu.zh-CN.md#安装-ipex-llm) - [验证安装](./install_windows_gpu.zh-CN.md#验证安装) - [监控 GPU 状态](./install_windows_gpu.zh-CN.md#监控-gpu-状态) - [快速示例](./install_windows_gpu.zh-CN.md#快速示例) - [故障排除和提示](./install_windows_gpu.zh-CN.md#故障排除和提示) ## 系统环境安装 ### (可选) 更新 GPU 驱动程序 > [!IMPORTANT] > 如果你的驱动程序版本低于 `31.0.101.5122`,请更新 GPU 驱动程序。 可参考[此处](../Overview/install_gpu.md#prerequisites)获取更多信息。 可以从 [Intel 官方下载页面](https://www.intel.com/content/www/us/en/download/785597/intel-arc-iris-xe-graphics-windows.html)下载并安装最新的 GPU 驱动程序。更新后需要重启以完成安装。 > [!NOTE] > 该过程可能需要大约 10 分钟。重启后,检查 **Intel Arc Control** 应用程序以验证驱动程序是否已正确安装。如果安装成功,应该会看到类似下图的 **Arc Control** 界面。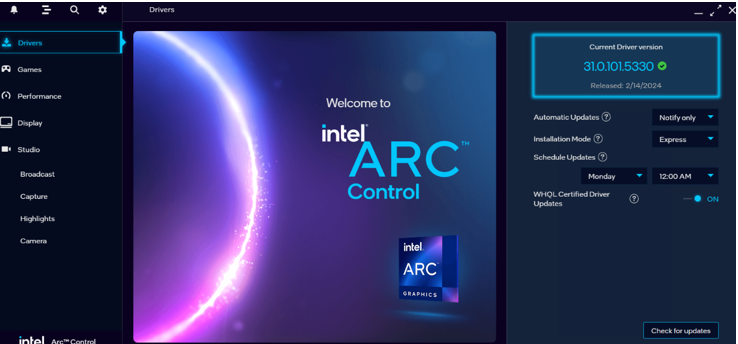 ### 设置 Python 环境
访问 [Miniforge 安装页面](https://conda-forge.org/download/),下载 **适用于 Windows 的 Miniforge 安装程序**,并按照说明步骤完成安装。
### 设置 Python 环境
访问 [Miniforge 安装页面](https://conda-forge.org/download/),下载 **适用于 Windows 的 Miniforge 安装程序**,并按照说明步骤完成安装。
 ## 快速示例
现在让我们实际运行一个大型语言模型(LLM)。本示例将使用 [Qwen2-1.5B-Instruct](https://huggingface.co/Qwen/Qwen2-1.5B-Instruct) 模型,一个拥有15亿参数的LLM。 请按照以下步骤设置和运行模型,并观察它如何对提示词 "What is AI?" 做出响应。
- 步骤 1: 按照上述 [运行时配置](#步骤-1-运行时配置)章节,准备运行时环境。
- 步骤 2: 创建代码文件。IPEX-LLM 支持从 Hugging Face 或 ModelScope 加载模型。请根据你的需求选择。
- **从 Hugging Face 加载模型**:
创建一个名为 `demo.py` 新文件,并将如下代码复制进其中,从而运行基于 IPEX-LLM 优化的 [Qwen2-1.5B-Instruct](https://huggingface.co/Qwen/Qwen2-1.5B-Instruct) 模型。
```python
# Copy/Paste the contents to a new file demo.py
import torch
from ipex_llm.transformers import AutoModelForCausalLM
from transformers import AutoTokenizer, GenerationConfig
generation_config = GenerationConfig(use_cache=True)
print('Now start loading Tokenizer and optimizing Model...')
tokenizer = AutoTokenizer.from_pretrained("Qwen/Qwen2-1.5B-Instruct",
trust_remote_code=True)
# Load Model using ipex-llm and load it to GPU
model = AutoModelForCausalLM.from_pretrained("Qwen/Qwen2-1.5B-Instruct",
load_in_4bit=True,
cpu_embedding=True,
trust_remote_code=True)
model = model.to('xpu')
print('Successfully loaded Tokenizer and optimized Model!')
# Format the prompt
# you could tune the prompt based on your own model,
# here the prompt tuning refers to https://huggingface.co/Qwen/Qwen2-1.5B-Instruct#quickstart
question = "What is AI?"
messages = [
{"role": "system", "content": "You are a helpful assistant."},
{"role": "user", "content": question}
]
text = tokenizer.apply_chat_template(
messages,
tokenize=False,
add_generation_prompt=True
)
# Generate predicted tokens
with torch.inference_mode():
input_ids = tokenizer.encode(text, return_tensors="pt").to('xpu')
print('--------------------------------------Note-----------------------------------------')
print('| For the first time that each model runs on Intel iGPU/Intel Arc™ A300-Series or |')
print('| Pro A60, it may take several minutes for GPU kernels to compile and initialize. |')
print('| Please be patient until it finishes warm-up... |')
print('-----------------------------------------------------------------------------------')
# To achieve optimal and consistent performance, we recommend a one-time warm-up by running `model.generate(...)` an additional time before starting your actual generation tasks.
# If you're developing an application, you can incorporate this warm-up step into start-up or loading routine to enhance the user experience.
output = model.generate(input_ids,
do_sample=False,
max_new_tokens=32,
generation_config=generation_config) # warm-up
print('Successfully finished warm-up, now start generation...')
output = model.generate(input_ids,
do_sample=False,
max_new_tokens=32,
generation_config=generation_config).cpu()
output_str = tokenizer.decode(output[0], skip_special_tokens=False)
print(output_str)
```
- **从 ModelScope 加载模型**:
请在 Miniforge Prompt 中运行以下命令来安装 ModelScope:
```cmd
pip install modelscope==1.11.0
```
创建一个名为 `demo.py` 新文件,并将如下代码复制进其中,从而运行基于 IPEX-LLM 优化的 [Qwen2-1.5B-Instruct](https://www.modelscope.cn/models/qwen/Qwen2-1.5B-Instruct/summary) 模型。
```python
# Copy/Paste the contents to a new file demo.py
import torch
from ipex_llm.transformers import AutoModelForCausalLM
from transformers import GenerationConfig
from modelscope import AutoTokenizer
generation_config = GenerationConfig(use_cache=True)
print('Now start loading Tokenizer and optimizing Model...')
tokenizer = AutoTokenizer.from_pretrained("Qwen/Qwen2-1.5B-Instruct",
trust_remote_code=True)
# Load Model using ipex-llm and load it to GPU
model = AutoModelForCausalLM.from_pretrained("Qwen/Qwen2-1.5B-Instruct",
load_in_4bit=True,
cpu_embedding=True,
trust_remote_code=True,
model_hub='modelscope')
model = model.to('xpu')
print('Successfully loaded Tokenizer and optimized Model!')
# Format the prompt
# you could tune the prompt based on your own model,
# here the prompt tuning refers to https://huggingface.co/Qwen/Qwen2-1.5B-Instruct#quickstart
question = "What is AI?"
messages = [
{"role": "system", "content": "You are a helpful assistant."},
{"role": "user", "content": question}
]
text = tokenizer.apply_chat_template(
messages,
tokenize=False,
add_generation_prompt=True
)
# Generate predicted tokens
with torch.inference_mode():
input_ids = tokenizer.encode(text, return_tensors="pt").to('xpu')
print('--------------------------------------Note-----------------------------------------')
print('| For the first time that each model runs on Intel iGPU/Intel Arc™ A300-Series or |')
print('| Pro A60, it may take several minutes for GPU kernels to compile and initialize. |')
print('| Please be patient until it finishes warm-up... |')
print('-----------------------------------------------------------------------------------')
# To achieve optimal and consistent performance, we recommend a one-time warm-up by running `model.generate(...)` an additional time before starting your actual generation tasks.
# If you're developing an application, you can incorporate this warm-up step into start-up or loading routine to enhance the user experience.
output = model.generate(input_ids,
do_sample=False,
max_new_tokens=32,
generation_config=generation_config) # warm-up
print('Successfully finished warm-up, now start generation...')
output = model.generate(input_ids,
do_sample=False,
max_new_tokens=32,
generation_config=generation_config).cpu()
output_str = tokenizer.decode(output[0], skip_special_tokens=False)
print(output_str)
```
> **提示**:
>
> 请注意,有些模型在 ModelScope 上的 repo id 可能与 Hugging Face 不同。
> [!NOTE]
> 在内存有限的 Intel iGPU 上运行大语言模型时,我们建议在 `from_pretrained` 函数中设置 `cpu_embedding=True`。这将使内存占用较大的 embedding 层使用 CPU 而非 GPU。
- 步骤 3. 使用以下命令在激活的 `Python` 环境 `llm` 中运行 `demo.py`:
```cmd
python demo.py
```
### 示例输出
以下是在一个配备 Intel Core Ultra 5 125H CPU 和 Intel Arc Graphics iGPU 的系统上的示例输出:
```
<|im_start|>system
You are a helpful assistant.<|im_end|>
<|im_start|>user
What is AI?<|im_end|>
<|im_start|>assistant
Artificial Intelligence (AI) refers to the simulation of human intelligence in machines that are programmed to think and act like humans. It involves the development of algorithms,
```
## 故障排除和提示
### 首次运行时进行 Warm-up 以获得最佳性能
首次在 GPU 上运行大语言模型时,你可能会注意到性能低于预期,在生成第一个 token 之前可能会有长达几分钟的延迟。发生这种延迟是因为 GPU 内核需要编译和初始化,这在不同类型的 GPU 之间会有所差异。为获得最佳且稳定的性能,我们推荐在正式生成任务开始之前,额外运行一次 `model.generate(...)` 做为 warm-up。如果你正在开发应用程序,你可以将此 warm-up 步骤集成到启动或加载流程中以加强用户体验。
## 快速示例
现在让我们实际运行一个大型语言模型(LLM)。本示例将使用 [Qwen2-1.5B-Instruct](https://huggingface.co/Qwen/Qwen2-1.5B-Instruct) 模型,一个拥有15亿参数的LLM。 请按照以下步骤设置和运行模型,并观察它如何对提示词 "What is AI?" 做出响应。
- 步骤 1: 按照上述 [运行时配置](#步骤-1-运行时配置)章节,准备运行时环境。
- 步骤 2: 创建代码文件。IPEX-LLM 支持从 Hugging Face 或 ModelScope 加载模型。请根据你的需求选择。
- **从 Hugging Face 加载模型**:
创建一个名为 `demo.py` 新文件,并将如下代码复制进其中,从而运行基于 IPEX-LLM 优化的 [Qwen2-1.5B-Instruct](https://huggingface.co/Qwen/Qwen2-1.5B-Instruct) 模型。
```python
# Copy/Paste the contents to a new file demo.py
import torch
from ipex_llm.transformers import AutoModelForCausalLM
from transformers import AutoTokenizer, GenerationConfig
generation_config = GenerationConfig(use_cache=True)
print('Now start loading Tokenizer and optimizing Model...')
tokenizer = AutoTokenizer.from_pretrained("Qwen/Qwen2-1.5B-Instruct",
trust_remote_code=True)
# Load Model using ipex-llm and load it to GPU
model = AutoModelForCausalLM.from_pretrained("Qwen/Qwen2-1.5B-Instruct",
load_in_4bit=True,
cpu_embedding=True,
trust_remote_code=True)
model = model.to('xpu')
print('Successfully loaded Tokenizer and optimized Model!')
# Format the prompt
# you could tune the prompt based on your own model,
# here the prompt tuning refers to https://huggingface.co/Qwen/Qwen2-1.5B-Instruct#quickstart
question = "What is AI?"
messages = [
{"role": "system", "content": "You are a helpful assistant."},
{"role": "user", "content": question}
]
text = tokenizer.apply_chat_template(
messages,
tokenize=False,
add_generation_prompt=True
)
# Generate predicted tokens
with torch.inference_mode():
input_ids = tokenizer.encode(text, return_tensors="pt").to('xpu')
print('--------------------------------------Note-----------------------------------------')
print('| For the first time that each model runs on Intel iGPU/Intel Arc™ A300-Series or |')
print('| Pro A60, it may take several minutes for GPU kernels to compile and initialize. |')
print('| Please be patient until it finishes warm-up... |')
print('-----------------------------------------------------------------------------------')
# To achieve optimal and consistent performance, we recommend a one-time warm-up by running `model.generate(...)` an additional time before starting your actual generation tasks.
# If you're developing an application, you can incorporate this warm-up step into start-up or loading routine to enhance the user experience.
output = model.generate(input_ids,
do_sample=False,
max_new_tokens=32,
generation_config=generation_config) # warm-up
print('Successfully finished warm-up, now start generation...')
output = model.generate(input_ids,
do_sample=False,
max_new_tokens=32,
generation_config=generation_config).cpu()
output_str = tokenizer.decode(output[0], skip_special_tokens=False)
print(output_str)
```
- **从 ModelScope 加载模型**:
请在 Miniforge Prompt 中运行以下命令来安装 ModelScope:
```cmd
pip install modelscope==1.11.0
```
创建一个名为 `demo.py` 新文件,并将如下代码复制进其中,从而运行基于 IPEX-LLM 优化的 [Qwen2-1.5B-Instruct](https://www.modelscope.cn/models/qwen/Qwen2-1.5B-Instruct/summary) 模型。
```python
# Copy/Paste the contents to a new file demo.py
import torch
from ipex_llm.transformers import AutoModelForCausalLM
from transformers import GenerationConfig
from modelscope import AutoTokenizer
generation_config = GenerationConfig(use_cache=True)
print('Now start loading Tokenizer and optimizing Model...')
tokenizer = AutoTokenizer.from_pretrained("Qwen/Qwen2-1.5B-Instruct",
trust_remote_code=True)
# Load Model using ipex-llm and load it to GPU
model = AutoModelForCausalLM.from_pretrained("Qwen/Qwen2-1.5B-Instruct",
load_in_4bit=True,
cpu_embedding=True,
trust_remote_code=True,
model_hub='modelscope')
model = model.to('xpu')
print('Successfully loaded Tokenizer and optimized Model!')
# Format the prompt
# you could tune the prompt based on your own model,
# here the prompt tuning refers to https://huggingface.co/Qwen/Qwen2-1.5B-Instruct#quickstart
question = "What is AI?"
messages = [
{"role": "system", "content": "You are a helpful assistant."},
{"role": "user", "content": question}
]
text = tokenizer.apply_chat_template(
messages,
tokenize=False,
add_generation_prompt=True
)
# Generate predicted tokens
with torch.inference_mode():
input_ids = tokenizer.encode(text, return_tensors="pt").to('xpu')
print('--------------------------------------Note-----------------------------------------')
print('| For the first time that each model runs on Intel iGPU/Intel Arc™ A300-Series or |')
print('| Pro A60, it may take several minutes for GPU kernels to compile and initialize. |')
print('| Please be patient until it finishes warm-up... |')
print('-----------------------------------------------------------------------------------')
# To achieve optimal and consistent performance, we recommend a one-time warm-up by running `model.generate(...)` an additional time before starting your actual generation tasks.
# If you're developing an application, you can incorporate this warm-up step into start-up or loading routine to enhance the user experience.
output = model.generate(input_ids,
do_sample=False,
max_new_tokens=32,
generation_config=generation_config) # warm-up
print('Successfully finished warm-up, now start generation...')
output = model.generate(input_ids,
do_sample=False,
max_new_tokens=32,
generation_config=generation_config).cpu()
output_str = tokenizer.decode(output[0], skip_special_tokens=False)
print(output_str)
```
> **提示**:
>
> 请注意,有些模型在 ModelScope 上的 repo id 可能与 Hugging Face 不同。
> [!NOTE]
> 在内存有限的 Intel iGPU 上运行大语言模型时,我们建议在 `from_pretrained` 函数中设置 `cpu_embedding=True`。这将使内存占用较大的 embedding 层使用 CPU 而非 GPU。
- 步骤 3. 使用以下命令在激活的 `Python` 环境 `llm` 中运行 `demo.py`:
```cmd
python demo.py
```
### 示例输出
以下是在一个配备 Intel Core Ultra 5 125H CPU 和 Intel Arc Graphics iGPU 的系统上的示例输出:
```
<|im_start|>system
You are a helpful assistant.<|im_end|>
<|im_start|>user
What is AI?<|im_end|>
<|im_start|>assistant
Artificial Intelligence (AI) refers to the simulation of human intelligence in machines that are programmed to think and act like humans. It involves the development of algorithms,
```
## 故障排除和提示
### 首次运行时进行 Warm-up 以获得最佳性能
首次在 GPU 上运行大语言模型时,你可能会注意到性能低于预期,在生成第一个 token 之前可能会有长达几分钟的延迟。发生这种延迟是因为 GPU 内核需要编译和初始化,这在不同类型的 GPU 之间会有所差异。为获得最佳且稳定的性能,我们推荐在正式生成任务开始之前,额外运行一次 `model.generate(...)` 做为 warm-up。如果你正在开发应用程序,你可以将此 warm-up 步骤集成到启动或加载流程中以加强用户体验。